


Hand painting is the traditional method of detailing up a kit. While it takes considerable patience, one can achieve the same great look as though the work was done with an air brush. It's also the best way to touch up and detail kits. The Devil is in the details, or so they say.
Brushes
There are many different types of brushes out there, with many different bristle types. While they play an important part in conventional painting, I have yet to experience an issues when working on Gunpla. Instead, look for a size and hardness that suits your need. For small, detail work, a thin stiff head would be most appropriate. If you're working on a larger area a wider, little softer brush, would probably suit your needs. Brushes can get fairly expensive, especially when purchased individually. Luckily many craft stores sell reasonably priced bundles with various shapes and sizes. With proper care a brush will last you a long time.
It is important to clean up your brushes immediately after every application. Letting the paint dry can make removal difficult and damage the brush's head. What I like to do is to take the brush head, submerge it in the cleaning solution, and gently brush the side of said container. This helps work solution into the head and remaining paint out. Once everything looks clean rinse with water and brush a paper towel till it dry.
It is important to never dab the head during cleaning. Doing so will cause the head to fray out, decreasing the brush's usability and life.
Enamel v. Acrylic
You'll be working either with enamel or acrylic paint 90% of the time. Everyone has their own personal preference but for most hand painting applications acrylic is your best choice. Acrylic, being water soluble, can easily be thinned with water. As a result it's a lot easier to clean up after. Enamel on the other hand needs a solvent based thinner both for thinning and cleaning. That brings in an additional cost and the risk of running out.
For many of my details I use enamel paints, unthinned. Applied in light doses in small areas the thickness isn't a problem. Not to mention Model Masters makes some great metallic paints.
In my experience acrylic paints tend to dry fully faster than enamels.
Apply Thin Coats
Painting is pretty simple, start by prepping the pieces as you would airbrushing. You want to treat the paint the same way, thinning until the consistency of milk. Okay, everyone likes to compare it to milk, but last I checked there's no one unifying lactic consistency. Instead, focus on what you want to achieve: thin even coats that don't run.
I generally start with 3/5 paint and 2/5 thinner and adjust by adding more of either depending on how things look. Brush on a layer at a time making sure not to apply too much paint, you don't want it to run and bead up the end of your piece. At first you're going to notice very little coverage. The key here is many light coats. The alternative is a thick, uneven, monstrosity.
Patience is incredibly important. You need to allow enough drying time between coats. If you don't, you risk brushing away the prior coat. Enamel paints generally suffer from this issue and require a longer set time than acrylics due to the corrosive nature of the thinner.
Protective Coating & Touch-ups
If you intend to apply a second color over top, or any sort of detailing, it's highly recommended that you apply a protective top coat. Since coats done via hand are generally thinner than other application methods the need to protect is greater.
Top coats, in addition to lacquer, can come in acrylic. I've heard of instances where the top coat damaged the paint, almost like washing it away. I have not yet experienced this problem but it's better safe than sorry. Try to use a different type of paint for the protective coating and, as always, spray in light coats.
The same goes for any lining your doing after, that is, use a different paint type for lining than your base.
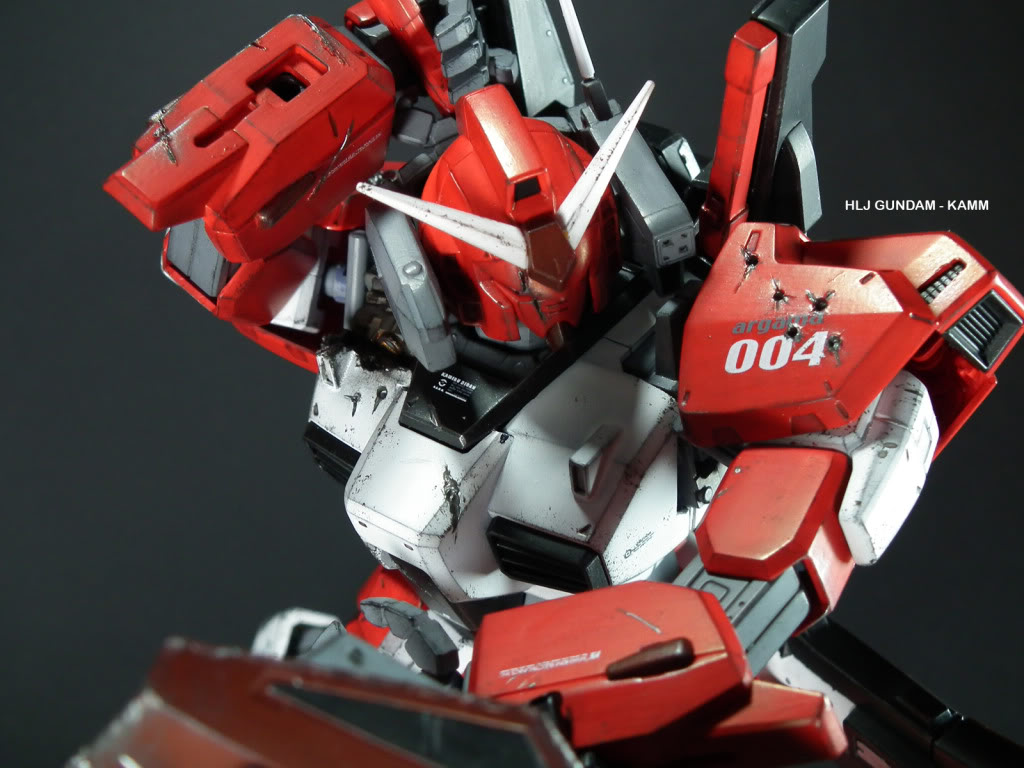
Examples
Kamm's HLJ themed MKII is a great example of what hand painting can do...