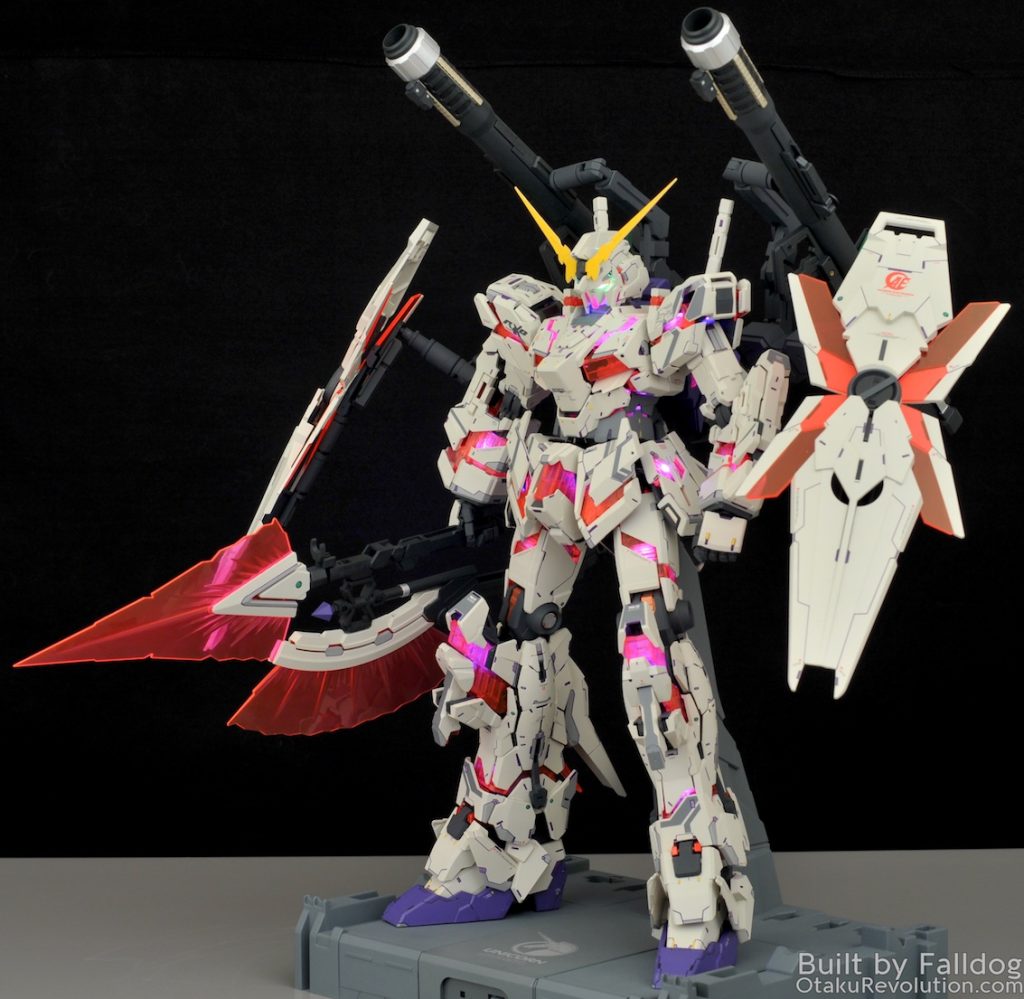
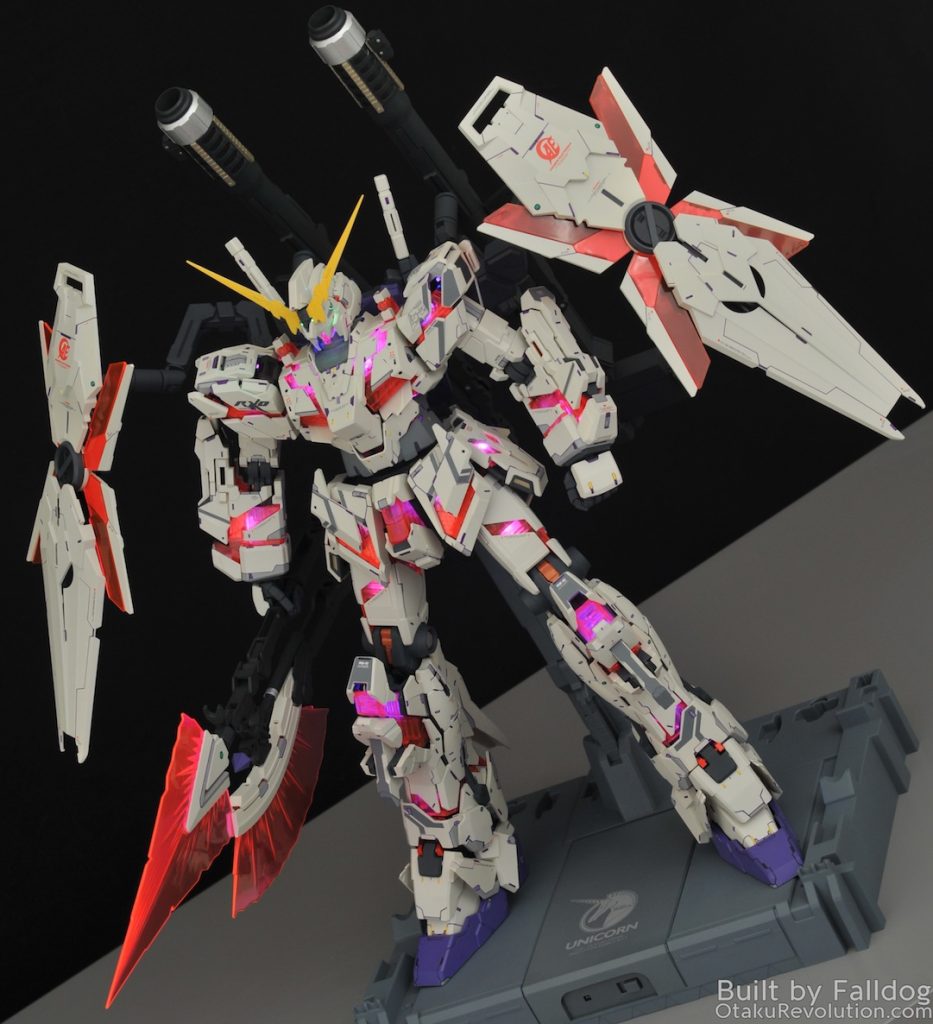
Another build complete, and my first one of 2017. At the very least it can’t get any worse from here. Behold, Dragon Momoko’s PG Unicorn. It’s actually pretty good looking, though the devil’s in the details, and the details is where things went south for me.
Before I discuss my work I want to add to my initial review of DM’s Unicorn…
- The decals are pretty high quality. They’re thick enough that you can place the big ones without worrying about them ripping yet thin enough that they disappear into the paint after you apply MicroSol or equivalent.
- There are a lot of decals, and if you follow DM’s guide, 50% are unused. There’s just under a half of the giant decal sheet that went untouched. With a bunch that don’t quite work on the kit itself, but seem well suited for an Armed Armor…
- One of the unique things about the DM’s decals are the line details used on the shin, waist, shoulder, and other places. In the manual they use the decals only on one side for the most part, but in a few areas they use both. They also neglected the decals that go on the outside of the arm (the end of the piece that holds the beam saber). Why they did this? I have no idea. While I followed the decals elsewhere on the kit (aside from a few I added to the feet since they were too bare) I said ‘fuck it’ and used up all the special decals.
- There are three things on the this kit which are different than Bandai’s (other than all the exterior details that is, and the backpack system if you want to include that too)…
- The chest/cockpit piece. It’s more pronounced and looks pretty cool but the neck piece that sits on top doesn’t quite fit. You can even see the issue in their official photos. Seems like a lazy thing to get wrong.
- The shoulder to upper arm bit has bit of extra added on, as though it were there to provide more contact deeper into the arm for extra grip. While they added it, they didn’t actually add anything in the upper arm to make use of that addition. It’s odd, especially since there’s no real reason for it. Of the areas on the PG Unicorn that could use improvement, that part of the arm is not one.
- In the rear skirt armor, they added an extra notch for the two pieces that make the little square thruster thing. This means it doesn’t fall out before you mount the backer piece, and is a super nifty addition.
- So, about the details. Pretty solid all around. I didn’t encounter any issues with the detail molding.
- So, about the molding. Well, there’s quite a lot of subtle flashing issues across the kit. The kind of shit that you don’t really notice when it’s staunch white. There were also mold alignment issues (where left side of the mold isn’t 100% matching with the right) which created seam lines across parts, and in some circumstances, a half mm to mm worth of slide (think of when someone cuts through a guy with a sword and the victim slowly slides apart).
- For the most part everything fit together really well, or at least, as well as can be expected for a fully painted PG Unicorn. Key areas that stunk: the poly caps. They were a smidge too big which make fitment a pain. The shin pieces don’t fit on mine, more specifically, they fit but there’s something about the upper connection that means they keep popping out.
- The LEDs… well they’re much dimmer than Bandai’s. See the comparison shot below. The wire insulation also pulls away from the light modules really easily. Such that in some of the tighter areas you might look back at the module and see the copper exposed. They’re free, and I shouldn’t complain, but Bandai’s are worth the money and the remote control gimmick is pointless IMHO.
- There’s also a slight circuitry change which is odd. The kit’s left leg doesn’t light up unless the right leg is plugged in. At first I thought I had some bad wires and was about ready to solder the shit out of the waist piece before I realized what the issue was.
- Last but not least, the LED set’s 4 separate cables that run from the battery pack to the rest of the kit is a lot more of a pain in the ass to work with Bandai’s two wire bundle.
Wait, there’s more!
- You know that weird backpack contraption? It’s really cool, but it’s seam line city.
- For being built without poly caps, it does a damn good job hold all the weapons (granted all my joints there are somewhat painted).
- The single mounting point to the backpack is a super obvious point of failure. While mine hasn’t broken, it does like to sag out a bit.
- In case you didn’t know this, the contraption is a copy of the arms that come with the Tamashii Nation Unicorn MS Girl.
Final verdict on the Dragon Momoko Unicorn? If you can get it for retail, it’s a hell of a steal and worth a pickup. If you’re looking for a show quality kit, get the real version. Or at least the real LED set.
Any how, my build. Lots of purple lines, gray, yellow, light purple, and green details. Orange/gold details on the frame and thrusters, plus silver and bronze details here and there like on my other PG Unicorn builds. Any questions? I feel like no one ever reads my lengthy paint and detailing notes so I’m going to lazy my way out of this post-build review. One thing of note is that I used Model Master’s Camo Gray for the main colour. It adds quite a bit over the dark plastic which you can see in a comparison shot down below. I didn’t prime because the last thing a PG Unicorn needs is more layers, so I encountered a lot of chipping from the MM acrylic paint. Thankfully it’s thin and light so it’s easy to touch up. Any questions? Wait, you actually read all the way here, I’m impressed!
At the end of the day is looks pretty cool, but there are too many issues with my sloppiness and the kit took two months longer to paint than I originally wanted. I wish I could say I’m done with PG Unicorns, but I have one more to build before I can tackle something else…
Anyhoo, photos! Thanks for checking out my work!


