Posted in

Layman’s Gunpla Guide – Construction Guide

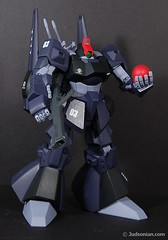
Welcome to the construction guide! The goal here is to review some of the basics of taking transforming that box of plastic runners into a proper Gundam kit. Beginners who have picked up their first kit have probably opened up the box, looked at the runners, than the Japanese instructions. How do you feel? Excited, maybe have a sense of tribulation? Well worry not!

Despite the number of small parts and the Japanese instructions putting together a kit perhaps the easiest part of the hobby.

Basic Terminology

Before we begin it’s important that you familiarize yourself with some of the common terminology. Those plastic things with all the pieces attached? Those are called runners. The parts of the runner which connect directly to the kit’s pieces are called sprues. When you cut a piece from the runner and sprue there will likely be a little piece of plastic left sticking out of the piece itself, that is called a nub. read more

Posted in

Layman’s Gunpla Guide – Weathering Tutorial

Some people like their kits nice, clean, and pristine, Others like them looking like they just got kicked down a hill. Weathering can add detail from the subtle to the extreme depending on your preferences. The best part is that it’s extremely easy (and cheap) to do. It’s also a lot of fun. There are many different ways to weather a kit. Here are just a few.

Distressing Decals

It stands to reason that if your gunpla is getting worn down, so would the markings. This part’s easy. After you’ve fully applied your decals, simply scratch away with a toothpick. I think it adds character. read more

Posted in

Layman’s Gunpla Guide – Top Coat Guide & Tutorial

Welcome to the top coat tutorial on the Layman’s Gunpla Guide. Top coating is an incredibly easy way to add an extra dimension to your Gundam model. Unpainted kits can look great with just a nice top coat while painted kits will gain that extra umph. Top coats also serve to protect the underlying paint and details while the difference between a matte and gloss finish can dramatically change the feel of a project. Top coats, especially a dull one, has the extra benefit of helping to hide the edges of any applied decals. read more

Posted in

MG Ball, Vr. Ka

Master Grade for only $15? Well, it is just a Ball…

The Ball is probably the most under appreciated suit in Gundam. Cannon fodder way before the arrival of the GM. It’s single time to shine was that those brief scenes early on in the beginning 08th MS Team.

You can get a MG Ball for less than $15 and it shows. Not due to the build quality but because it’s such a small kit. At least a third of the instruction manual is nothing but pictures and information about the Ball. Of course none of it I can read, but it sure looks nice! read more

Posted in

Layman’s Gunpla Guide – Buying Kits & Difficulty Grades

First timers might be wondering where exactly to start. There have been hundreds of kits released since 1980, if not thousands. Over the years the complexity and engineering has (generally) improved as Bandai’s production technologies and design methods advance.

Size and Scale

Gundam models, like most other plastic models have an accompanying original to model ratio, or scale. A 1/100 kit would be roughly 100 times smaller than actual size of the object the kit represents. A 1/60 scale kit would only be 60 times smaller resulting in a larger model. read more

Posted in

Layman’s Gunpla Guide – Posing & Bases!

Probably the most important thing you can do after putting together a model is give it a pose. Add some life and personality to your kit.

Posing

It’s a rookie mistake, your Gundam shouldn’t stand around stiff as a robot. It should be allowed to loosen up as to look and feel more natural.

 (click for larger, via ??? with thanks to /m/)

From here on everything is up to you. Reenact a scene, pit it in combat against another model, make it dance, facepalm, etc. If you’re working on your first kit with individual fingers, do what everyone does the first time, flip the bird. I really shouldn’t have to help with this part. read more

Posted in

Layman’s Gunpla Guide – Decals & Stickers

[flickr-photo:id=13103543165,size=n] (Click to Enlarge)

Panel lining and top coats are simple and great ways to spruce up a kit. Applying decals is another great way. It’s simple, easy and a great way to customize your kit’s appearance. Most Master Grade kits come with a set of stickers and decals (either wet or dry transfer). Perfect Grade kits tend to come with a lot more (because of the size) and most HG do not come with any at all. The good news is there are quite a few third party decal makers out there in addition to basic detailing sets straight from Bandai. read more

Posted in

Layman’s Gunpla Guide – Painting Equipment

I decided to break this page down into three different sections relating to airbrushing equipment, hand and detailing painting equipment, and everything else that you’ll need. Of course, you’re also going to need some paint!

Airbrushing Equipment

Airbrushes


(Click to Enlarge)

Picking out an airbrush can be pretty daunting at first. Here’s some information on the basic types of airbrushes…

  • Gravity, Siphon, or Side-Feed – Different brushes receive their paint in different ways, gravity receives it from a reservoir on top and siphon brushes pull it from a jar beneath. Side fed, as you might have guessed by now, receives it from the side of the brush. Gravity fed brushes are my favorite on account of their ease of use. You can add as little paint as you like to the reservoir as opposed to a siphon fed system which will generally require a bit more paint for proper suction in a jar below. Siphon fed systems are also more painful to clean as the small tube used to suck up the paint can easily become clogged without proper maintenance. The benefit to siphon airbrushes is that the bottom heavy jar will generally provide enough support to rest the brush between coats. In addition most models allow you to swap jars on the fly compared to having to empty a gravity fed brush’s reservoir.
  • Single Action and Double Action – Single action brushes only allow one spray mode. Push the button and paint comes out the other side at a standard rate. Changing the rate requires moving the needle back and forth, usually by turning one end of the brush. Double action brushes allow you to move the needle back and forth on the fly, changing the flow rate.
  • Internal/External Mixing – At some point paint and air are going to mix, either internal to the brush or external. I feel as though internally mixing brushes give a more consistent spray and have had better luck with them over the years. They are a bit more difficult to clean than externally mixing brushes where the and air paint mix outside of your brush’s components.

Which brush is right for you? Well that’s something only you’ll be able to figure out. Each type has it’s own pros and cons and everyone is going to have their own preference. Some advanced modelers even have multiple types on hand for different purposes. To make things easier I recommend a simple gravity fed brush. read more

Posted in

Layman’s Gunpla Guide – General Building Equipment

If you’re looking to build Gunpla you’re going to need some tools. Thankfully you only need a small set at your disposal to accomplish great builds.

 Must have…

 Must have if you’re building regularly…

A pair of basic hobby nippers

A pair of GodHand nippers

General Hobby Nippers

Unless you’re a 15 year-old me you’ll want to do the smart thing and cut – not rip – all your Gunpla pieces from the runners. The easiest and safest way to do so is with a pair of hobby nippers (also known as hobby cutters or side cutters).

Ranging from $10 to $80 you should be able to find a pair at any hobby store and many online retailers. You’re probably wondering, is the more expensive pair better than the cheaper pair? Well, the short answer is, yes. Long answer is that generally, especially when it comes to tools, you get what you pay for. read more