Posted in

Layman’s Gunpla Guide – Masking Tutorial

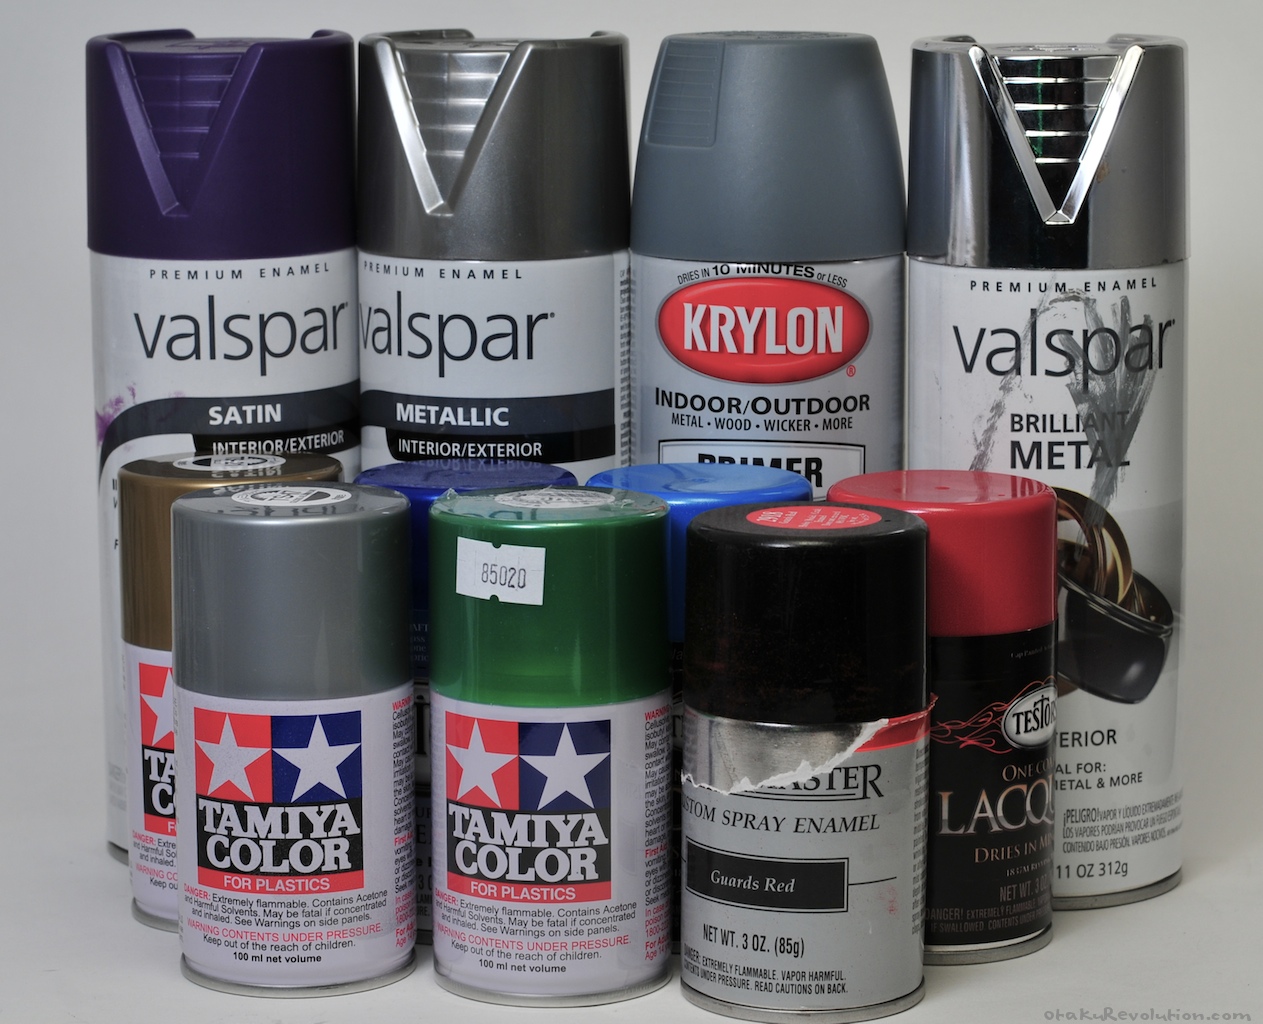
Masking is a very important step when it comes to detailed painting. Once you venture from painting whole pieces, you will find that great detail can come from treating different parts of the same piece differently. To do so, you’ll need to mask the pieces to avoid getting paint on the rest of the piece. While primarily used when applying paint via a can or airbrush, it can be used during hand painting to ensure a straight line.


Click to Enlarge

Tamiya v. Off the Shelf

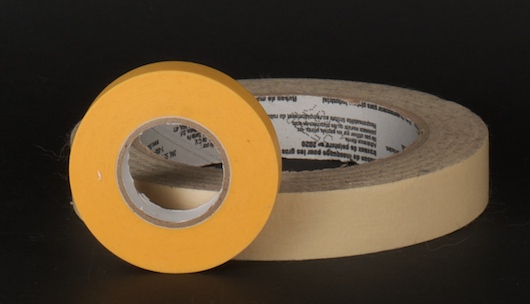
When masking pieces, I highly recommend getting a hold of some Tamiya brand masking tape (the yellow roll in the above photo). While your average beige brand is effective in stopping paint I’ve had many issues with paint seeping in along the edges. As a result, I do all of my edges with Tamiya and cover the rest with the generic stuff (blue painters tape or otherwise). read more

Posted in

Layman’s Gunpla Guide – Terminology

Here’s a handy reference to some of the terminology commonly used in gunpla and modeling communities. ’twas written by Sonar over at the Gundam Australia Forum and used with permission.

Be sure to check out the thread where this all started as it may have received updates not present here.

0-10

00 – “Double Oh” refers to the animated series Mobile Suit Gundam 00

0079 – “Double Oh Seventy Nine” – Refers to the pivotal year of the Universal Century time line where the One Year War was fought, and the original Mobile Suit Gundam TV series was set. read more

Posted in

Layman’s Gunpla Guide – Battle Damage Tutorial

Applying physical damage to a kit is extremely easy. The downside is that it’s the hardest addition to undo. Here are some popular, simple methods…

Bullet Holes and Sword Wounds

There are a lot of heat weapons in Gundam. Lasers that burn through metal, swords that melt through shields. Creating that effect is easy. The plastic Bandai uses melts nicely under heat and cools quickly. I have yet to see any discoloring, burning, or warping of pieces outside of the effected area. I highly recommend getting a soldering iron for this task. Some people out there use a candle to heat up a nail. You can find inexpensive soldering irons for $10, money I don’t mind spending for the considerable safety benefit of not running around with a hot nail and open flame. Allow me to demonstrate how quickly soldering irons melt right through… read more

Posted in

Layman’s Gunpla Guide – Mini Thrusters

Seen these before?


Click to Enlarge
 

They’re little thruster nozzles found on a lot of older kits. Most of the time they get a little lining and are left alone. A shame because with a little effort they can add great detail to a kit. It’s probably one of the oldest tricks in the book but I don’t see it that often. Maybe it’s because newer kits don’t feature these as prevalently, maybe it’s because fallen out of style or out of mind. All I know is that it looks great, is very inexpensive, and it’s really easy to do. All it takes besides your usual tools are some round IC sockets and a screwdriver. read more

Posted in

Layman’s Gunpla Guide – Sig Super Stripe

Sig Super Stripe in an interesting product I saw laying around at my local hobby shop. It’s a tape with a fuel resistant adhesive meant for making easy pin stripes on RC cars.

Always inquisitive I picked some up to see how it fared on gunpla. Cutting to the chase, it looks pretty good.


Click to Enlarge
| On Flickr


Click to Enlarge
| On Flickr

For the most part it’s easy to apply and adds a nice look to a kit. Between the color and width choices there’s a lot of potential.

The problem is ends of the strip don’t seem to adhere really well to unpainted plastic. For a special adhesive meant to stand up to fuel why it doesn’t stick very well to bare plastic is beyond me. read more

Posted in

Layman’s Gunpla Guide – Miscellaneous Tricks & Tips

Here are some random tricks and tips that have proved useful during my builds.

Tighten Loose Joints with Super Glue

An inevitability with gunpla are loose joints. Be it from age, poor engineering, or a lack of polycaps (I’m looking at you, F91 era kits). To help tighten things up just pull the piece out, apply a little bit of glue to one part of the connection, and let dry. DO NOT GLUE THE PIECES TOGETHER! Once the glue has dried you’ll find a much tighter fit on the joint. If it’s not yet tight enough apply more coatings as desired. A word of warning, too much glue can make for a very tight joint. Sometimes it can be difficult to fit the connection if you’ve applied too much glue. read more

Posted in

Layman’s Gunpla Guide – Paint Review

[working] Under Construction

Over the course of my kits I’ve used many different paints, with varying levels of success. To save everyone the trouble of my trials I thought I’d create a list of some of the more notable paints I’ve used and how I’ve fared with them.

Your own experiences may differ from mine, hopefully for the better due to my own incompetence. If I’m doing something wrong please don’t hesitate to give me some tips.

Jars-O-Paint

Posted in

Layman’s Gunpla Guide – Detailing Equipment

The most popular way to make your kit look its best is to paint its detail lines. Some people think kits look best with out them while others think they look best when done in heavy black. The popular consensus however is that you should line with a color and darkness relating to the plastic you’re working on. For example, when lining on white use a light gray. For medium colors try a darker gray, and on dark or somethings vibrant colors use a black. If you’re lining with paint try to mix in portions of the base color for a subtle effect. Remember to try different things and go with what you think looks best. read more

Posted in

Layman’s Gunpla Guide – Detail Line Tutorial

Line detailing is the simple process of painting or otherwise coloring the detail lines that criss cross your Gunpla. This process can be very easy to very difficult depending how you want to go about things. Regardless, in the end your kit will go from…

…to…

Not sure what to use? Check out the Detailing & Painting Equipment page.

Paint Prep

If you’re going to use paint, you need to a bit of prep first. No matter which paint you’re going to use for this application you need to mix it with thinner until it achieves a watery consistency and can run smoothly. This will allow the paint to run along the lines, and if you’re fortunate, save yourself a lot of work. If you’re working on a kit that’s been painted with flat paints it’s very important to cover the piece in a good gloss coat. This helps smooth out the surface to allow the paint to flow freely again. Even if you didn’t use a flat paint it’s a good idea as it will help protect the paint below. Most importantly, use a different type of top coat than the paint below and the kind you’re using for the detail lines. If you don’t the thinner in the line mixture will eat away the paint below. read more