I like the part where Bright grabs Banagher’s arm. Is a Brightslap imminent?
Gundam UC
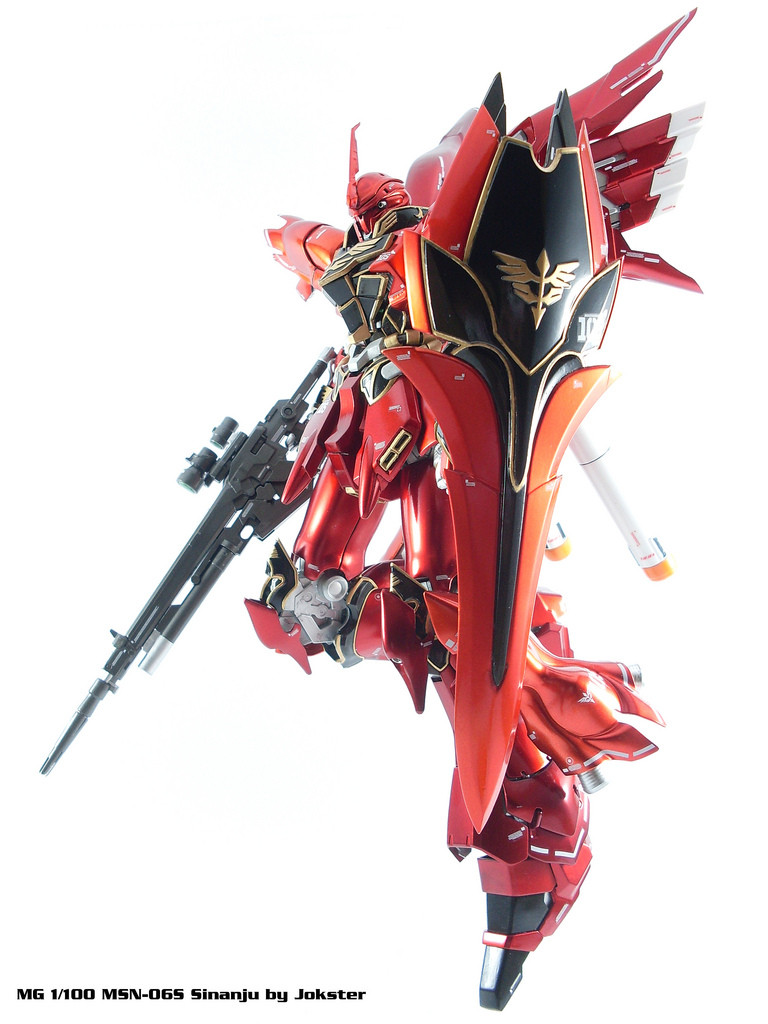
Jokster’s MG Sinanju
Saw this build over on figure.fm and wanted to share it with everyone here.
Click to Enlarge
It’s his first attempt at a chrome finish and I think it turned out fantastically.
His comments,
| Greeting guys and wish you all a Merry Christmas
This is my attempt on making a titanium finish version of the Sinanju . Tried following mtomczek tutorial on painting the titanium finish but sadly the paints required here in my country aren’t available. So i decided to substitute some of the paints that were available here. For the chrome i used rj london chrome spray can paint and used the same mr color clear red and orange paint sprayed via air brush then top coated with mr top coat gloss. Can i ask you guys how you protect the paint specially in painting titanium finishes, because when i started to assemble the kit the clear paint easily peels off and did a lot of touch ups because of that. Was it the paint that I’ve used? ’cause I’ve found out that the chrome i used was enamel base and mr color was lacquer base and lacquer over enamel doesn’t work well from what the experts say. Any feedback from you guys would be a great help because i want to try this paint job again on my mg sazabi for next year. Thanks a lot guys |
Click to Enlarge
Click to Enlarge
The over exposed whites in his shot look great too.
I’ve seen a lot of Sinanju’s done in metalic/candy red. Haven’t been a fan of most, but I really like this one. It makes me want to start experimenting with the concept immediately, but I have to finish my PG SF first!

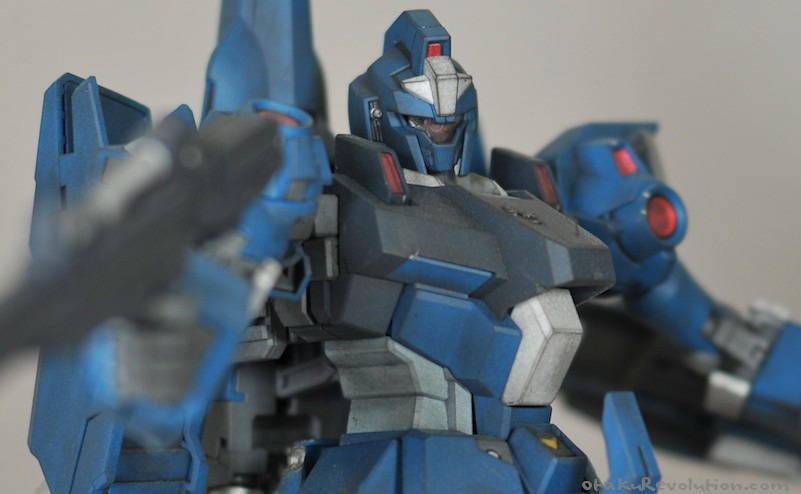
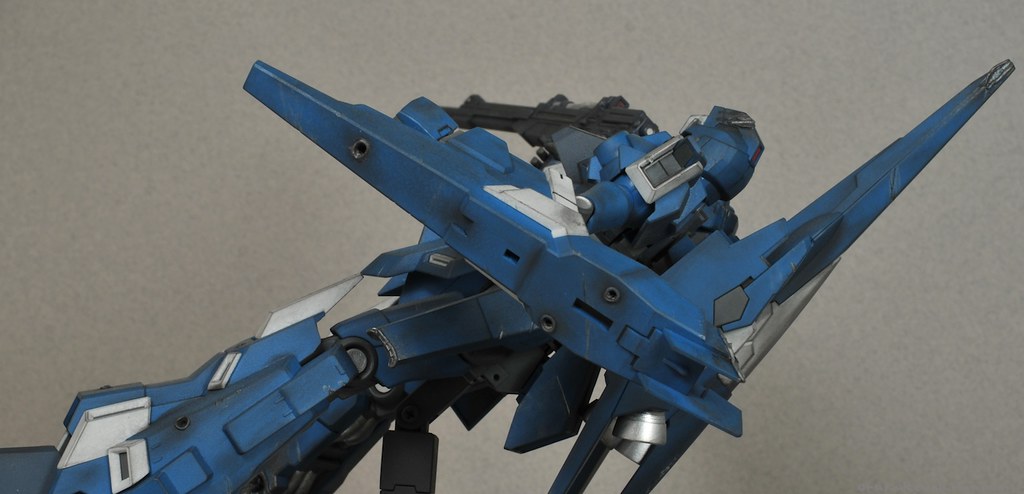
Wounded ReZEL – Complete
After an initial disaster at my first attempt at pastel weathering, my wounded MG ReZEL has been completed. It didn’t turn out like I wanted to. Some people like, some don’t. Take a look at decide for yourself. My thoughts on the project at the bottom.
Click to Enlarge | On Flickr
And the reference pose…
Click to Enlarge | On Flickr
Click to Enlarge | On Flickr
Note the damaged visor.
Click to Enlarge | On Flickr
Click to Enlarge | On Flickr
Click to Enlarge | On Flickr
For the most part the kit is a straight build. Just a few silver touch ups and lining here and there. I intended for this kit to be a quick and easy build, nothing elaborate.
Wounded ReZEL WIP Update 02: Pastel Woes
For my damaged ReZEL I decided to give pastel weathering a shot. Everything was going good until I gave it a top coat of Testor’s Dull Cote. All of the pastel soaked up into the coat and nearly disappeared.
Click to Enlarge | On Flickr
Click to Enlarge | On Flickr
The outcome was better than I expected, but completely out of left field. (Better because I expected to wake up and see an unsalvageable mess)
The whole situation is no different than when a dirty car gets hit with a little bit of rain. Dirty little water spots.
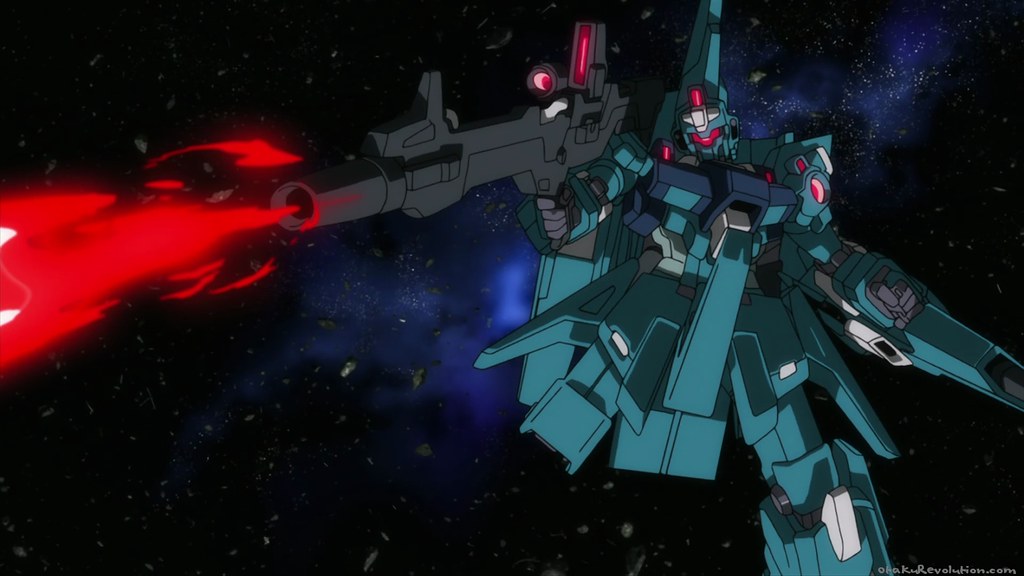
Gundam Unicorn OST vs. Tron 2 OST
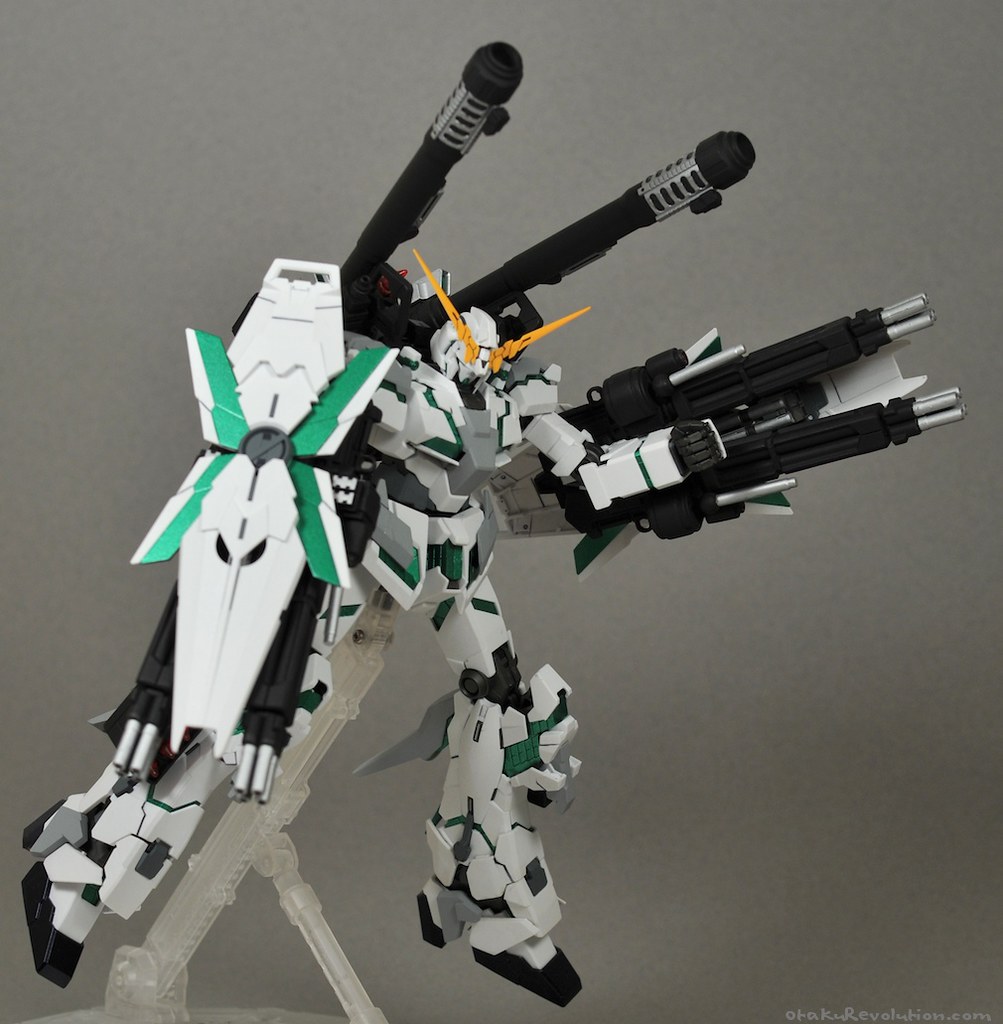
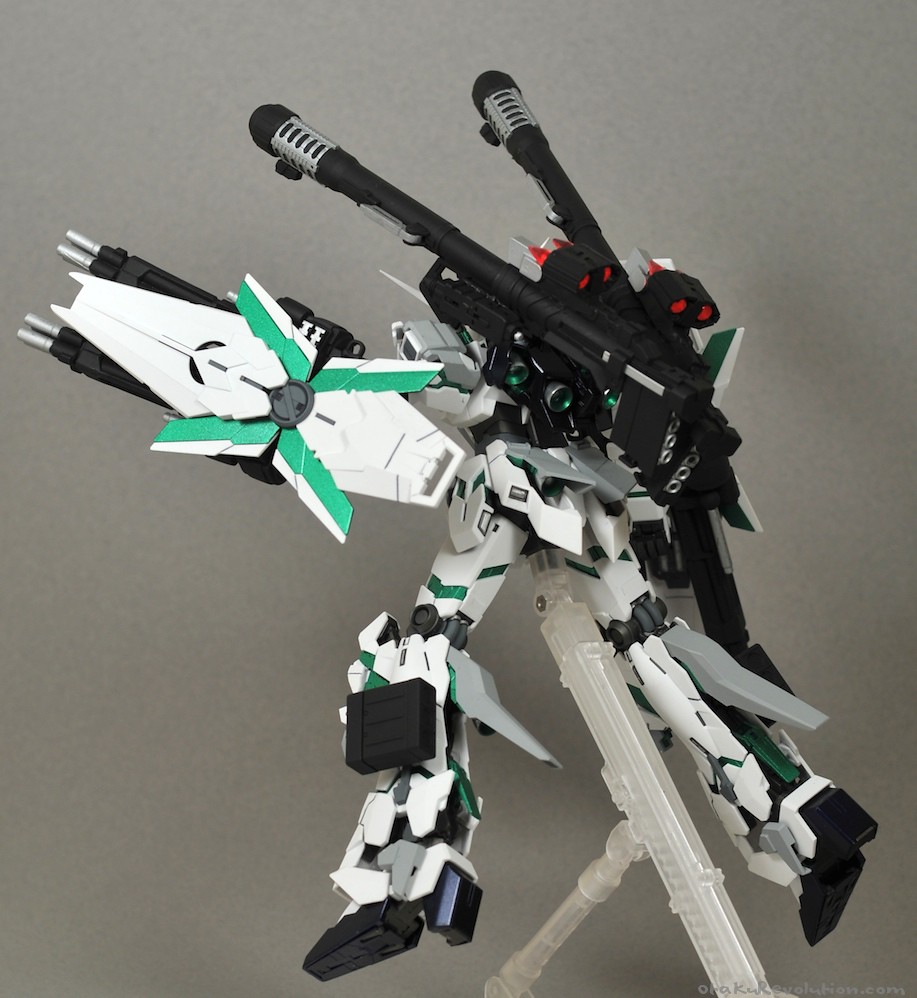
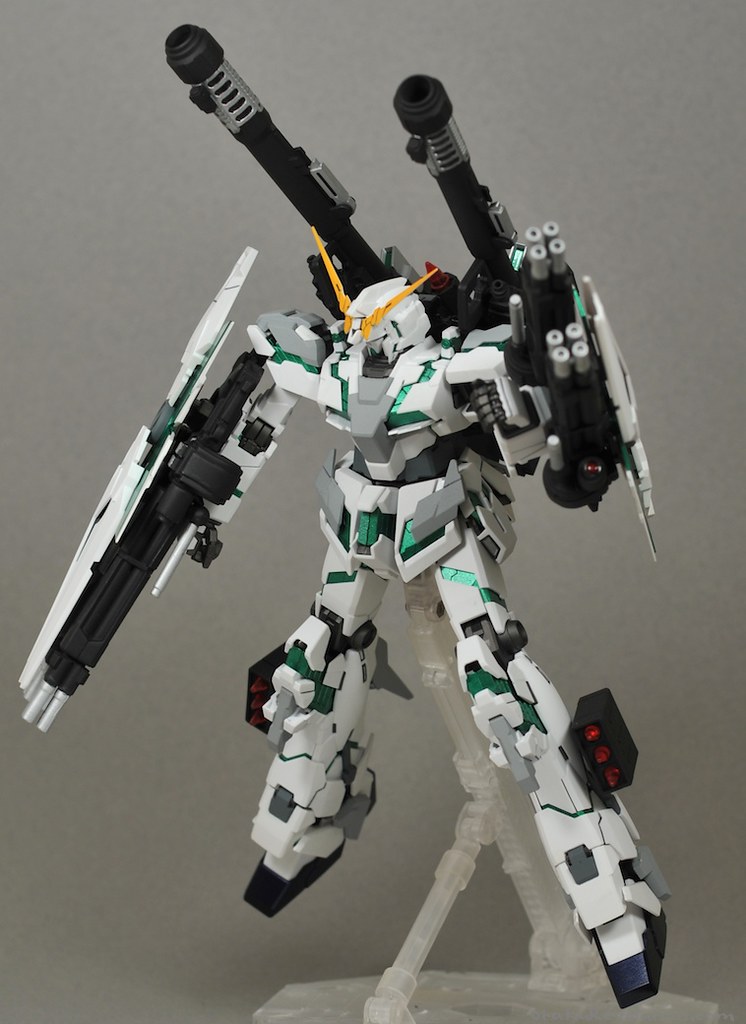
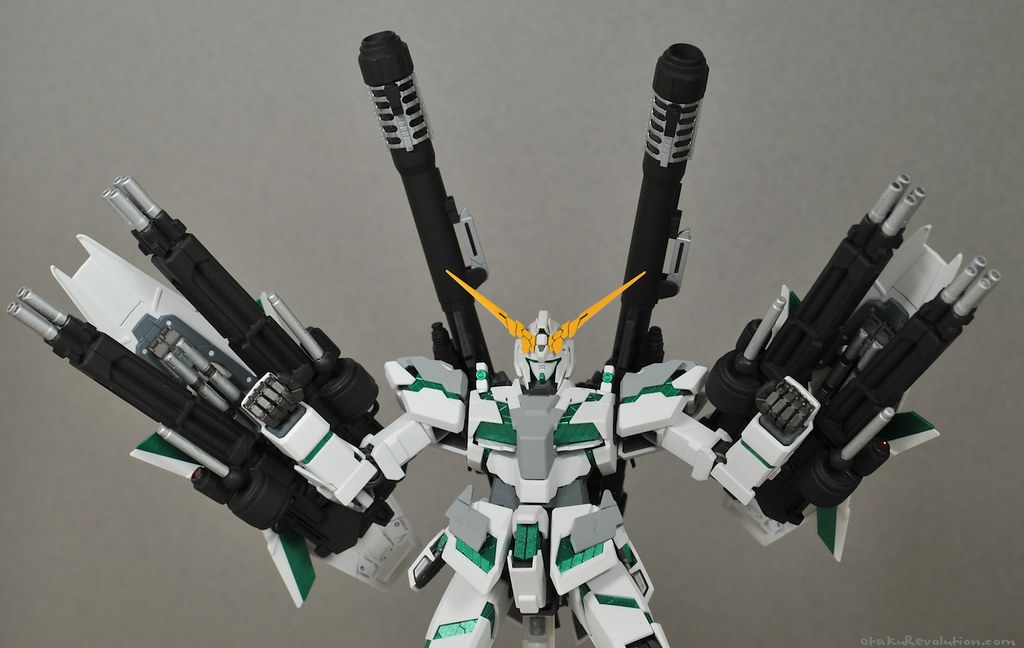
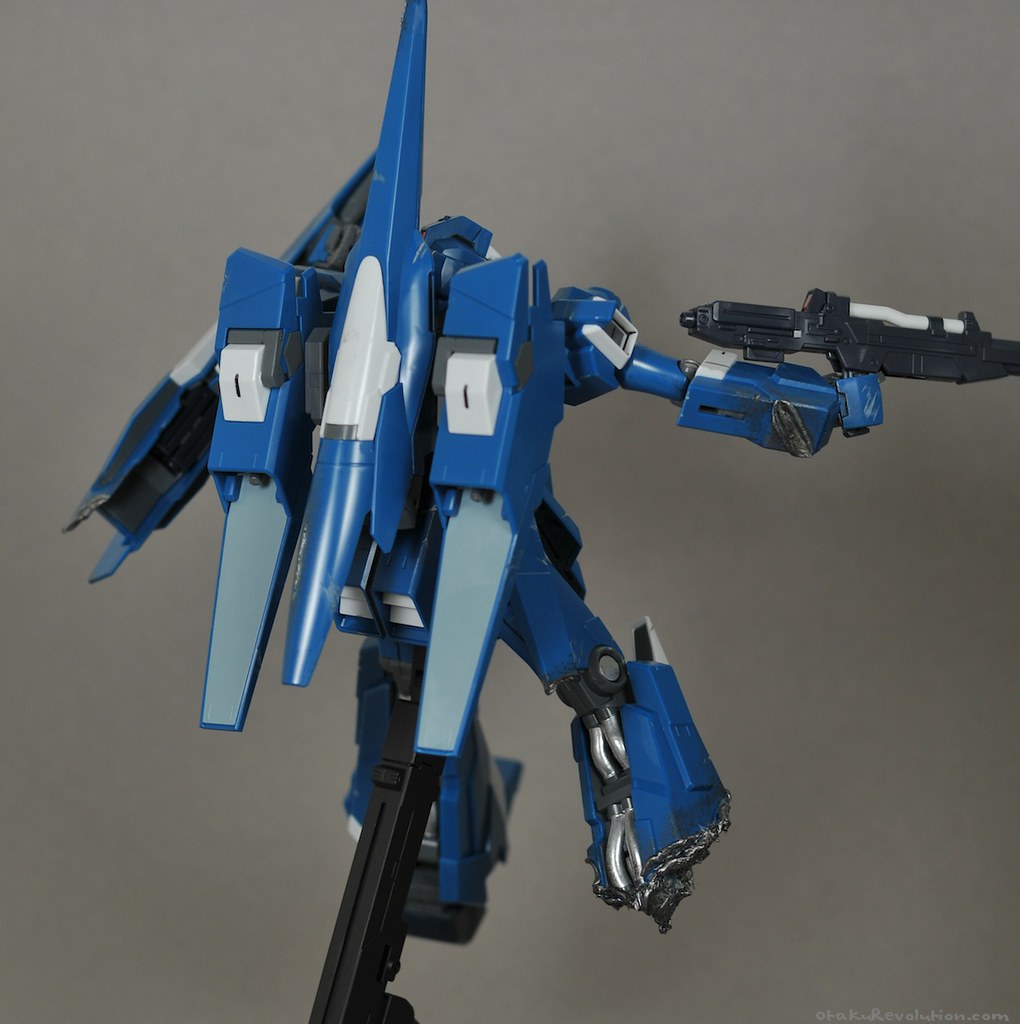
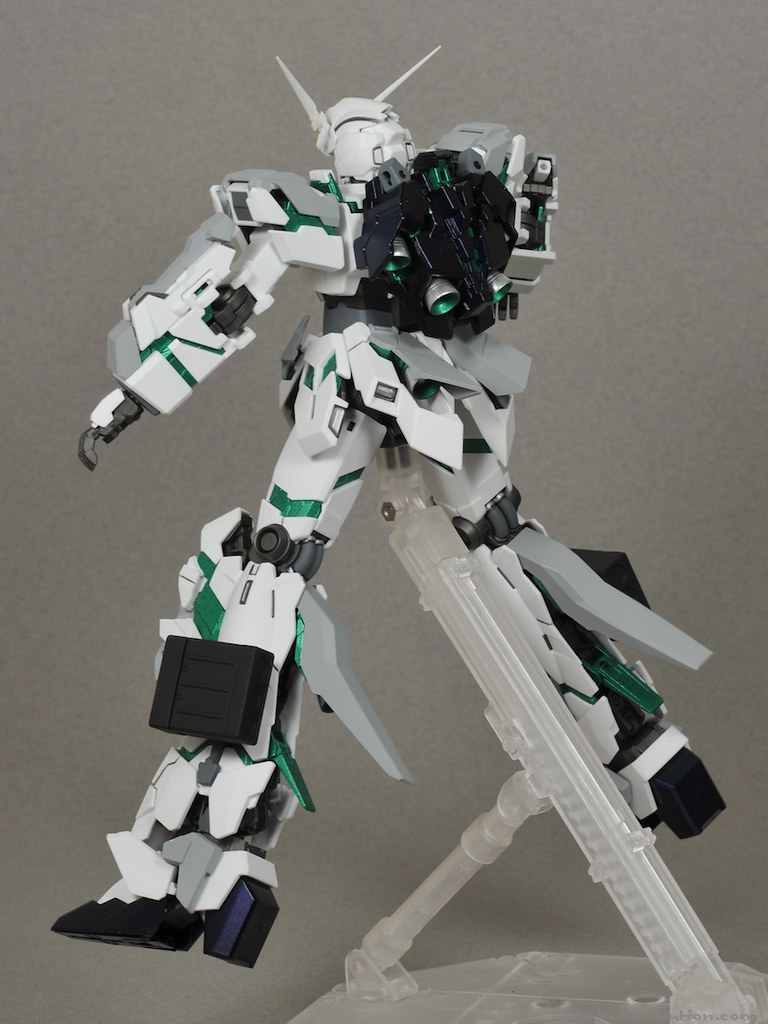
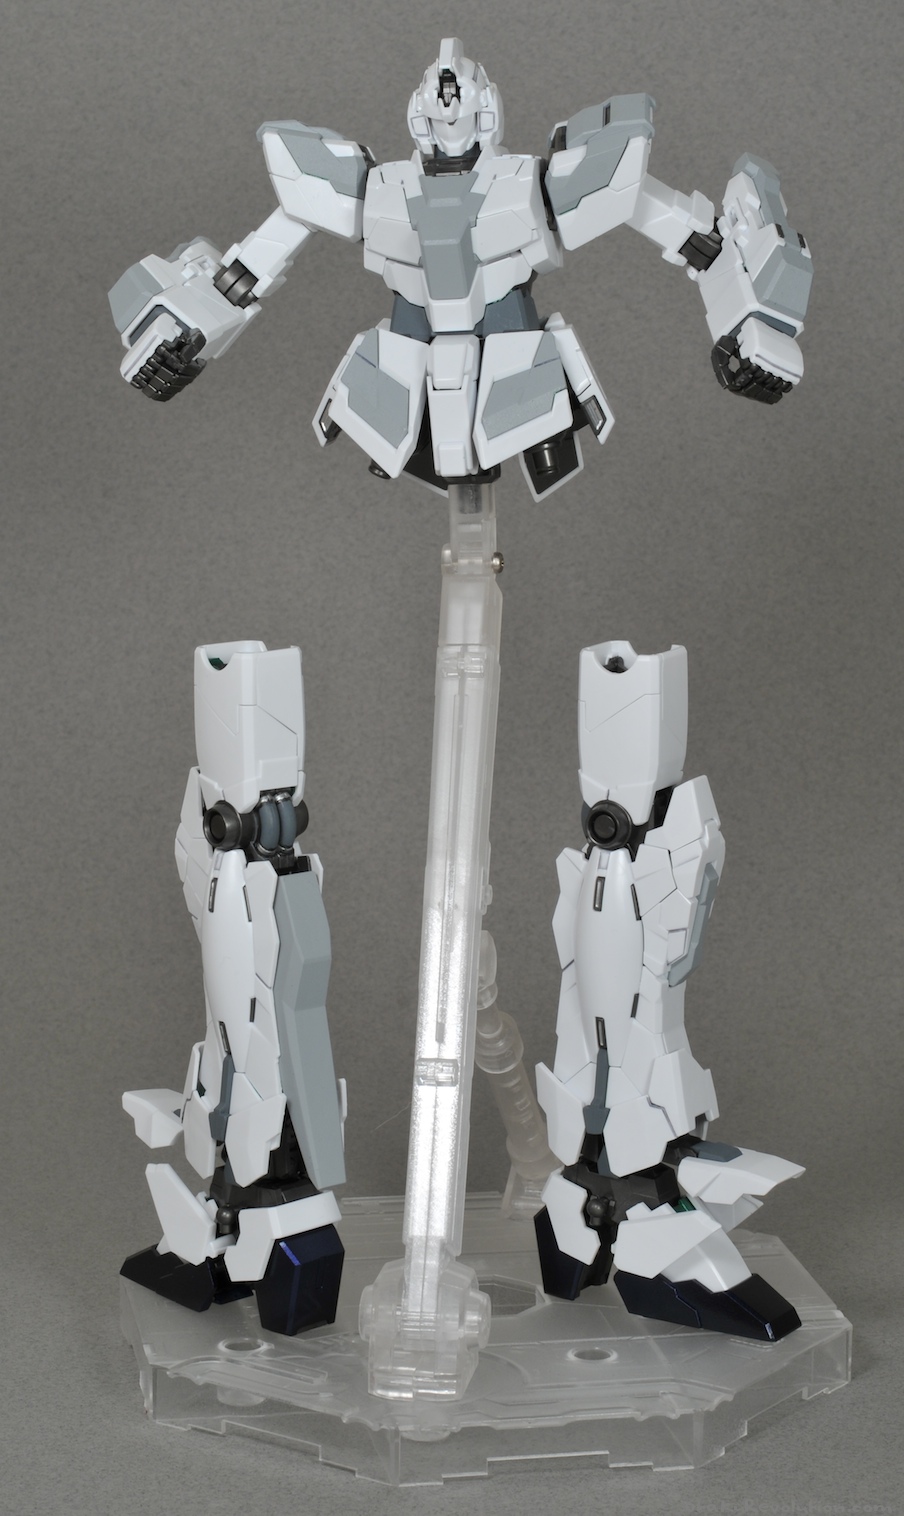
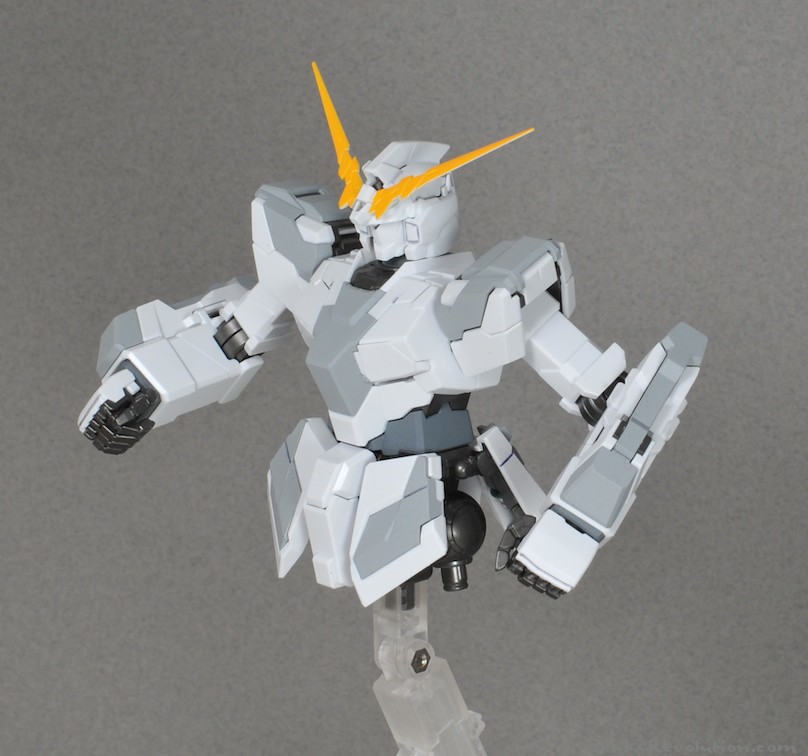
Full Armor Unicorn Prototype Ver.
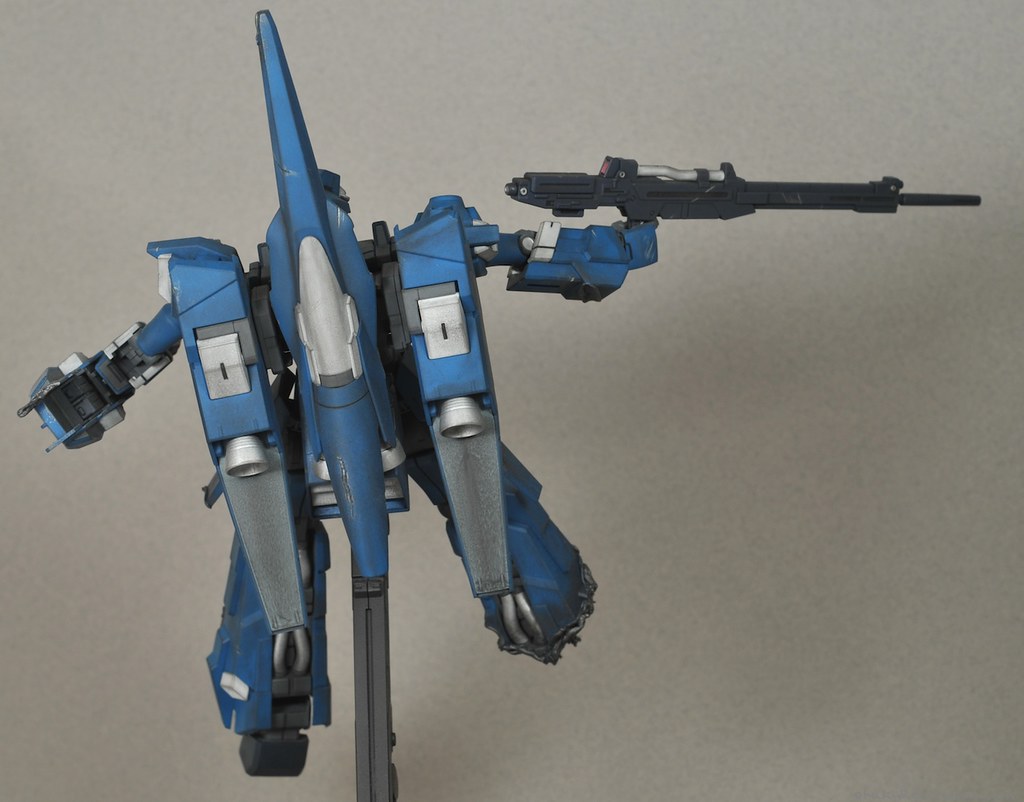
At last, I my Full Armor Unicorn is complete. First a few photos you may have already seen…
Click to Enlarge | On Flickr
Click to Enlarge | On Flickr
Click to Enlarge | On Flickr
Click to Enlarge | On Flickr
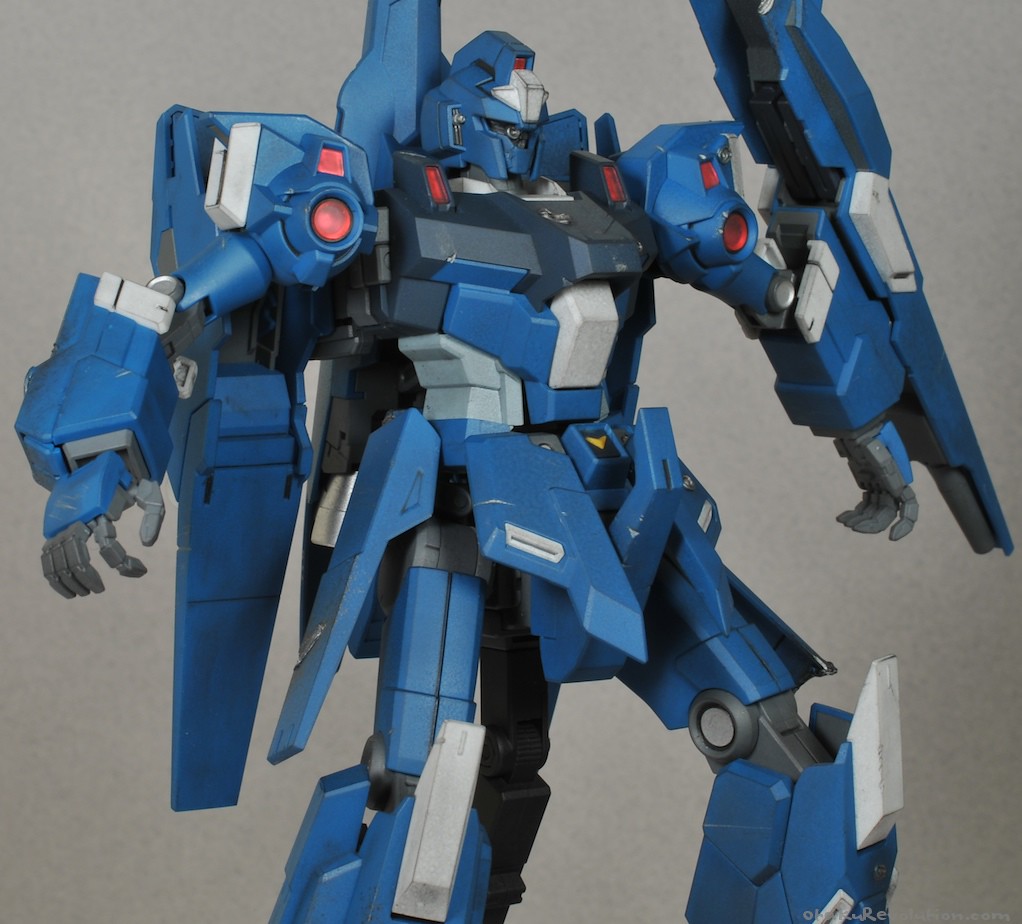
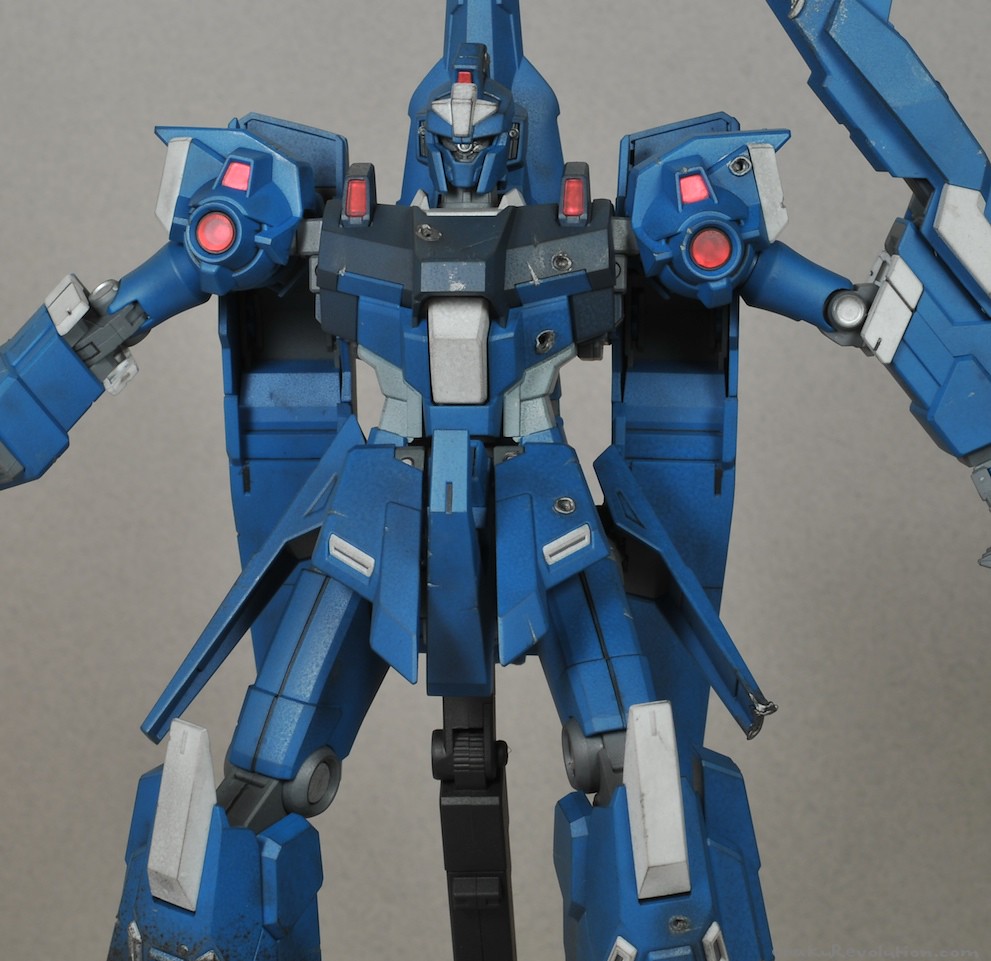
And the finished product…
Click to Enlarge | On Flickr
Click to Enlarge | On Flickr
Click to Enlarge | On Flickr
Click to Enlarge | On Flickr
And a shot of the full Unicorn family…
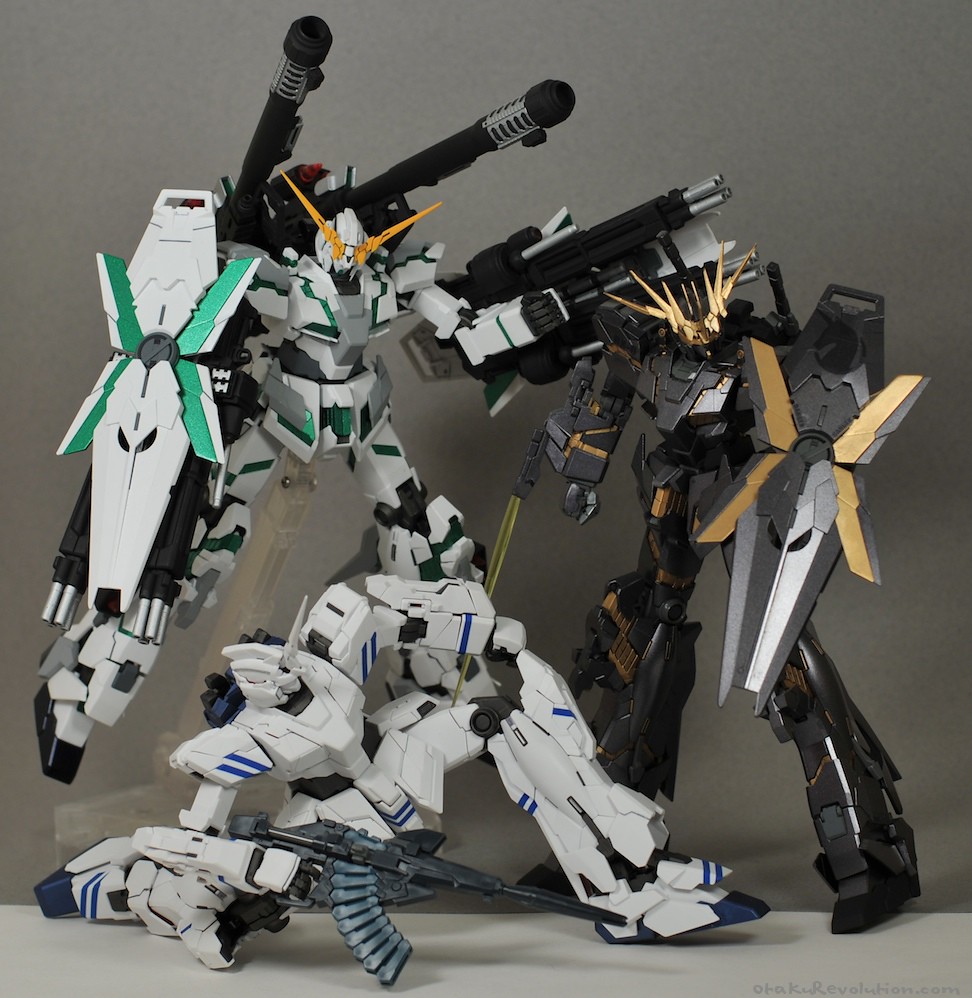
Click to Enlarge | On Flickr
Thus a project conceived back in March has finally come to a close.
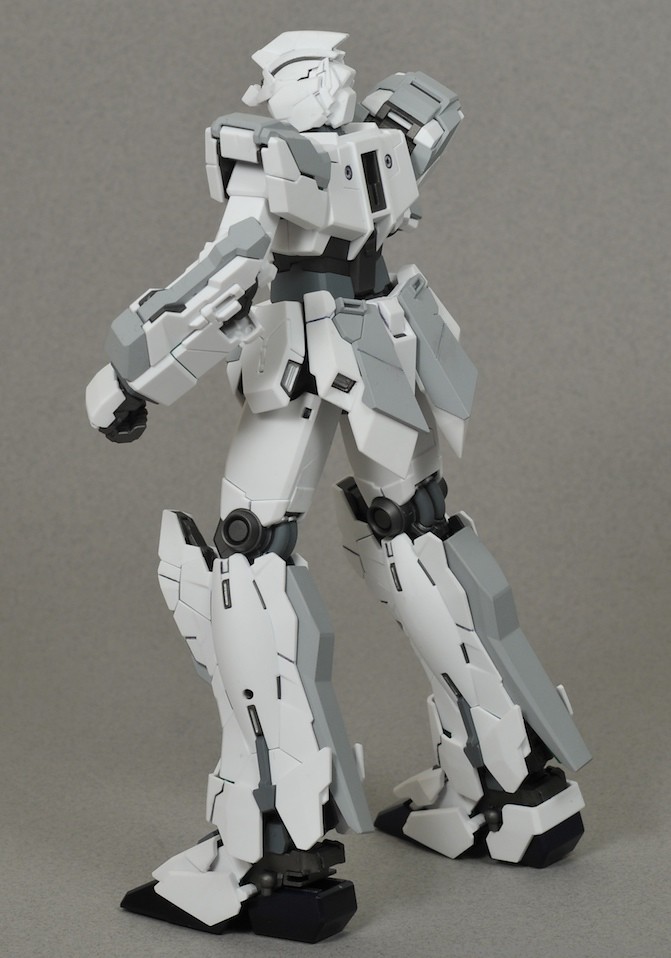
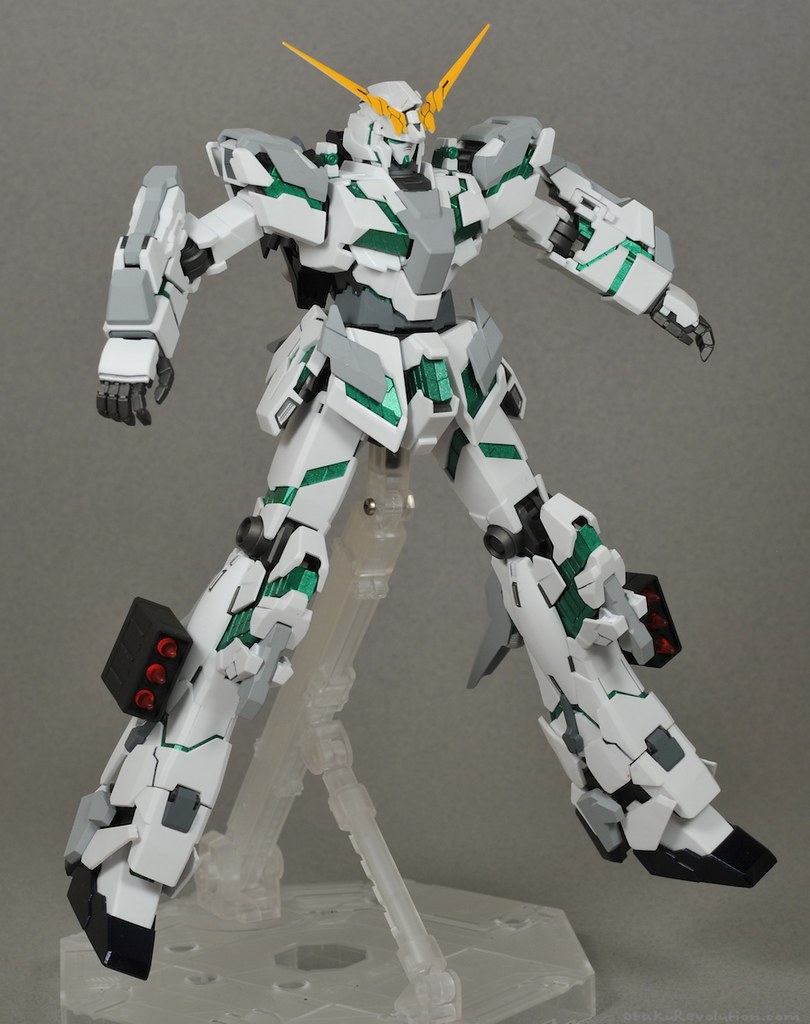
As this was the third MG Unicorn built, the process was the smoothest and the end result better than the previous two. Painting the psycho frame and exterior pieces when without a hitch. Aside from the green, and the v-fin, the main suit itself is done in four different tones. White, light gray, medium gray, and dark gray.
Wounded ReZEL WIP Update 01
Built this guy a few weeks ago, finally had sometime to get started on it today. (Mainly because I’ve all but run out of paint for last pieces of my FA Unicorn)
Anyhow, this is a short and simple attempt at a battle worn ReZEL inspired by the Unicorn episode two. While in the ep, the leg is severed at the knee, I thought that would be too easy. So I decided to cut (err, melt) at the thickest part.
Click to Enlarge | On Flickr
Click to Enlarge | On Flickr
Click to Enlarge | On Flickr
Full Armor Unicorn Prototype Ver. WIP Update 03
It’s been a while since I posted any updated shots.
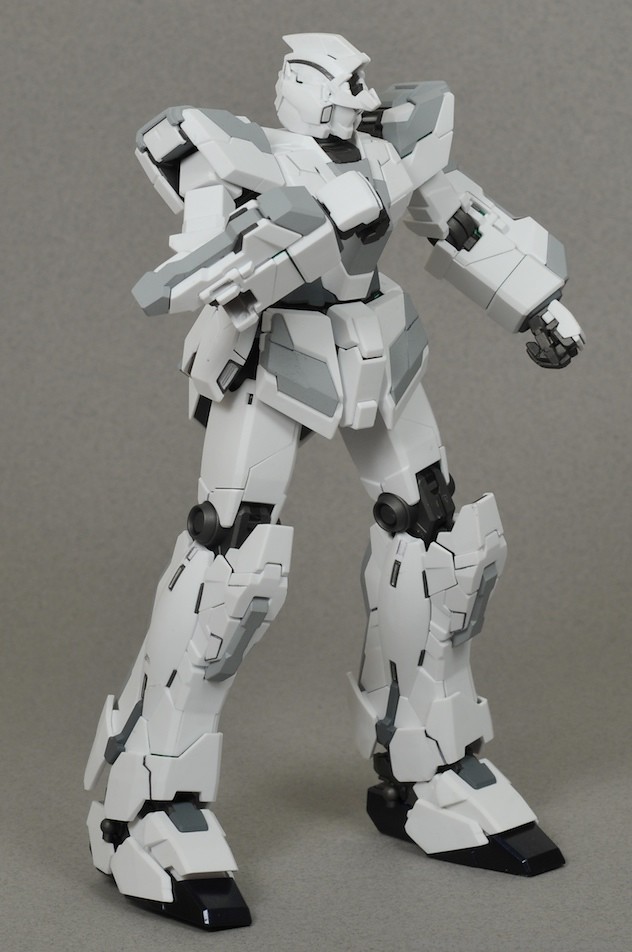
This is how the kit looks prior to transformation. Missing a few parts here and there. It will probably never be in this configuration again.
Click to Enlarge | On Flickr
Click to Enlarge | On Flickr
Might as well go all in and dazzle you with the fully exposed psycho frame…
Click to Enlarge | On Flickr
Click to Enlarge | On Flickr
Click to Enlarge | On Flickr
The weapons are still in various stages of completion. Not sure when I’ll get around to those though. Hopefully I’ll find some free time this week to get some more work in.
Full Armor Unicorn Prototype Ver. WIP Update 02
How about an update? Plus another shot of the metallic green!
Click to Enlarge | On Flickr
The legs are finished. A few pieces are over drying still. It’s almost ready for a top coat but I’m still debating whether or not to do some decals.
But first I need to finish the leg launchers.
Click to Enlarge | On Flickr
I’m modifying the launchers from an old Zaku kit. For the leg connections I drilled some holes and luckily for me, a toothpick was just the right size. I’ll paint and finish the launcher before I cut the pole down to size and glue it in.
Full Armor Unicorn Prototype Ver. Introduction
Click to Enlarge | On Flickr
A while back I set into motion a rather ambitious project. A third MG Unicorn themed off of the Full Armor version.
It’s not going to have all of the bells and whistles though. It’ll be toned down a little bit, but should be impressive none the less. It’ll also feature a four toned paint job (white, light gray, gray, dark gray) and a brilliant metalic green for the psycho frame.
Here are some early shots. Depending on my workload this week I’d like to get the legs done and start prepping the backpack. I’ve already figured how I’m going to mount the cannons and I can’t wait to see if it actually works.