
After four months of paint, tears, and more paint… my black Perfect Grade Strike Freedom is complete. For those of us with ADHD I’m going to kick things off by posting all the pictures. From a technical prospective they’re rather ‘blah’ due to the small size of my studio and the humongous span of this kit’s wings, among other reasons. You can read more about that, along with very little detail about the build, after all the pretty pictures.
The Pictures

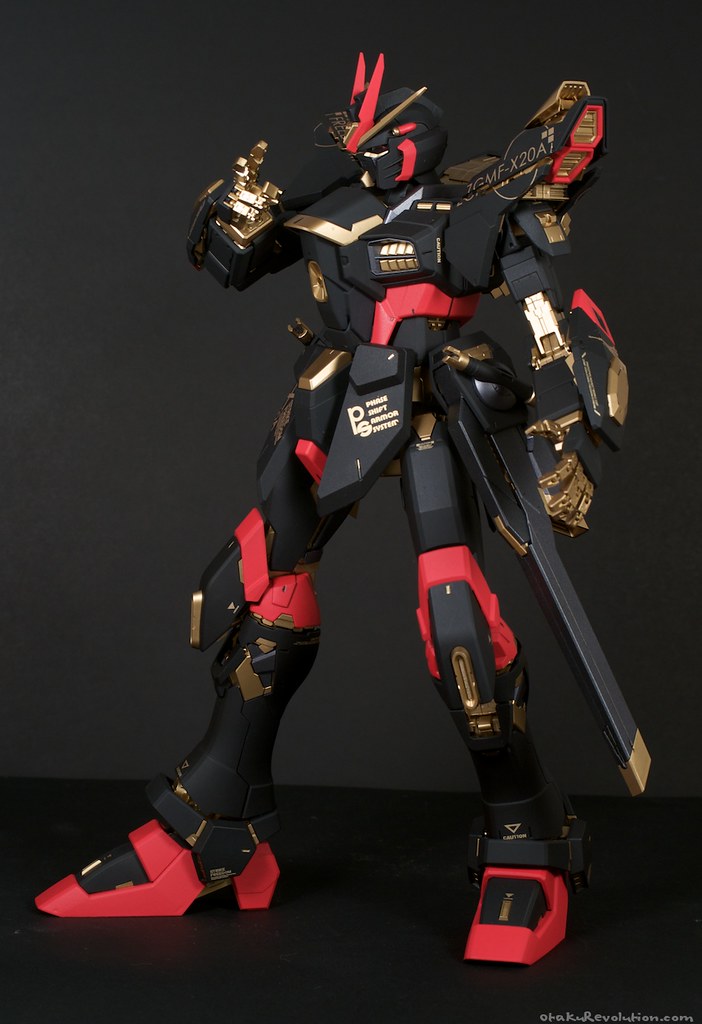
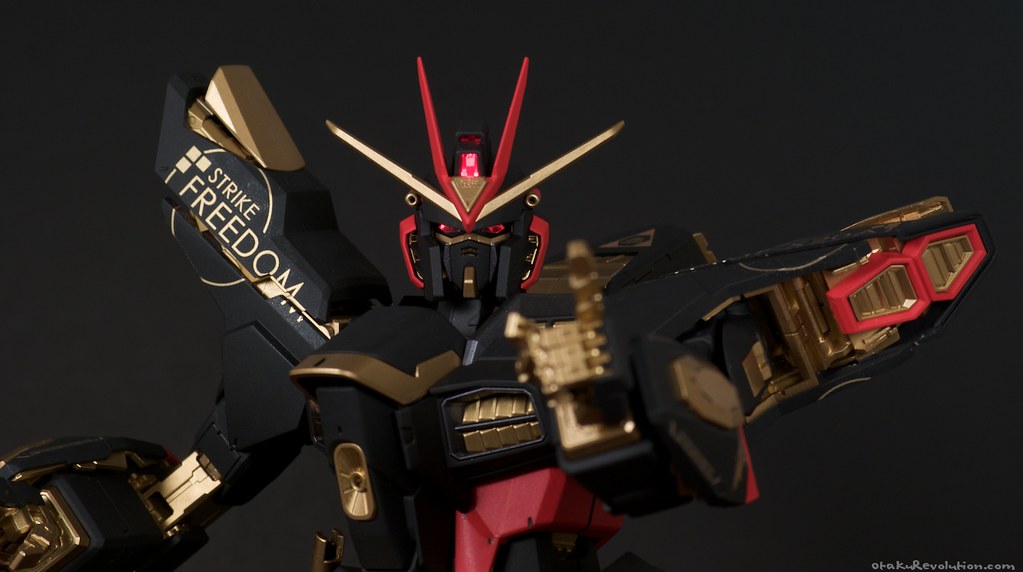
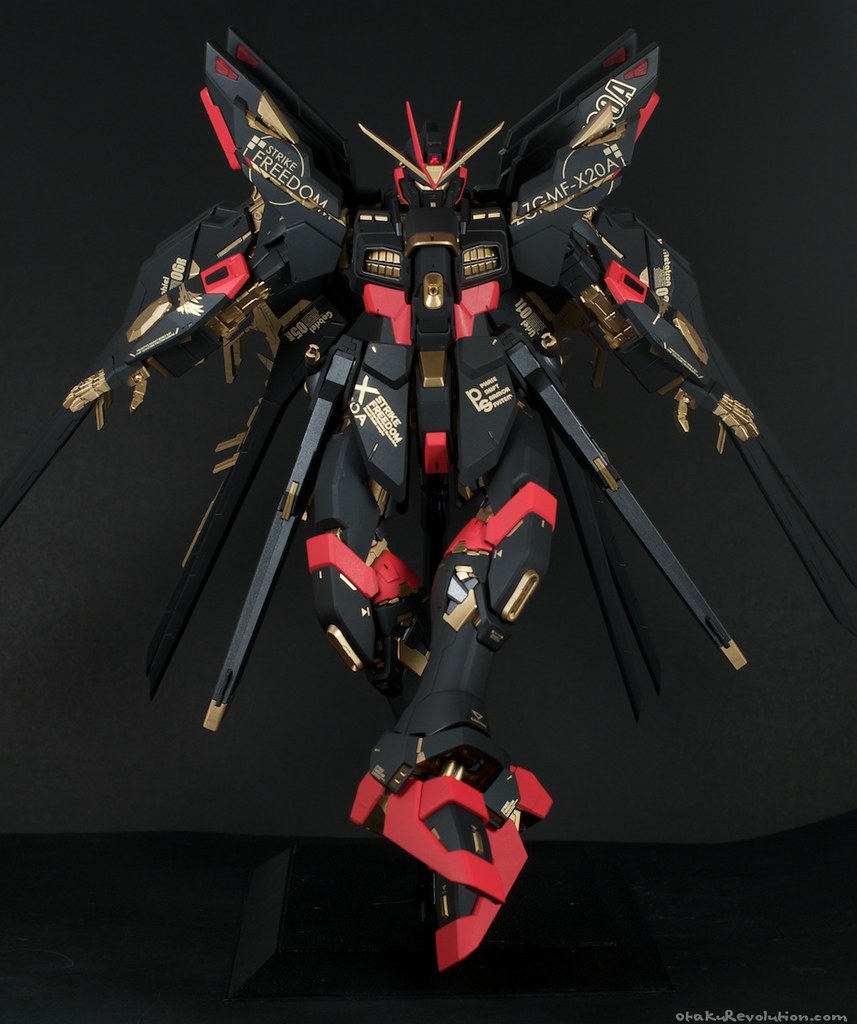
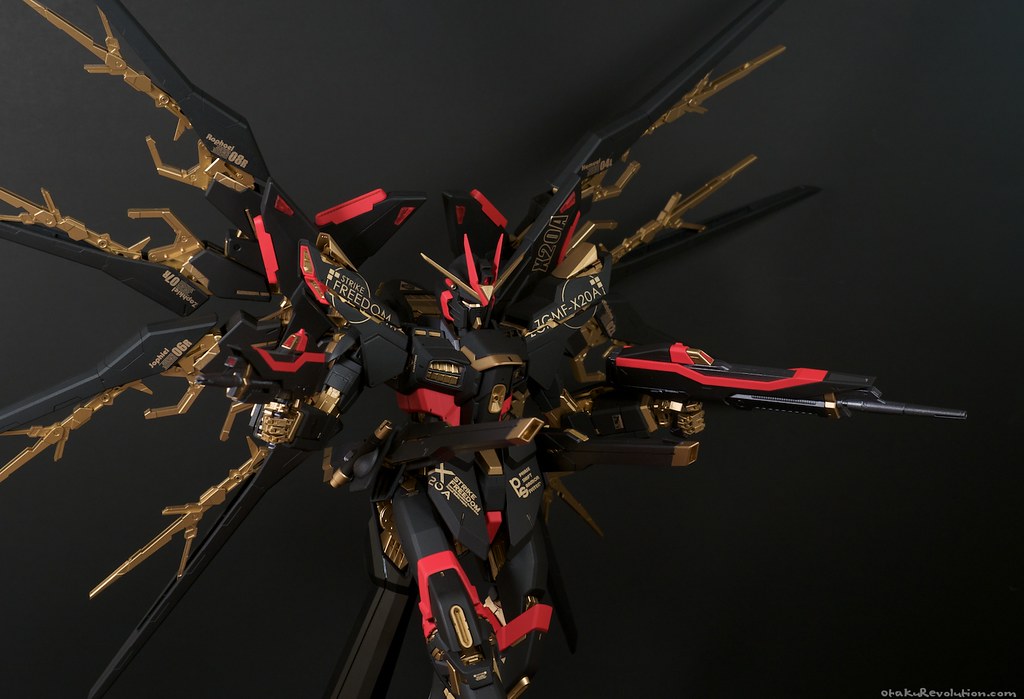
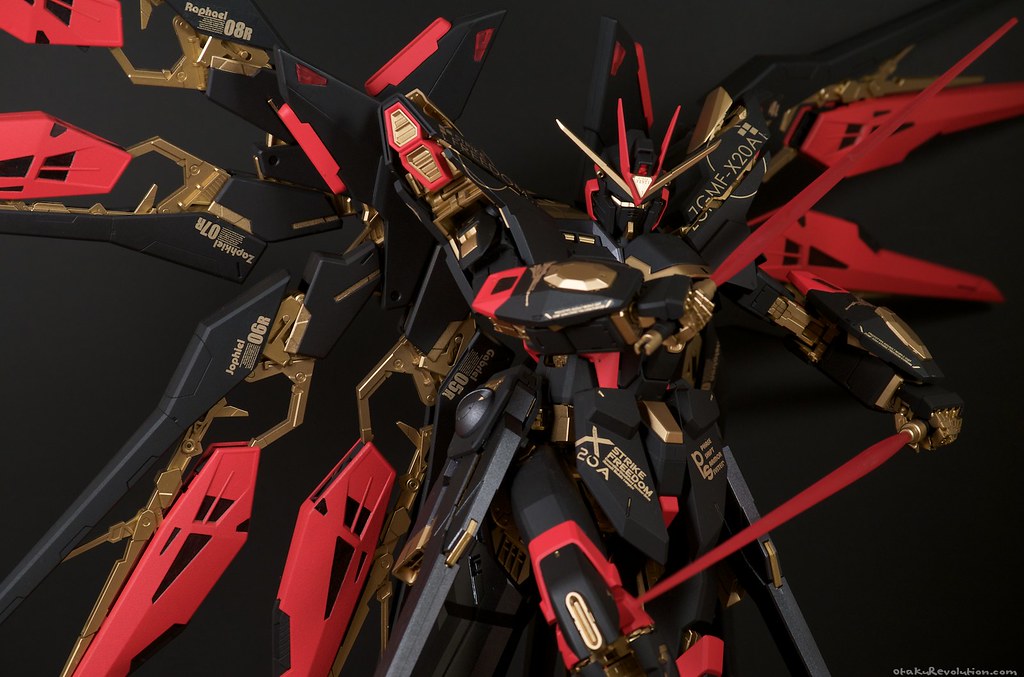
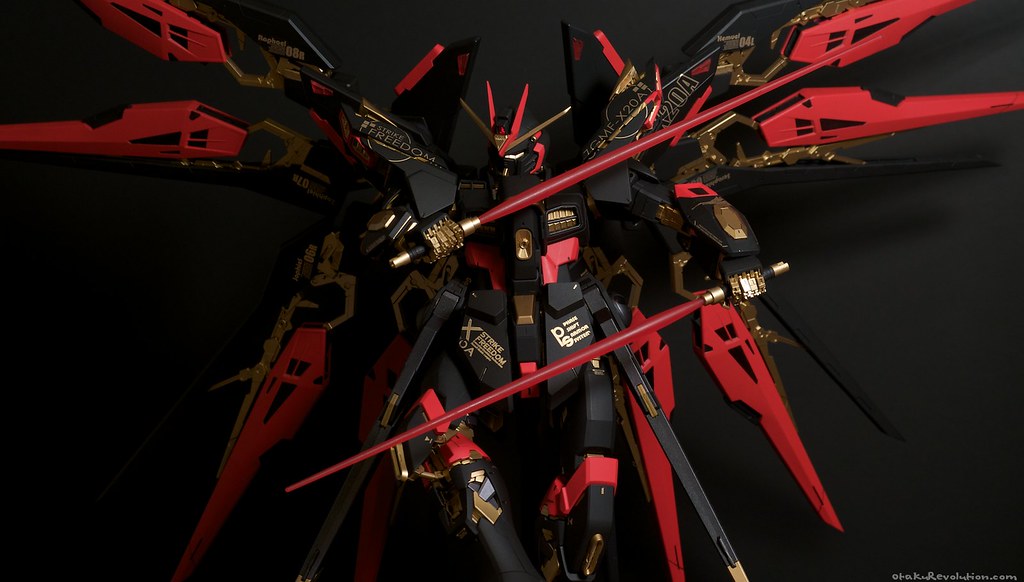
Click to Enlarge | On Flickr
Click to Enlarge | On Flickr
Click to Enlarge | On Flickr
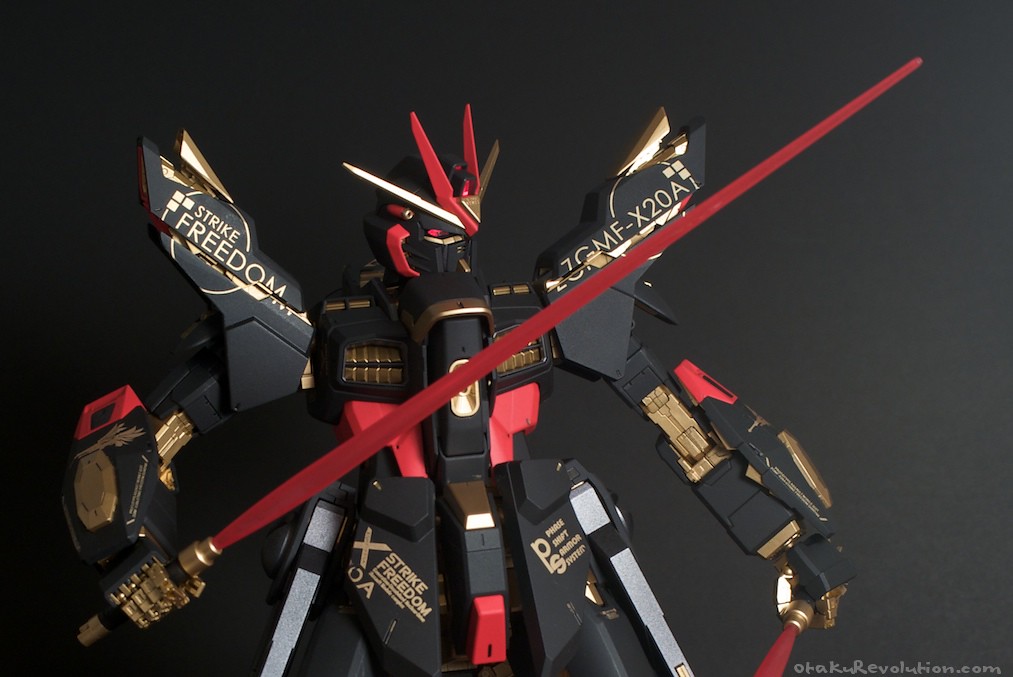
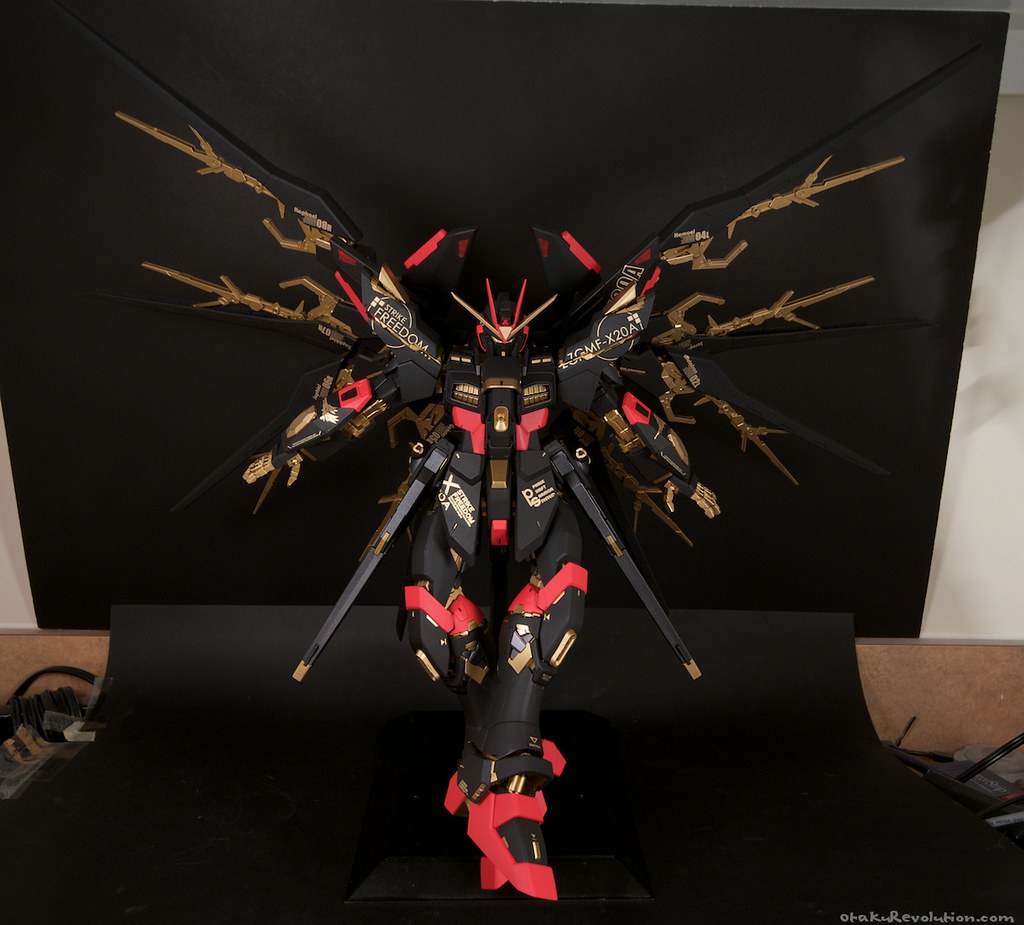
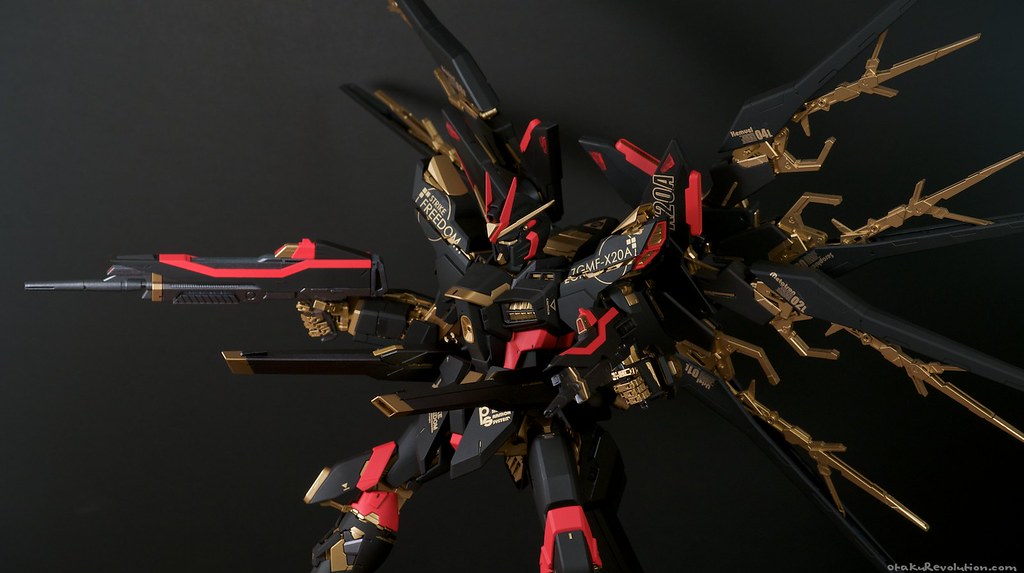
Click to Enlarge | On Flickr
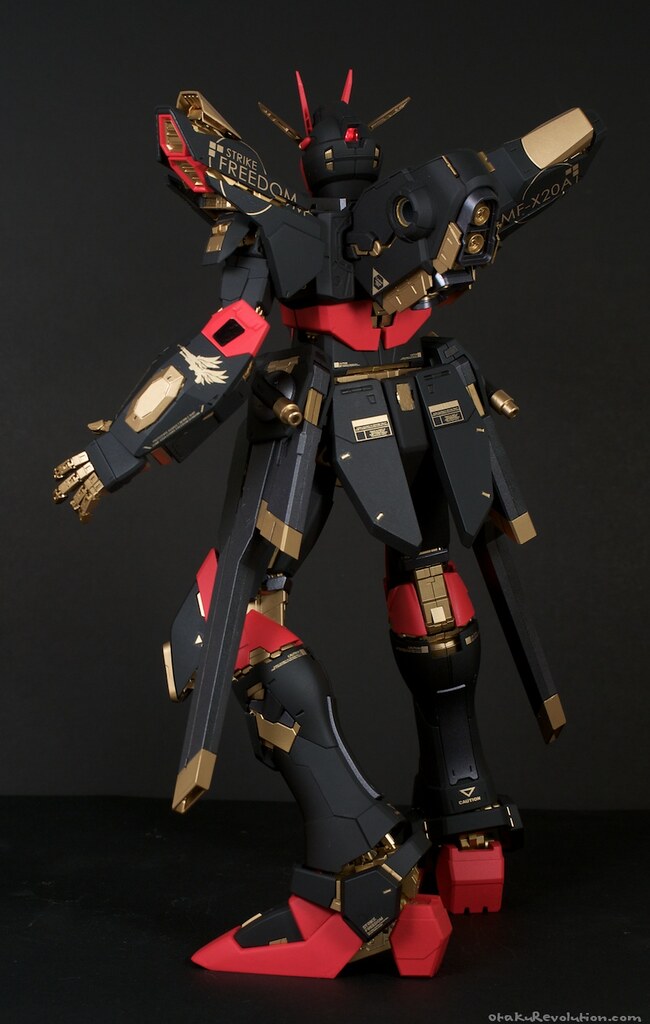
Click to Enlarge | On Flickr
Click to Enlarge | On Flickr
Click to Enlarge | On Flickr
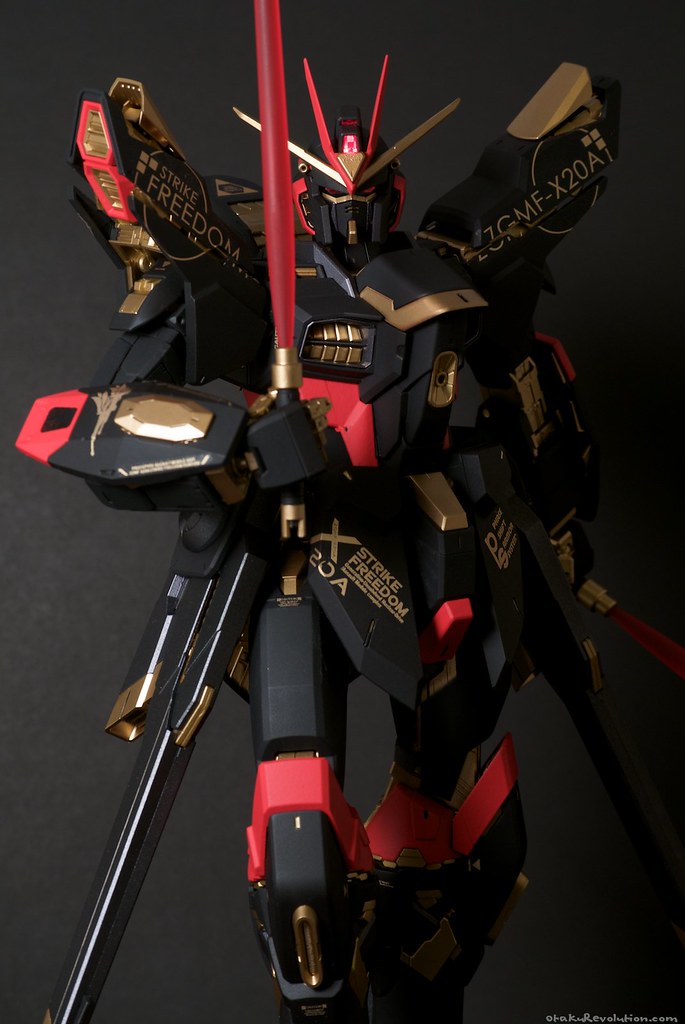
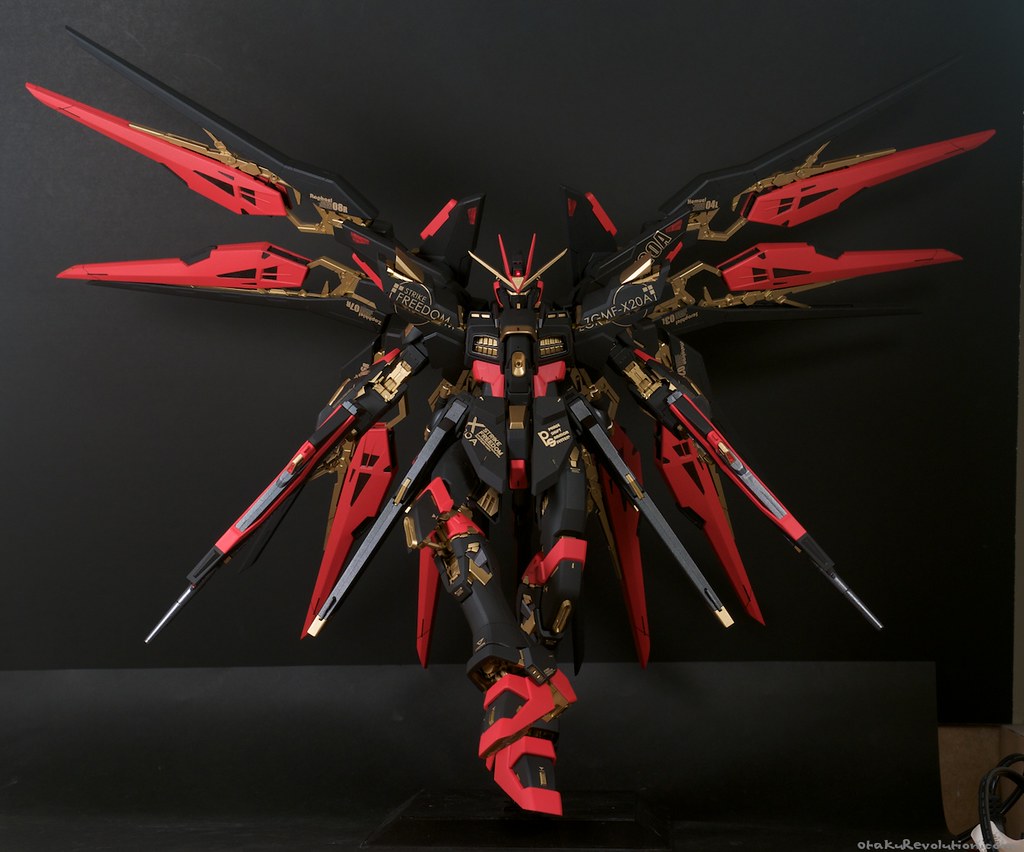
Click to Enlarge | On Flickr
Click to Enlarge | On Flickr
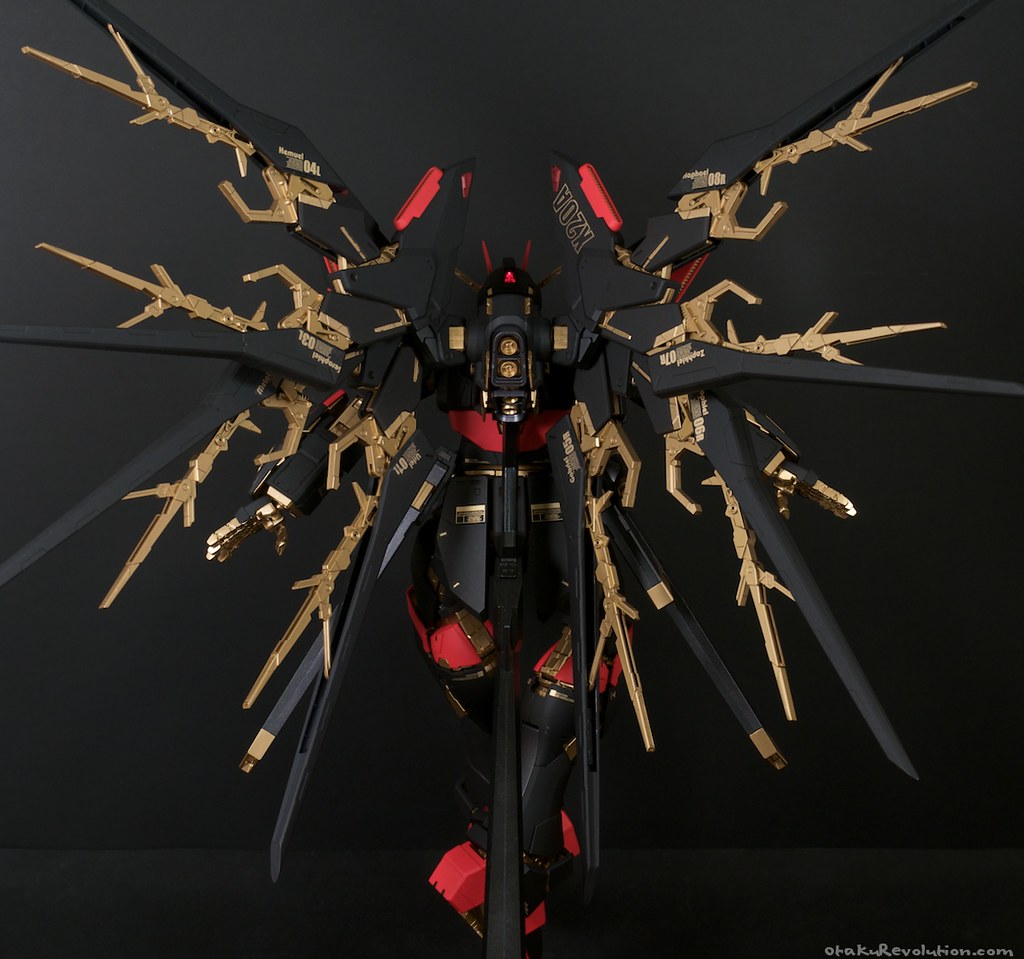
Click to Enlarge | On Flickr
Click to Enlarge | On Flickr
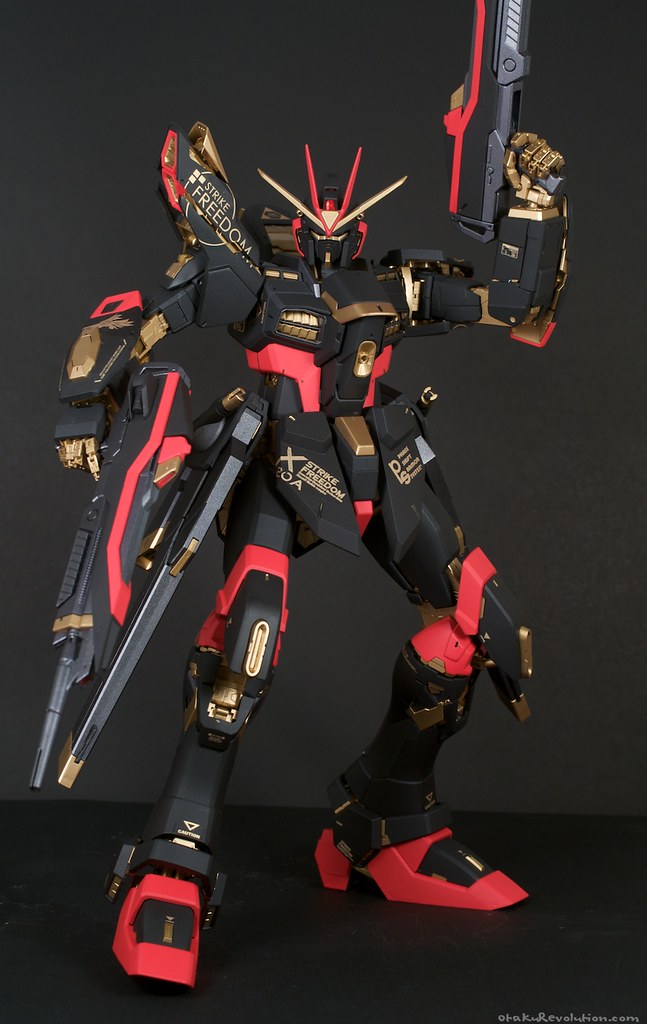
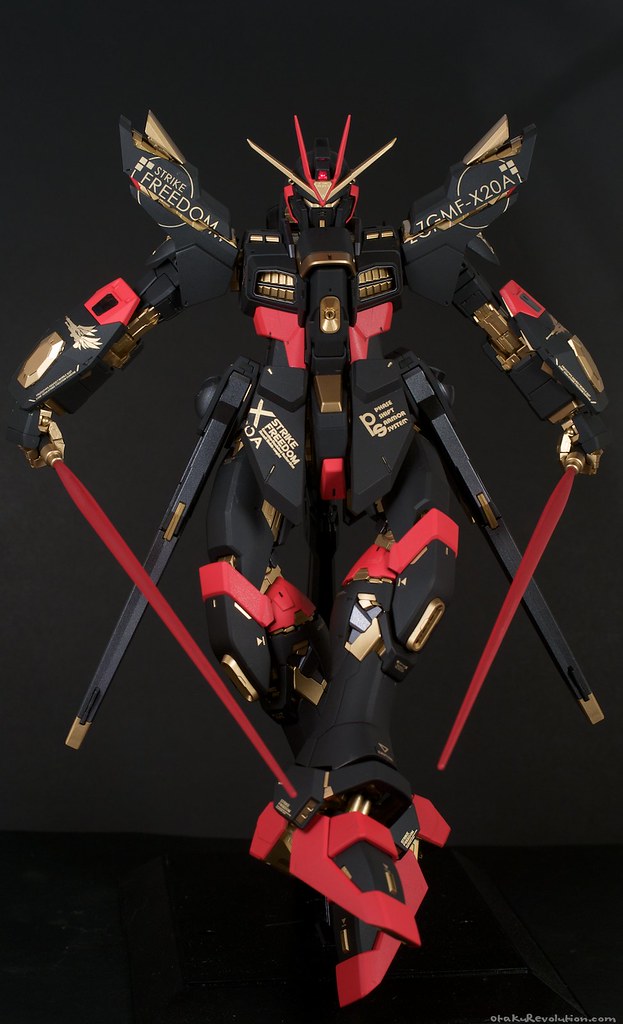
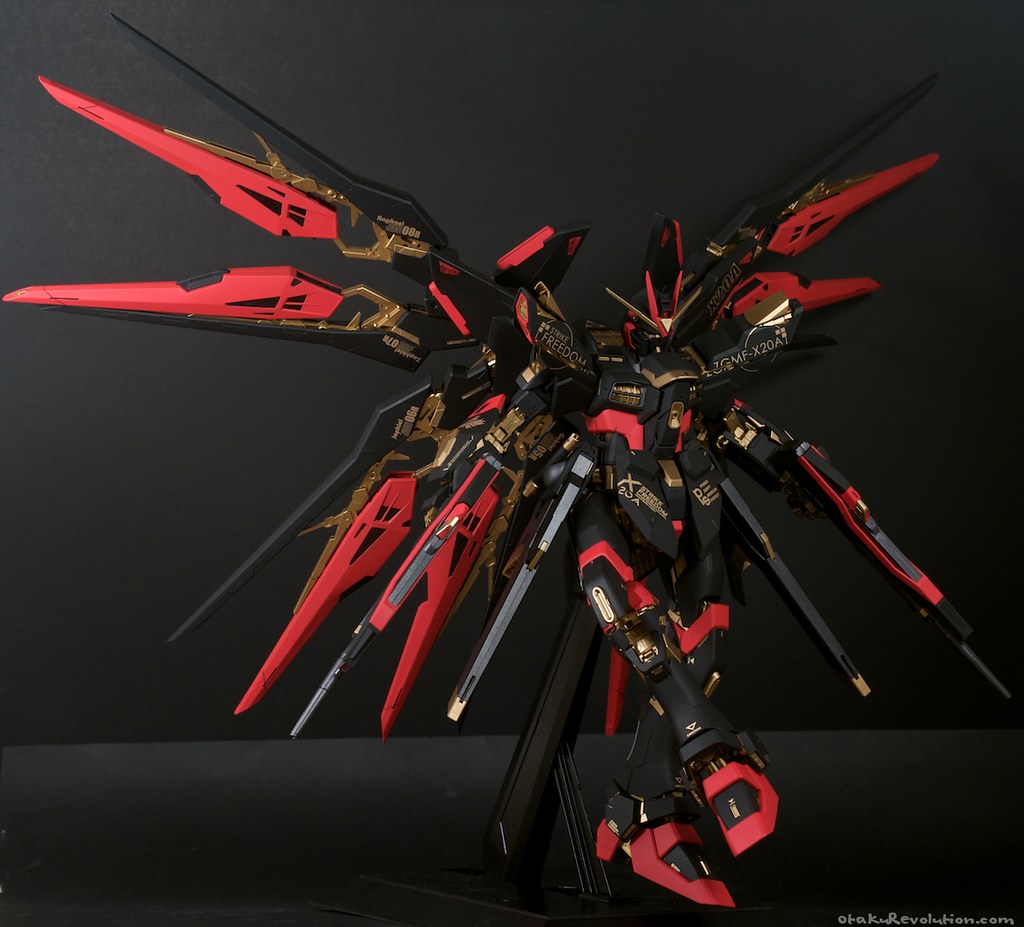
Click to Enlarge | On Flickr
Click to Enlarge | On Flickr
Click to Enlarge | On Flickr
Click to Enlarge | On Flickr
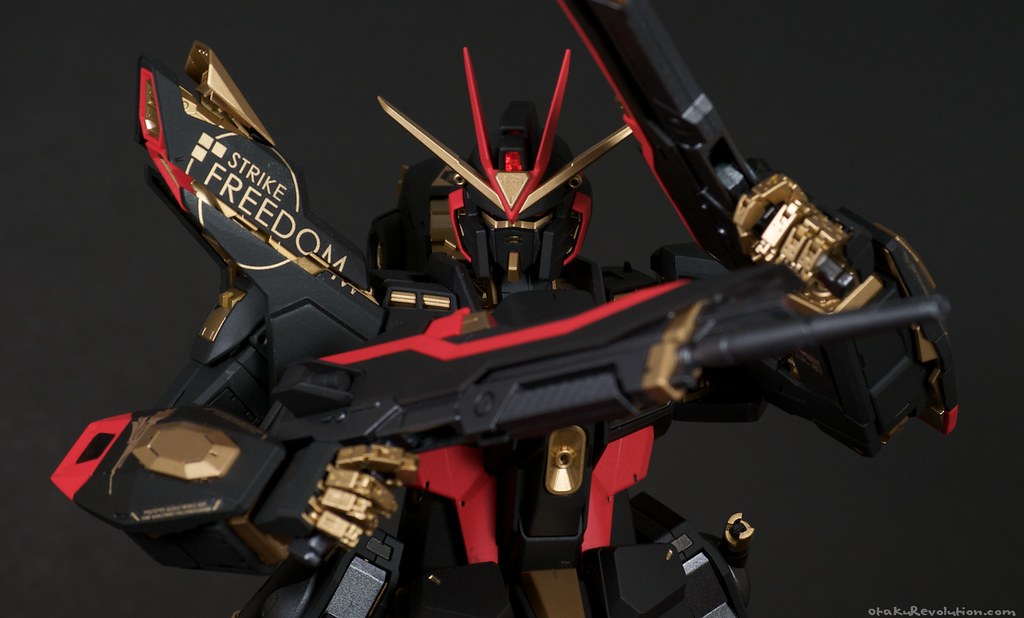
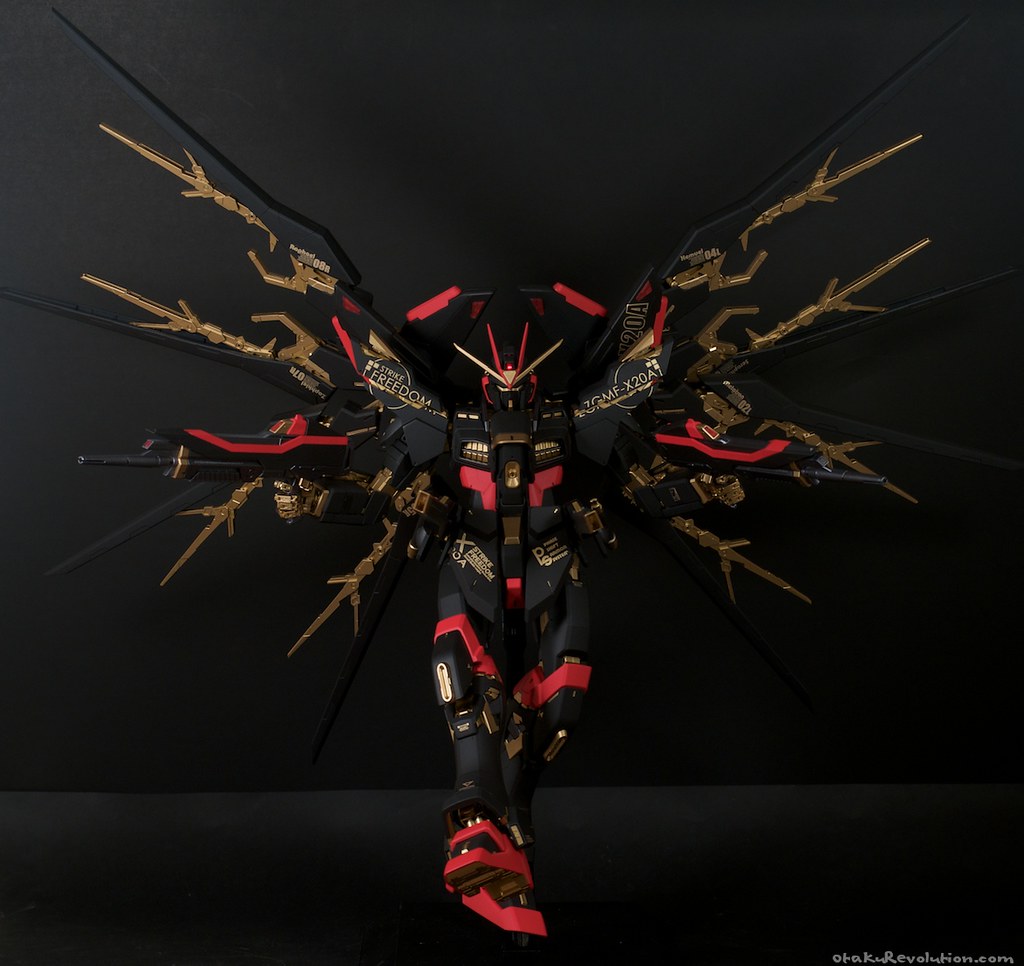
Click to Enlarge | On Flickr
Click to Enlarge | On Flickr

Click to Enlarge | On Flickr
Click to Enlarge | On Flickr
Click to Enlarge | On Flickr
Now for the text portion of this review. I’m going to go into more detail than I think I have on any of my previous projects. This is because I tried several new things, ran into plenty of painful issues, and want to pass that knowledge on. After such a long day my mind is starting to fade so I will likely ramble like an old man here and there. If you have any questions please don’t hesitate to ask.
Scheme Origins
I like attempting to be original with my paint schemes and wanted to do the same with my Strike Freedom. I say attempt because at this point there are so many Strike Freedom kits out there that I doubt there’s one original scheme (that doesn’t look like shit) left undone. Early ideas involved painting the frame something other than gold. At one point I was even thinking of doing it in silver much like Lupes has done since. Then I realized that this will probably be the first and last time I work on a kit with a golden frame, let’s not spoil it. From there things just fell into place. Over all it’s pretty generic but it looks great. If you’re planning on getting one of these kits, do purple and gold. I think it would look amazing.
Paint
With every kit I try something new. Partially for me, gaining the experiance and partially for you, so I can pass that experiance on. Here are the paints I used and why I should never do it again…
- Black > Krylon Black Primer – I used it for small touch ups and details here and there beforehand, like the guns for my Full Armor Unicorn. At some point I wondered how well it would fare during a much wider application. For the most part it was very successful. It produced a fantastic flat black and has probably held up a lot better than some of the other paints used. One issue is that it does mark rather easy from piece contact. Another is that it doesn’t handle a dull top coat very well and is much more prone to spotting than other paints. Many pieces had to be repainted through the project due this. Its flat nature also made the application of water slide decals an issue, even with a simple gloss coat beforehand. More on that later when I talk about the decals.
- Red > Model Master Guards Red – After much consideration I decided to go with Guards Red from Model Master (Testors brand). At first I started airbrushing the appropriate pieces following a nice coat of gray primer. For whatever reason, probably incompetence, my attempts all met with a spotty, almost bumpy, coat. After going through several jars I realized that I hadn’t made much of a dent in covering up the gray primer and decided to try out their spray cans. For the most part that went considerably better but I still had a hard time getting nice even coats. It also, along with the primer below, apparently likes to chip very easily. If you look at the photos above there are a few spots where you can see the blue of the original plastic following less than aggressive posing.
- Gold > Tamiya Gold (TS-21) – After using this successfully on my MG Banshee I figured this would be a perfect application, and it was. The gold frame looks spectacular and I had very little issue with the paint. For the small individual details I used Model Master’s Brass, which is closer in consistency and shade than Model Master’s Gold or Tamiya’s Gold Leaf (X-12).
- Gray > Tamiya Gun Metal (TS-38) – Another paint I used on my MG Banshee, I think it looks fantastic on my Strike Freedom. It’s dark enough to not be distracting against the flat black but light enough to break it up just so. There are also a few pieces on the legs which I painted this color as well.
- Clear Piees > Tamiya Clear Red (TS-74) – While I have jar of this in my possession I wanted to see how effective the spray can was. In the end it made short work of the clear pieces which came out great. Afterward I hit them with a dull coat to frost ’em up.
Why didn’t I use an air brush you ask? Several reasons actually. The first is that I don’t really have a proper area to paint in. Any painting in doors leads to a fine coating of colored dust everywhere. I lack a garage or spare room and only have a deck available. Air brushing out there is ripe with issues so spray cans were the best alternative.
Top Coat Issues
During the construction of this kit I ran into a lot of issues with my top coat. I was using Testors Dull Cote, the most widely available brand in my area. The first issue popped up when the temperature had dropped below 60 degrees Fahrenheit. I hadn’t noticed the change and went outside to spray down some of my pieces. When I returned I noticed that the dull coat had blotched rather noticeably. As a result a lot of pieces had to be repainted & redecaled.
Decals
The decals are a special order from Samuel Decal. The two sheets, just gold versions of some of their existing Strike Freedom sets, actually took three tries before I recieved what I requested. Luckily they look fantastic as does all their work. What I didn’t realize is that a lot of the same decals are used on both of the sheets, so despite the abundance of decals there was very little variety. As a result I used decals sparingly (in comparison to how it would look if it received all of Bandai’s stock decals and stickers) to avoid overwhelming.
Applying the smaller decals went rather smoothly but I had issues with the larger ones. Due to the flat nature of the black paint I had to apply a gloss coat ahead of the decals so that they would apply cleanly. On some pieces I don’t think I applied enough gloss and, despite using Micro-Sol and Micro-Set, had significant silvering. I also had, after applying the dull coat, a new issue I’m not familiar with. Simply put, some of the decals didn’t blend seamlessly and you can see the outline of them on the piece.
Thankfully most of these issues aren’t too prominent in the photos although they’re there if you know where to look.
Issues with the Kit
For the most part the PG Strike Freedom is a pretty solid kit, for a Master Grade. However this is a Perfect Grade model and as such it needs to be held to the highest of standards. Here are some of my main issues…
- Out of the box gold pieces – I discussed the color issues in a previous WIP post but it’s work bringing up again. For whatever reason Bandai decided to release this kit with three separate gold colors. One of the shades is actually sprayed on at the factory, and done very inconsistently. Why they went this route, I have no idea.
- Heavy wings, not enough support – Several folks out there have had issues with various wing joints breaking under pressure. While I did see a minor stress fracture on one of the piece at which both wings attach I haven’t encountered anything so major. However, when I first did a fit test I thought to myself, "Gee, these wing joints don’t seem that tight, once I add the DRAGOONs they’re going to dip a bit." The thought hadn’t crossed my mind since then but reared its ugly head once I attached them for the first time today. Not only did the point components of the wings sag, but the whole unit. If you look at my photos there’s no shot of them fully errect. That’s because every time I put them in that position they quickly sagged back down. Hell, I don’t think I have one shot where there’s one aspect of the wings w/ DRAGOONs that doesn’t have an issue.
- Spring released DRAGOONs – Honestly, I haven’t an idea how they work. I’m afraid if I mess around with them something’s going to break.
- Seam lines – The body is pretty solid when it comes to seam lines, or rather, the lack there of. Unfortunately the wings and hip guns are a seam line bonanza.
- Stand limits poseability – If you have a PG Aile Strike or MG Ex-S Gundam you’ll notice that the PG Strike Freedom using the same standard Bandai stand. As with previous releases this display limits the torso to an upright position. As a result while on the stand you’re rather limited to poses with a vertical torso. With such amazing wings the kit could have really benefited from a stand allowing it to tilt side to side or front to back.
Photographing the Kit
A long while back I set up a little studio for when I photograph my kits. A backdrop, some lamps with custom diffusers, it worked great. However due to limited space my best efforts to rest it for the size of this kit were unsuccessful.
In the early shots, where it’s standing by itself, you can see that it worked really well. When the wings are attached and expanded they easily reached ends of my backdrop. As a result I had to pull my camera back and push the kit further toward the backing. I didn’t want to limit my depth of field (and risk more of the kit being out of focus) so I left the aperture at f/8. As a result imperfections and lighting/shadows on the backdrop are a lot more prominent in the shots with the wings. In addition I was only able to move one of my lights further out which is why the lighting is harsher on the left side of the shot.
Of the two pieces of black backing I have, one was significantly shorter than the other. As a result in several shots you can see the desk area in the corner.
In Summary
After working on this kit for four months I really phoned it in at the end. There are small imperfections all over the kit that really bug me. Despite the kit looking wonderful in the photos I don’t think it holds up so well in person. At the very least I’m glad it’s over. I look forward to working on smaller, more manageable kits for the foreseeable future.