Welcome back to my multi-part review of the of Mechanicore’s 1/100 scale Tief Stürmer. In this section I'm going to review the main gun and the radar dome(?).
Review Menu:
- Part 1: Kit Introduction
- Part 2: Head and Torso (Steps 1 through 5)
- Part 3: Booster Pods and Rear Booster Module (Steps 6 and 7)
- Part 4: Main Gun and Radar (Steps 8 and 9)
- Part 5: Arms, I-Field Generator, and Secondary Gun (Steps 10, 11, 12, and 17)
- Part 6: Rear Boosters and Booster Legs (Steps 13 through 16)
- Part 7: Stand and Final Assembly (Step 18 and 19)
- Part 8: Final Kit Review
Common Issues
This is a quick list of the common issues on the build. They apply pretty much across the board and pop up so much that I'd probably go crazy trying to specifically mention each time it occurs throughout the build.
- Beware pegs and holes with fitment issues. Whenever inserting pegs watch to make sure that the peg actually fit. Quite often they're too large for the hole they're supposed to go into. This can be resolved by a properly sized drill bit (use an hand held driver instead of an electric one, or be very careful, to avoid going through the other side of the piece) or with a fine round metal file to widen it from the inside out.
- Beware pieces who's sprue connection often coexists with an important piece. In other words, runners have been connected to the pieces themselves in areas that are also happen to be connection points to other parts of the kit. Never cut flush with the plastic to get it off the runner (which you shouldn't be doing anyway. For the second cut, make sure you check out the part and how it's going used to make sure you don't lop off something important.
- Beware pieces with subtle flashing around the connection points. Connection points may have subtle flashing issues that result in a poor fit. If something doesn't quite work like it should, make sure this is not the case before proceeding. Use of a hobby knife is recommended to clean these areas up.
Build Notes
- There are quite a few piece that really should be glued into place. Since I intend to go back and paint I'm holding things together with masking tape.
- Because I'm going back and repainting I'm not applying any of the metal detail parts at this point. When I finish the build, and add them, I'll add any additional thoughts regarding their application to this review.
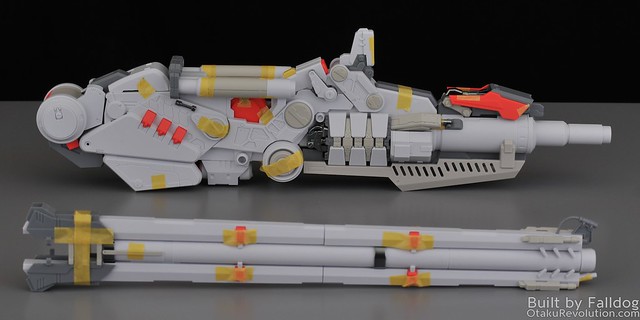
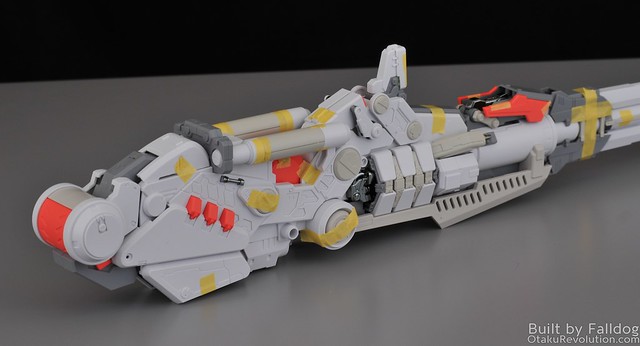
Main Gun (Steps 8.1 - 8.28)
The two pieces of the main gun
From a build prospective the building of the gun is pretty straight forward until you start on the second half of the unt. The layout in the manual for this seond half of the is all mixed up. On the first page, you have 8.4, then it leads into 8.5 and 8.6… and 8.4 is actually another view of a complete 8.5/6. Then it jumps into 8.2, even though there was already a step 8.2 on the previous page. There’s otherwise steps 8.7/8/10/11/12/etc so I’m not sure what went wrong here. Doesn’t really affect the build, it’s just weird.
In said step, 8.2 Part 2, you should leave 8.8/8.11 off until later after step 8.18. You can add those pieces on now, but you’ll have to remove it later for parts 13-3/4
In part 8.7 you should widen up the slots that 31-1/2 fit into. Otherwise the thickness of the pices causes 8.7 to bend outward.
In step 8.16, it would probably be easier to put on parts 15-24/25 before 12-19/27, but it’ll work as illustrated.
In step 8.19, I’m not sure how deep those small chrome pieces should sit within the disk. Based on the fitment of the piece itself it seems they shouldn’t rise higher than the elevated part of the disk. With the chrome coating mine didn’t fit that deep and I didn’t want to risk hammering them in and never getting them back out again cleanly.
In step 8.28 you really really really need to sand off or otherwise remove the chrome from piece 36-32 before trying to put 11-11 on. The fit is so tight that it'll actually cause the piece to split open...
The rear 11-11 piece also sits far too back preventing the unit from fitting in front of the 8.27 pieces directly behind. I had to shave off a good part (3mm or so) off of the rear 11-11 piece to get it all to fit into place.
Some general notes about the main gun itself...
- It's long, super long. Just shy of 29 inches.
- Also feels like pieces were bolted on after an initial design phase.
- Since the pieces in the first portion of the gun are mirrored, there's a little hole in underneath the tip where the nozzle thing is up on top. You're probably not supposed to look at the bottom of the gun anyway as it's sorely lacking in detail.
- More seam lines on the front portion of the gun.
- My gun bends ever so slightly to one side.
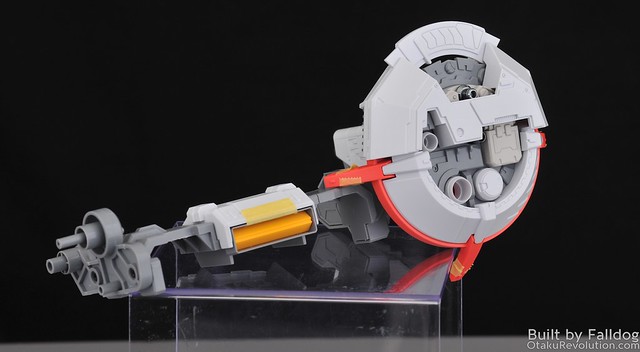
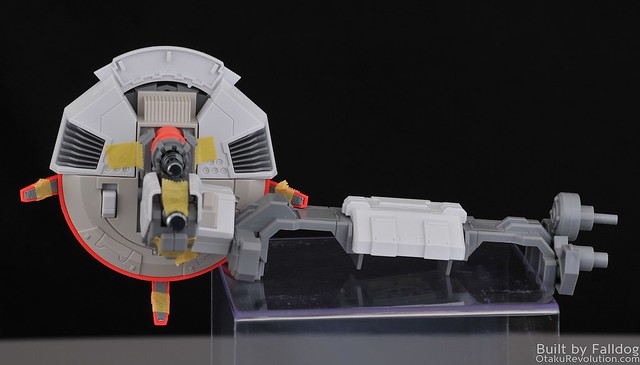
Radar Dome
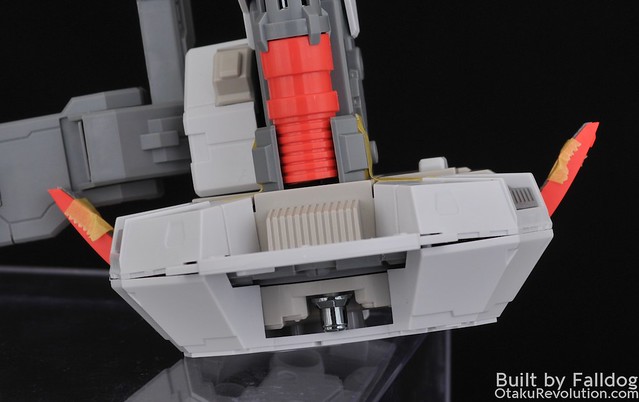
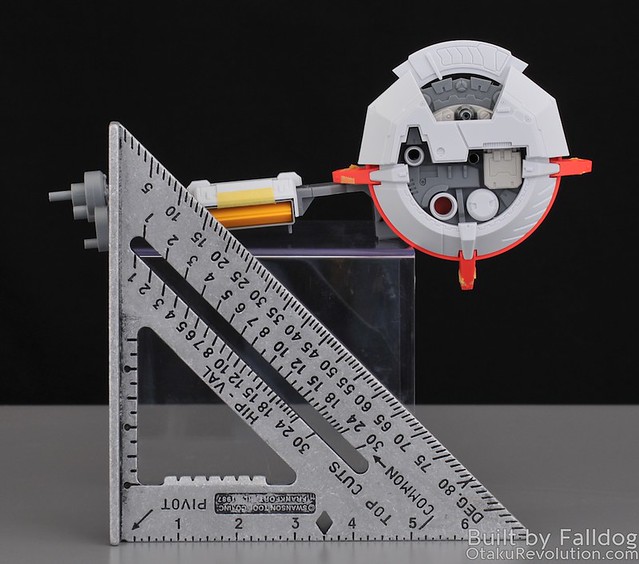
Nothing out of the ordinary during the build process to report on. There are a couple of interesting things there though. The first is that there aren't clear coverings for the optical parts on the dome. It may look that way in the renderings of the kit, but they're actually exposed LEDs. The LEDs may light up to the right colours, but they're not coloured in anyway. If you leave them off the build (as I did here) you'll have some big empty holes. If you add them in, without being powered on, they'll just be milky white exposed LEDs.
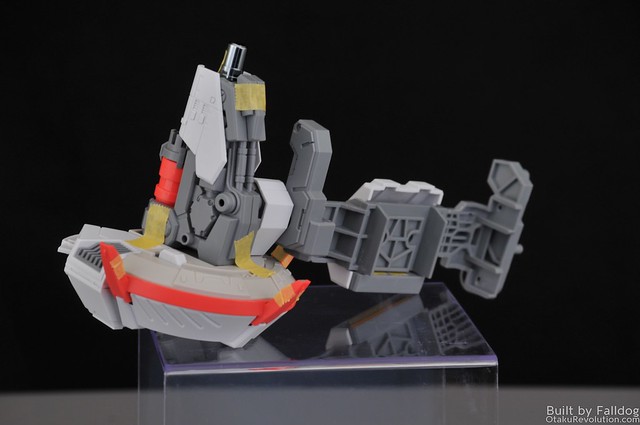
On the rear of the radar, up top, there's a section that really looks like they forgot to add a piece to finish of the design. It's just an unsightly area that doesn't make sense with the rest of the kit's design. Best I can tell this isn't just something left out of the guide, but has been left out of the design as a whole. You can see the same void in the renderings and other completed builds.
The odd void is at the very top of the radar
At the top of the radar, this time when viewed from the front, there are some really big gaps. I'm not sure if this is because I don't have pieces together properly or because of some poor design.
Last but not least, my radar dish seems to tilt a bit to the right. I'm not sure if this is by design, or beause I didn't put in a screw, but I feel like if it were aligned properly with the cross member one of the fins that stick out would be obstructed.


