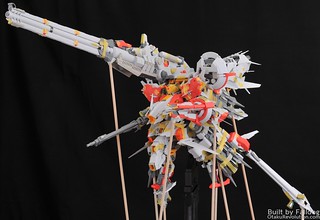
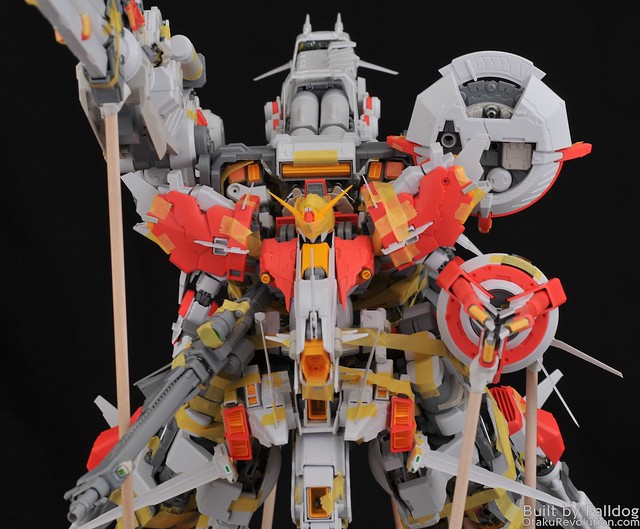
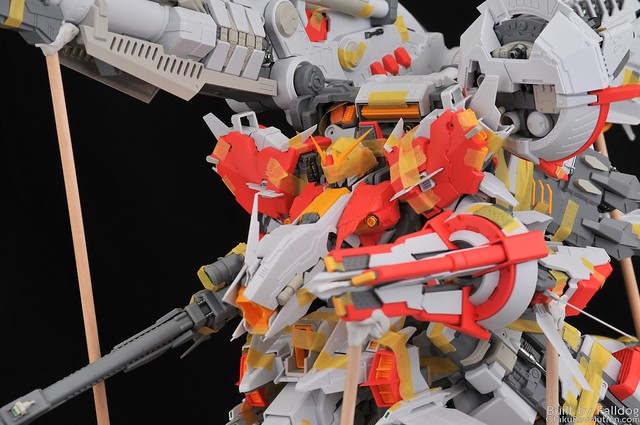
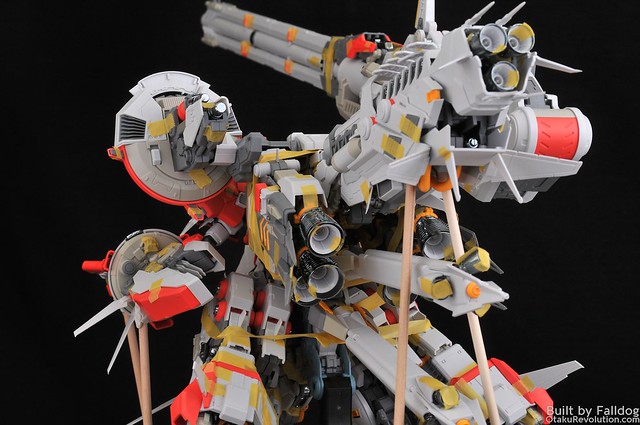
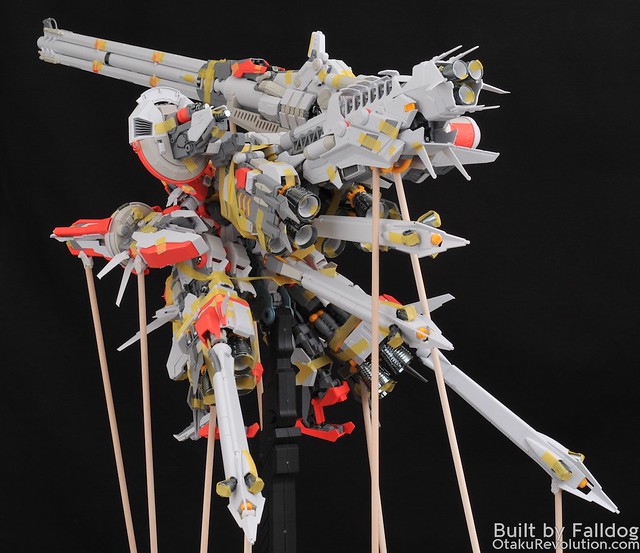
Welcome to final portion of my multi-part review of Mechanicore’s 1/100 scale Tief Stürmer. At last, the long awaited full review of this massive build.
As with most of my posts, enjoy a wall of text up front where I discuss the kit followed by a ton of photos down below. If this it he first time you're checking out the review, and you've got a Tief Stürmer to build of your own, please check out the prior sections. In them I tried to write about all the issues I ran into during construction so you'll be better prepared. Some of the issues I harp on about are more evident in the prior sections as well.
Review Menu:
- Part 1: Kit Introduction
- Part 2: Head and Torso (Steps 1 through 5)
- Part 3: Booster Pods and Rear Booster Module (Steps 6 and 7)
- Part 4: Main Gun and Radar (Steps 8 and 9)
- Part 5: Arms, I-Field Generator, and Secondary Gun (Steps 10, 11, 12, and 17)
- Part 6: Rear Boosters and Booster Legs (Steps 13 through 16)
- Part 7: Stand and Final Assembly (Step 18 and 19)
- Part 8: Final Kit Review
Introduction
I've been holding off on this review for a bit longer than I should, for a couple reasons. The first being that The Division came out and I've decided to spend my evenings shooting from cover. The second is that I don't really have much in the way of positive points about this kit.
When I review I like to try and provide a balanced opinion. The last thing I want to do is give folks the wrong impression about a kit and make people avoid what they might otherwise enjoy. A good example might be the Elyn Hobby Kshatriya that I finished last year. There are a lot of problems with that kit, a lot, but at least it can look really bad ass when all the issues have been worked on and the kit's been detailed up. I think the vast majority of builders should avoid the kit. The Tief Stürmer is pretty similar. It's made by the folks who used to be Elyn Hobby and has a lot of the same issues. However, as far as I know, this kit isn't based on a preexisting design like the Kshatriya was. It's built from the ground up with questionable engineering and questionable design choices. As such I feel like it lacks a lot of the design and detail elements that provided the only real redeeming element of the Kshatriya.
Thus, I'm tasked with writing a largely negative review. I don't have anything against Mechanicore, and I appreciate them releasing elaborate kits where seemingly Bandai wants to keep thing dumbed down. For all their fortitude, though, they really shouldn't bee tackling releases this expansive.
How about we start things off with a summary of all the good and bad things about this kit...
The Good
- Lots of potential for the kit to look great after detailing and paint
The Neutral
- It's large
- It has plenty of LEDs
The Bad
- Poorly designed
- Poorly engineered
- Poor molds
- No attention to detail
Now, let's break those down a bit...
Lots of Potential
There's no doubt that if you took the time to paint this kit, with all the detailing it deserves, it would be incredibly sexy. Even on areas where the details are a bit lacking there's plenty of room for improvement. On areas where there's lots of detail, get ready to spend ages, upon ages, just on lining alone.
The Size
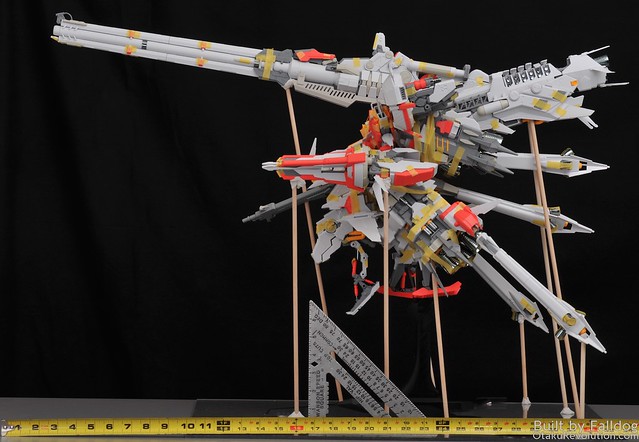
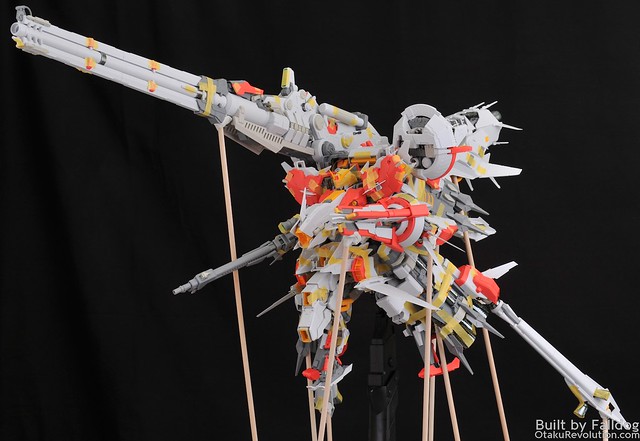
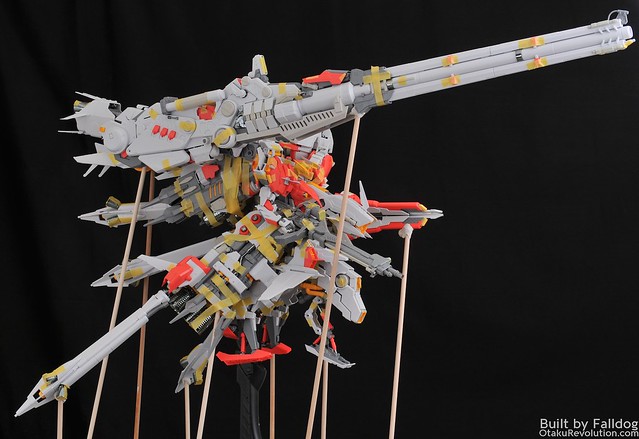
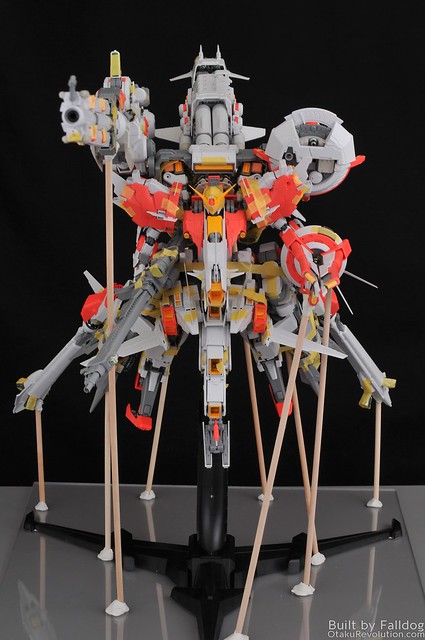
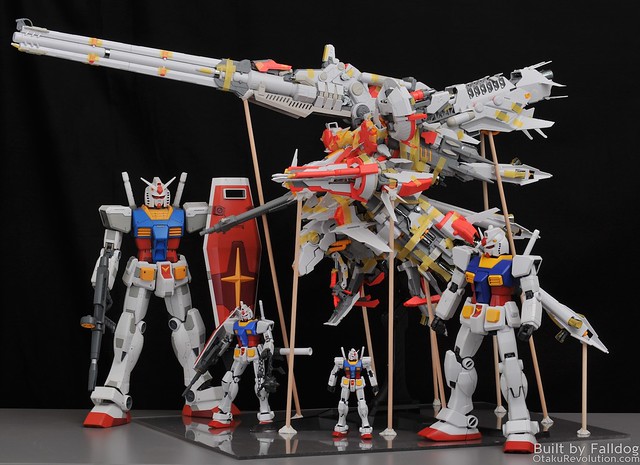
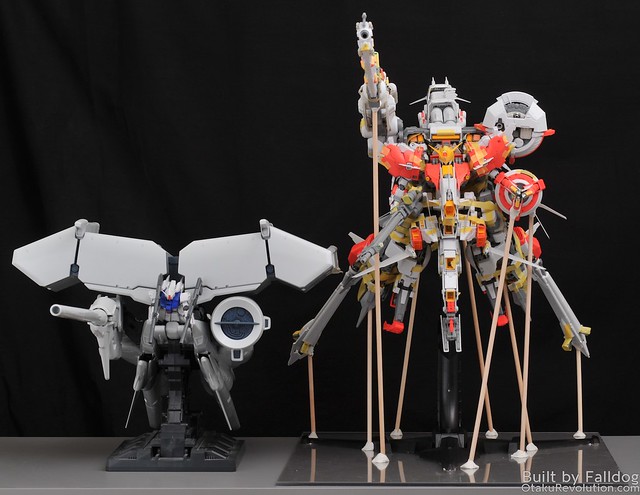
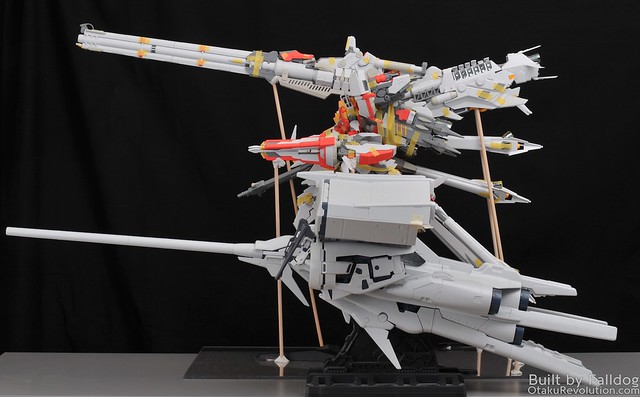
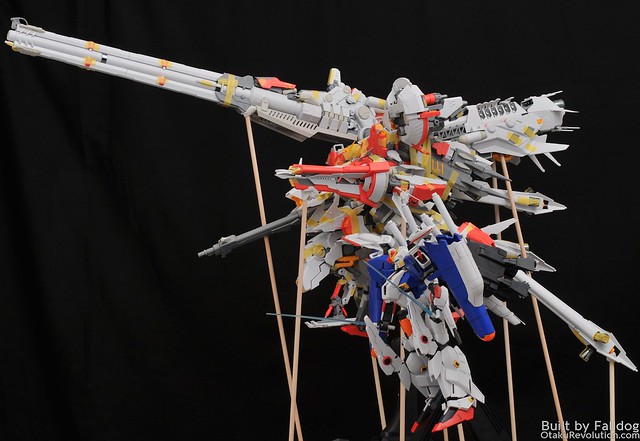
It's a large ass kit. Slightly larger than the HG Dendrobium, and heavier too (size comparison shots down below). The main gun is just over 28 inches in length. From end to end the kit is over 32 inches in lengthy and stands, from base to top of the gun in below images, at 24 inches. The weight of the kit (including the plastic base I have it on right now) is 9 lbs 2.2 oz. The HG Dendrobium weighs in at 7 lbs 6.9 oz.
So why is this in the neutral category? Because, unless you have a show room like me, you probably don't have a place to put it. It won't fit on any store bought bookshelf. Hell, if I paint this thing, I'm probably going to need a custom enclosure. I can't imagine most people having a place for this monster, especially when they can pick up a PG kit which is more manageable, and better in nearly every way, for less.
More size comparison photos are available down below.
LEDs
If you like things that light up, this might be a good kit for you. There are a lot of LEDs, last count had it around 40. Every booster lights up. There's a light in the barrel of the gun, the head, a couple in the sensor dome, and several parts of the torso light up as well. Unfortunately you're talking about a ton of separate circuits, no single on/off switch for this guy. Each booster is controlled separately. You're also going to pay a dime for all the batteries, an extra $50 to $100 out of pocket (full list on the first page of this review). Say what you will about the over priced LED option for the PG Unicorn, at least it's all wired together and uses four AA batteries which will last for ages.
The Design
Whether you like, love, or hate the design of the Tief Stürmer is subjective. From my standpoint, the over all design is a pretty strong one, though I much prefer the simplicity of the original Deep Striker design. However, as good as the design looks on the box, that doesn't always correlate to the appearance of the kit.
There are a lot of weird areas to the design. It's hard to explain, but parts feel like an after thought. A, "hey, here's a cool thing I like, let's throw this on too," sort of thing. This has resulted in a few rather unsightly areas where you can see an incohesive collection of pieces or obvious gaps in the panels. Some things look great, like the I-Field generator, while others are just a cluster of pointlessness, like the extended landing gear (completely superfluous, they can't be closed).
It's a design where someone went just a bit too far. Take the legs. The original Deep Striker design featured the same large boosters found on the back of the original Ex-S design (more or less)(would've looked way better and been easier to design if Mechanicore had just gone with that concept too). On the Tief Stürmer they incorporated the original legs and make it look as though the the booster has been tacked on. Not a bad concept by any stretch, however it results in a poorly engineered piece and looks really out of place.
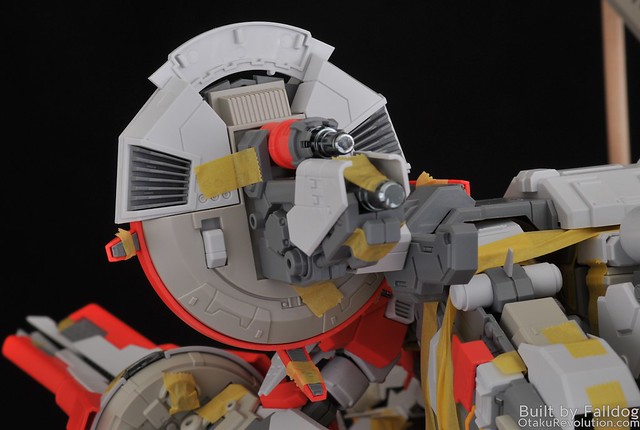
Potentially incomplete design above at the top rear of the sensor dome
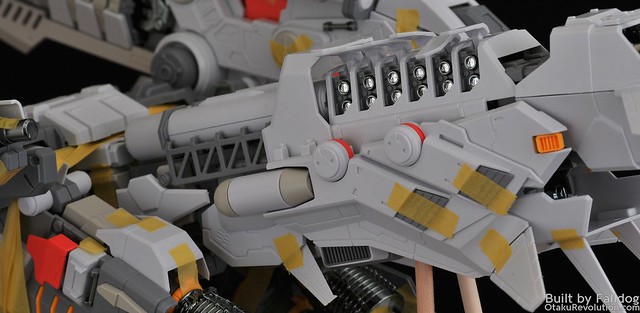
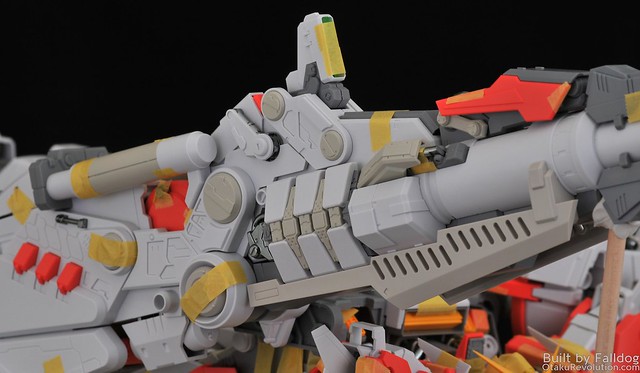
There are also a few parts of the kit that feel like something was accidentally left out of the design. The way they use repeating pieces for the outer end of the main gun leaves a hole, mirrored from the top where there's an additional piece, open on the underside. In the upper rear of the sensor dome there's a recessed area with a couple of pegs that look as though it's missing a piece. This is not only in the finished product, but reflected in the renderings used by Mechanicore.
The Engineering
There's very little positive feedback I can offer when it comes to the general engineering of this build. For the most part, if things were glued and all the screws in place, this kit would probably be just fine on its stand without any support. Beyond that there are just so many things that aren't right that I'm not sure if they were poorly designed from the beginning or whether it's a result of bad quality control with the molds.
90% of this kit does not fit together correctly. Sometimes the fit was too tight, sometimes the fit was too loose. Rarely did things actually fit together with the same quality and consistency you'd see from a larger model manufacturer. Quite a few pieces don't seem to really have any proper attachment points, you just sort of slot them in place and hope for the best.
In some areas, the outer armor and the inner frame don't quite have the same dimensions. That is to say, that the you can put the frame together, add the armor, and find out that the armor doesn't fit quite right and is actually pulling the internal frame apart. A good example of this is the head (which has to be one of the most poorly engineered parts of the kit). For more details on the head visit the second part of this review.
One thing I noticed is that a lot of pieces are pulled straight from the original MG S/Ex-S Gundam. The torso, the arms, and portions of the leg primarily. What made them stand out is that their engineering doesn't make sense for the build. It's overly complicated for no good reason. It's overly complicated because they were originally designed that way by Bandai to support the original's transformation gimmick. It boggles my mind that they could design everything else on the build but somehow had to rip these components straight off of Bandai's prior work. Well, since I think they did a poor job with the rest of the kit, that sort of answers why.
Mechaniore included one of those fully articulated hand sets that are all there rage now. On this kit it's fairly useless. For starters, one hand is hidden away in the sensor dome attachment. The other, if displayed with the gun, is completely useless. The fingers do not stay tight enough to hold onto the gun and the lack of a peg attachment makes it near impossible to hold. That my kit is holding it right now only due to a lot of putty and that part of the weight of the gun is supported by resting on other parts.
One of the most infuriating things about this kit is the undergating. If you're not familiar with undergating, it's when the nubs that attach a piece to the rest of the runner are positioned in such a way that after removal they won't leave a visible mark on the plastic. This is primarily used by Bandai on kits that they intend to have some sort of special metallic coating. I get the sense that the folks at Mechanicore said, "You know what people like? Undergating! Let's do that too!" without having any understanding of why undergating is a good thing. Undergated runners are fantastic if the kit has a metallic coating, or you want to be quick and just cut off your nubs without sanding. Otherwise it tends to be more trouble than it's worth. On the Tief Stürmer it's completely out of place.
First off, there's no way this kit would, nor should, ever be released with a metallic coating. It would be exorbitantly expensive and the coating would make already tight pegs a bloody nightmare. Mechanicore also did a terrible job placing these nubs. Some are awkwardly placed in up against pegs or other connection points. Others are in places that would never see the light of day. Worst of all, many are placed in channels built along edges of pieces meant as a detailable panel line to help hide seams. Even worse than that, is that the process is pretty inconsistent. There are quite a few pieces that aren't undergated when they really should be. Ugh.
One of the worst areas of this kit is the head (more commentary on in the second part of this review). Pretty much nothing about it fits properly. It's the first thing you build on this kit and it absolutely puts a bad taste in your mouth. Thankfully nothing else is nearly as bad, but you never really reach a point where things go as smoothly as they should.
Flawed Molds
While the quality of the pieces aren't exactly the worst quality in the modeling world, they leave a lot to be desired. For starters, a large amount of the kit has this odd, matte like, texture. Other parts of the kit don't suffer this issue so I'm not sure it's really an issue but a very odd design choice. Outside of that though, there are a lot of rookie mistakes. Quite a few parts feature punch marks (circles typically created when runners are punched out of their mold), others feature visible mold seam lines, and plenty of pieces have a bit of leftover flashing. It's hard to tell just how much of the latter is prevalent, it's something I didn't notice most of the time on the Kshatriya until I had at least a coat of paint down.
No Attention to Detail
One of the core concepts of technical writing is vetting work to make sure it's accurate. In this case, have someone build the kit who's not familiar with it and see if the instructions are accurate. It seems the folks at Mechanicore neglected to do this properly. It's not as though they didn't realize they made some mistakes as it comes with a two-sided sheet "Appendix to the Instruction Manual" that updates a few mislabeled steps throughout the guide. Unfortunately they still left quite a few issues behind. There a few areas where the step numbering is wrong, or the orientation of the steps on the page confusing. I do, however, appreciate their attempt to make the build easier by colour coordinating the order in which pieces together. Even if, in a few areas, the documented approach isn't the best way to go about it.
Photo Time!
Now, the moment you've all been waiting for, photos!
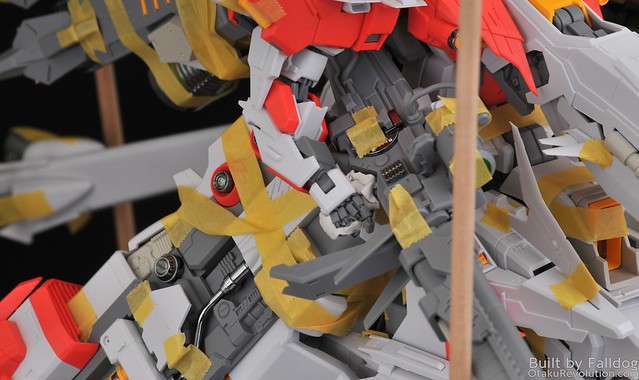
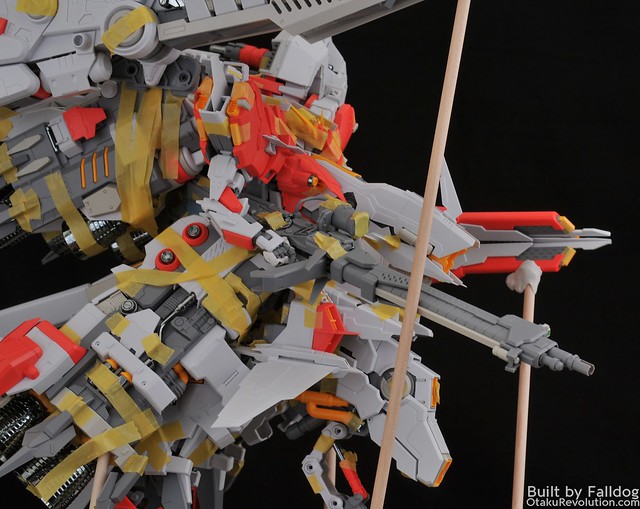
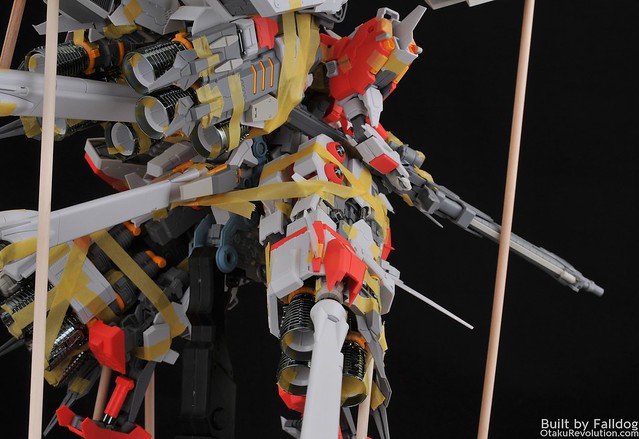
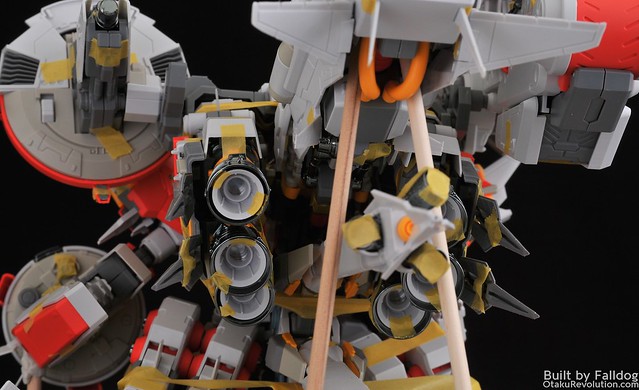
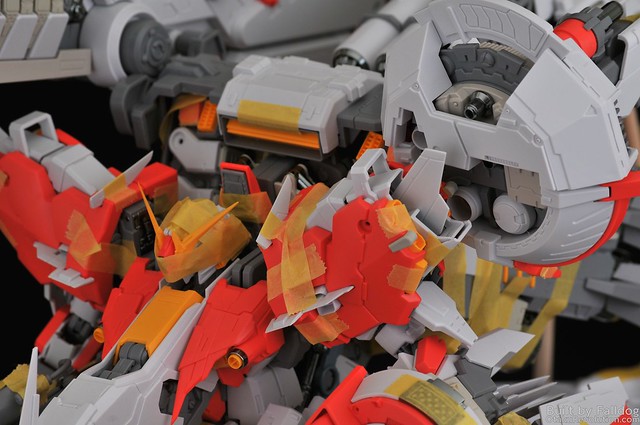
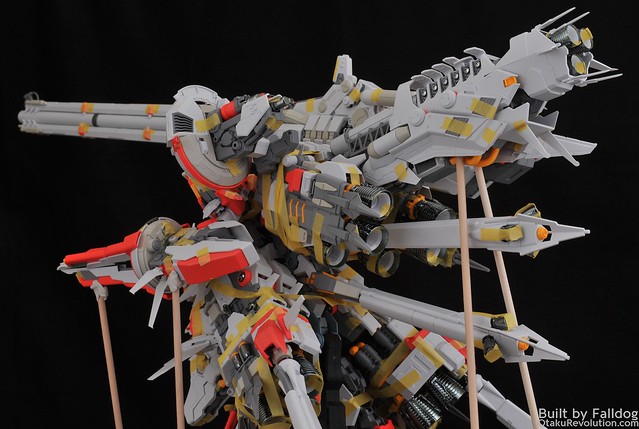
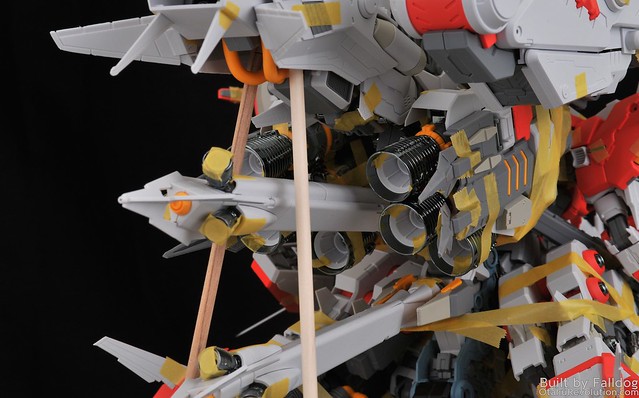
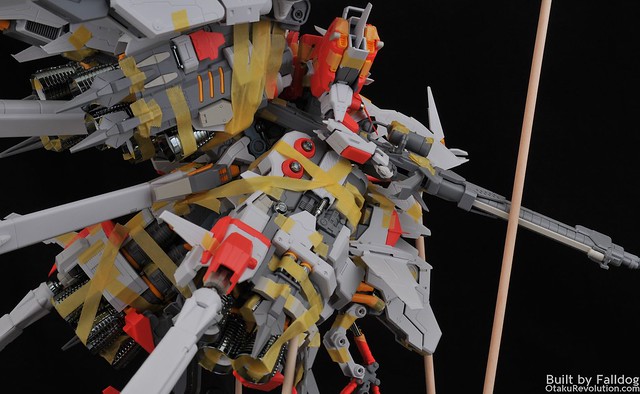
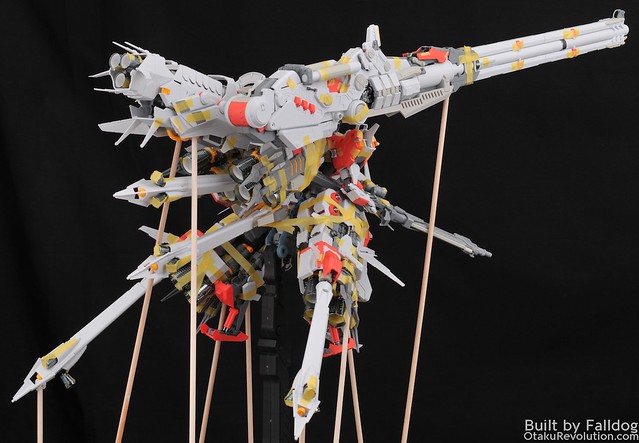
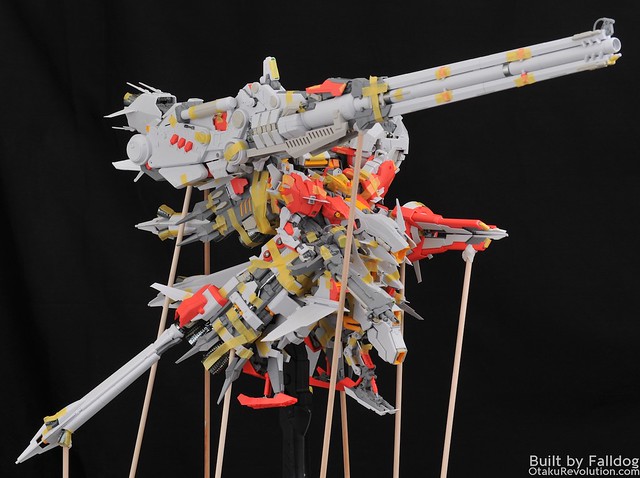
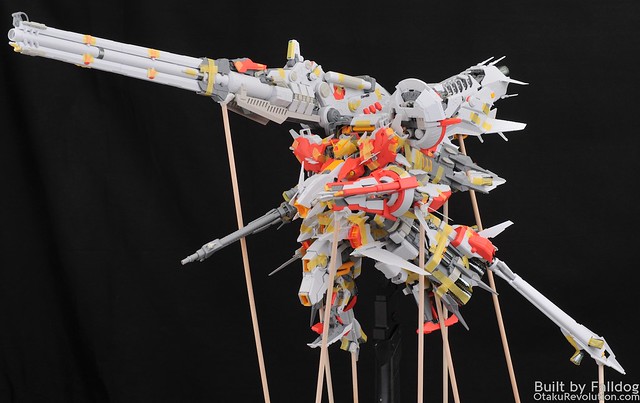
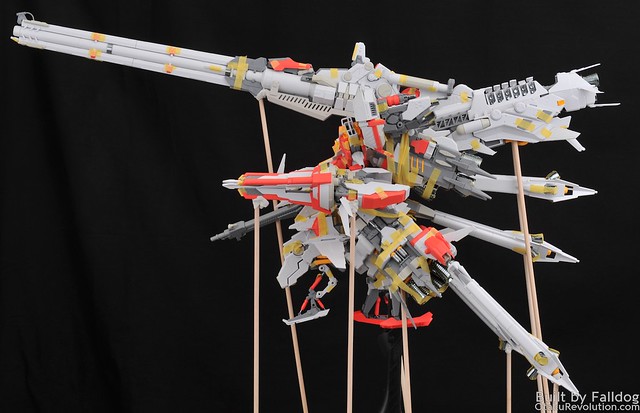
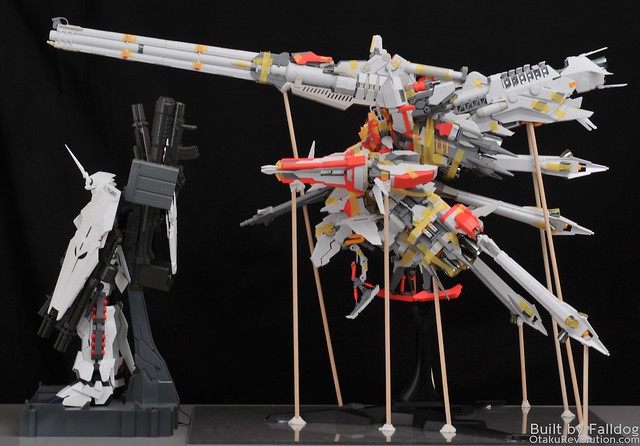
First I need to mention the gratuitous use of tape and the wooden dowels. I only applied a few of the screws here and there because, whether it's Bandai or Mechanicore, when you use a screw on plastic like this you tend you reduce the chances of it being a secure fit a second time around. Some of the tape you see wrapped around large sections is because of a lack of screws in place to help keep pieces in place. The vast majority of the tape, however, is simply there because the pieces behind wouldn't stay in place without (or is otherwise loose enough that I wouldn't want to risk losing said piece). The presence of tape everywhere should be enough to visually demonstrate the engineering issues mentioned before.
The dowels are there to support parts of the kit that I don't want hanging loose right now. Everything seems like it will hold when glued into place, though the main gun would likely sag a lot. The last thing I needed when putting this together was for parts to flex too much or start falling off, especially during the photo shoot. Some of the dowels are at weird angles because they were quickly cut mid-assembly and positioned at an angle to lower or push a piece into a specific position.
Normally those things close/stay open properly but the large piece they connect to doesn't stay secure to the rest of the kit. I don't want to try and push down it on it too hard on account of the booster unit being precariously balanced off the rear of the torso.
Size Comparison Shots
The Tief Stürmer, in part because of its stand, absolutely dwarfs other kits.
PG Unicorn for comparison
1/48, 1/100, 1/144, and 1/60 scale Gundam RX-78-2 kits respectively
HG 1/144 Dendrobium
MG 1/100 Ex-S Gundam
Still Interested?
If you've read through all my bitching, and seen all the photos, and still want the kit, I'm impressed. That's one hell of a sense of adventure you've got. Good luck, you're going to need it.
Whether you paint or not, you're going to want to glue pretty much everything together. Make sure to assemble it first, then take things apart and glue them together. If you glue in the order of assembly indicated in the instruction manual you're going to have issues. Don't forget to check out the rest of this review as I tried to record all the issues I encountered so you can be better prepared for your adventure.
In Summation
I applaud Mechanicore for this release. I really do. Taking the time to develop and manufacture something so massive is truly impressive. The fact that they haven't really improved upon the issues of their first kit, and are just getting bigger and bigger with their releases is disheartening. There's a lot of improvements to be made and throwing out more and more elaborate builds can't be the most efficient path toward resolution. Need to learn to walk before you can run. Or something like that.
For a lot of people, this kit is going to be more expensive than it's really worth. The time spent building, dealing with issues, painting, and worrying about display would be better spent toward a Perfect Grade kit from Bandai. I've got two PG kits in my backlog and kept thinking about how I'd much rather be building those right now.
So, that's it for the review right now. I feel like I've forgotten some aspects so I may return and edit this later. As always excuse my lack of proof reading skills. I am planning on painting this guy, thinking of replacing the red with blue, and am debating getting some of the camo decals just announced by Samuel Decal. Each set it pretty pricey, but at least it's not hot pink like the ones that shipped with the first edition Tief Stürmer.
If you have any questions, or have comments from your own build, please share below!

