Here’s a clever and dynamic opening paragraph that gets you interested in reading what I have to say about this build instead of skipping to the photos.
Despite building so many Unicorn Gundam kits over the last 8 years there’s always been a few ideas I’ve had floating around but never got to. While a Marida Cruz custom Unicorn was the runner up in my recent poll of ‘what project should I tackle next,’ it just happened to coincide with r/Gundam slash r/Gunpla’s UC 0096 group build on discord. Figured now would be a good time to try out a few of those ideas and see how they play out.
The base kit is a MG Full Armor Unicorn I picked up pre-built from someone years ago. It’s been sitting around, along side a decade of other Unicorn extra parts, for just that purpose. The original builder didn’t sand 70% most of the nubs, and some were pitted due to improper removal. I cleaned up what I could before paint, but was too lazy to fill in any pitted sections, which were thankfully few.
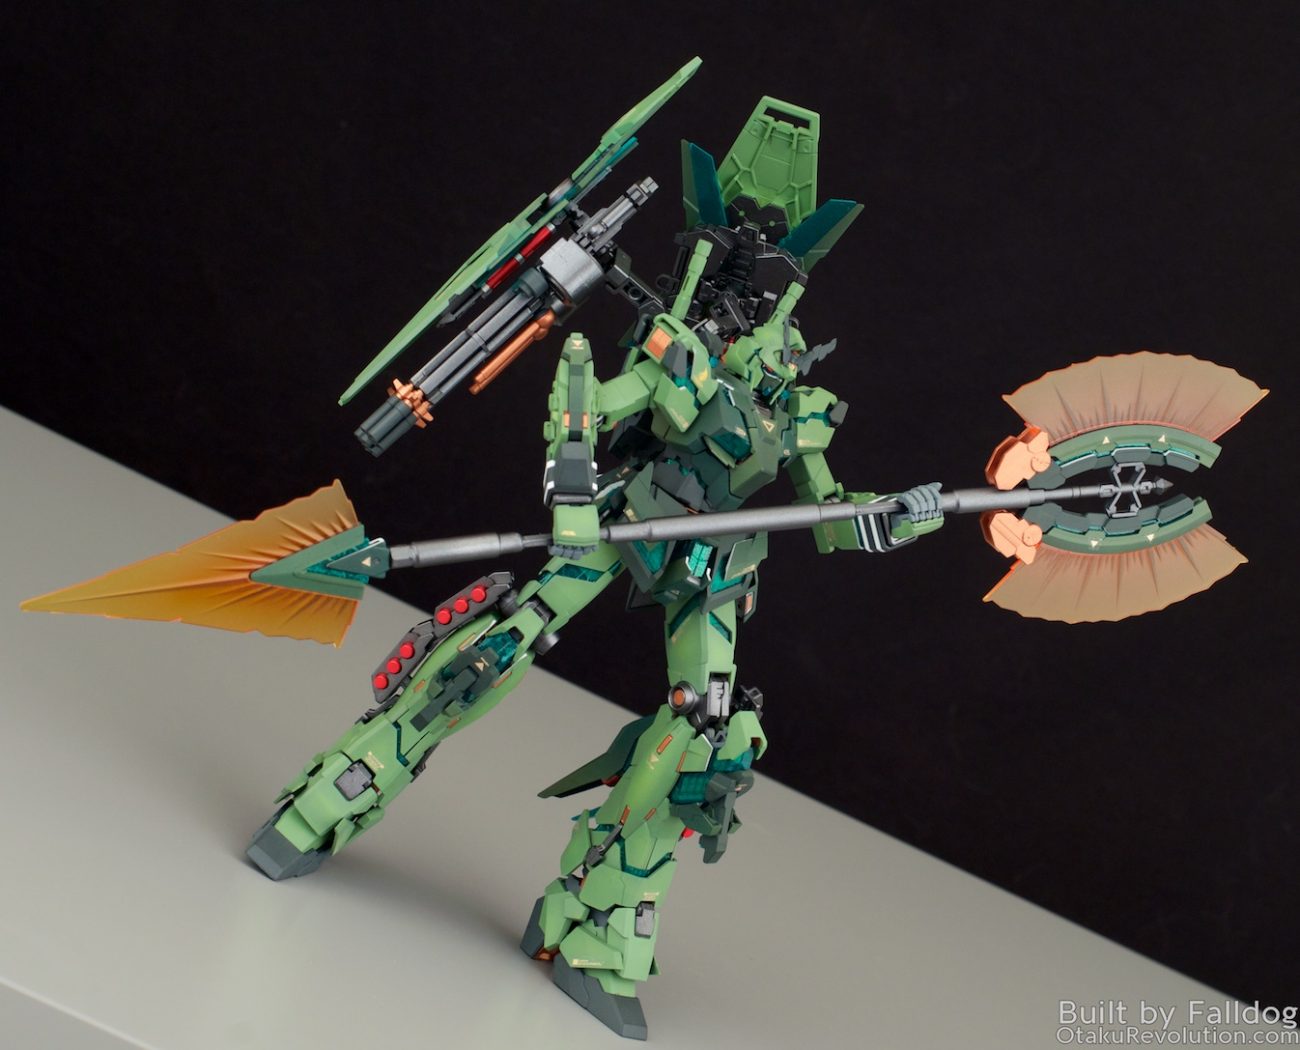
The paint scheme is close to what I used on my Elyn Hobby Kshatriya, namely Model Master’s Green Zinc Chromate as the key green with a darker shade of green from Tamiya. A slighty difference being the application of preshading which, as is the typical case for me, ended up being a tad too subtle. I also was lacking the right dark green, so I grabbed another colour, only to find it a bit too dark. I went back and applied some lighter colours of green on top: post-shade highlighting. In the photos it’s most visible on the rear leg thruster covers. The inner frame is a mix of Gunmetal and (my favorite Krylon) gray primer to break things up. For details I used Tamiya Copper, sprayed or hand painted depending on what would be the easist. The little bits of red (thrusters, rockets, shield supports) are clear red on top of silver or bronze.
One of the things I wanted to try, after suggesting this to folks for years, was painting the back side of the pyscho frame. To go with the warm colours I painted the inside of any internal frame pieces with reflective gold. It looks really great, but it’s pretty hard to see, especially on the green. When the light’s just right the pieces look a lot brighter than they would’ve otherwise. Unfortunately there are a few pieces where the internal connections make it impossible (without cutting) to get a seamless look. I also coated the outside with some Krylon green glitter spray (which I’ve also been sitting on for a decade, just for this project) and a top coat of Finish to smooth it out a bit.

Another thing I had long thought about doing was using the edges where the psycho frame is exposed as a highlight point. For this colour scheme I removed the paint along specific edges, leaving a bit of white to complement the Sleeves’ design. It ended up being more subtle than I expected with how thin some of the edges are and how the they fit against the pyscho frame. Over all I think it’s a cool detail that hides and reappears as you look around the kit vs. being painfully obvious everywhere.
The ax is custom made from some pla plate tubes with a hex piece running down the middle and exposed at a few place to help grip. I originally tried to fill the center piece with Tamiya putty, only to find out that like putty in the application tub thing, putty in a closed off pla pate doesn’t quite dry. In fact some of the solvents from the putty leeched into the plastic making it bend and flop around. The beam effect pieces were painted with Tamiya clear yellow, and a bit of clear orange along the inner edge for depth.
For the most part I’m really happy with the colour scheme, all the highlights pop and there’s a ton of out-of-the-box detail everywhere. Only thing I wish I did differently was to either go full metallic red on the thrusters or use silver instead of copper. As is they sorta wash away with the rest of the details.
Nothing too fancy with the shield binders, they’re just held in place with the same backpack attachment from the MG Phenex kit along with a bit of custom pla plate tubing.
The decals are Samuel Decal customs leftover from my PG Strike Freedom and MG Banshee builds in 2010 and 2011 respectfully (yes, I built a Banshee a year before the official release). Due to the age there’s a bit more silvering than I would like to see. Thought about trying out a stronger decal solvent I’ve been sitting on but didn’t want to risk fucking up the paint job that far into the build.
Well, that’s it for now. As always feel free to ask any questions you might have down below, or better yet, join us on the Discord where there’s always someone to help out. Enjoy a few more photos!


