


Have you ever looked at a finished kit and noticed that the paint has a bit of depth? That the edges have a subtle darkness to them? Well that’s the result of a very common technique in the modeling world known as pre-shading.
Pre-shading, at it’s simplest, is essentially a layer of darker paint under the top colour to make certain areas pop-out. Commonly used in model aircraft to highlight panel lines it’s been adopted on Gunpla for panel lines as well, or more often, shading around the outer edges of a piece.
Pre-shading is a great technique that is extremely accessible for beginner and advanced builders alike. The only special bit of equipment you need is a double action airbrush (a pressure regulator is great too, but you can manage without one). Can you get the same effect with spray cans? Some folks will say yes, but the reality is that you’re never going to get the same effects from a product that designed for wide and consistent disbursement of paint.
At a high level the process is pretty simple, but things can get pretty complex quickly. Let’s start off with the basic steps…
Step 1:
Apply dark paint around the edges, or details, of your kit using your airbrush. Step 1, complete.
Before rushing on, let’s take a step back and examine some of the finder points.
The final result is highly dependent on a couple things, namely the nature of the shading lines and the paint used. Airbrushmanship (that’s a word now) is key for getting the most out of this technique. Thick lines, thin lines, straight lines, crooked lines, heavy lines, thin lines, whatever paint you put down in this step changes the enter look later on. Getting the right kind shading now is key and all about being able to work your airbrush. A dual action airbrush will you to change the amount of paint being sprayed, and when backed up by changing the PSI high or low, will give you the best control. In this case, a lower PSI (8-12) will let you get a broad spray while not putting out much paint. A higher PSI (15-20) will let you put more paint down in narrow lines, perfect for highlighting lines and other details. Keep in mind that every airbrush performs differently, and every paint-to-thinner ratio performs differently, depending on the PSI. I recommend practicing technique and technical aspects before starting on your favorite kit.
When it comes to paint selection for shading, the most common pick is a flat black or gray. While I think gloss paints would work in most situations, flats should always work better since you’re applying more paint on top. You can also use colour paints for different looks, which I’ll get into a bit later.

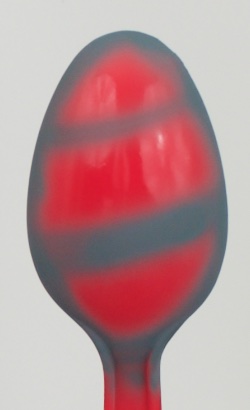
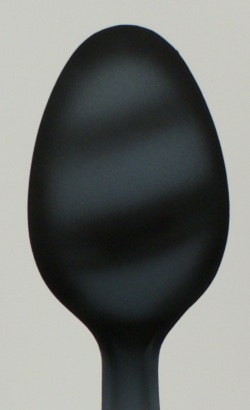
For this example, the RE Nightingale’s shield. The red piece is right out of the box and the black part has been primed…

For my pre-shading layer I put down light gray around the edges of the red, black for the center piece. Why two colours?
 |
Caution: Don’t forget to start spraying before hitting the piece and don’t stop until you’ve moved the spray off the piece. Stopping and starting in place is likely to give you dense, dark spots which will be visbile later. Also pay attention to how your airbrush responds to the PSI and paint mix. Mine, while on lower PSIs, has a tendency to sputter quite a bit. |
Step 2:
Apply a coat or two of your final colour over the piece. Paint like you would anything else, but apply as many or as few coats as needed to balance the underlying lines with the coat per the effect you’re going with. One of the nice things about pre-shading is that, if your shading is too intense, applying a few additional coats can go along way toward muting the effect. There’s no real rule on how many paint coats you should apply, but typically one or two should do. If you feel like you’re applying too many paint coats to get the look you want out of your pre-shade then you probably need to tone down the shading to begin with.

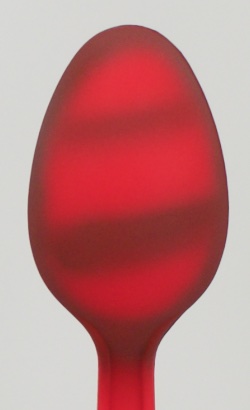
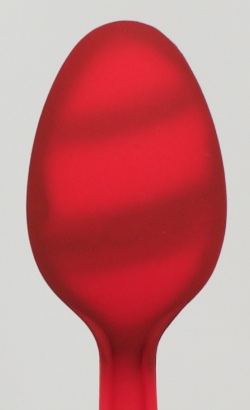
Here’s how it looks after a coat of Tamiya Flat Red and German Gray. The light gray I used on the red resulted in a more subtle shade with less coats of red on top. The black on top of gray gave me the best chance of standing out with the dark gray on top, though it still got washed out quite a bit.
And that’s it, you’re done! Proceed to stop coat, decal, weather, etc as you would any other kit.
Technique is everything
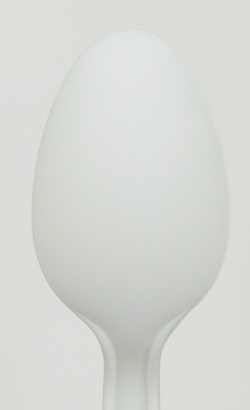
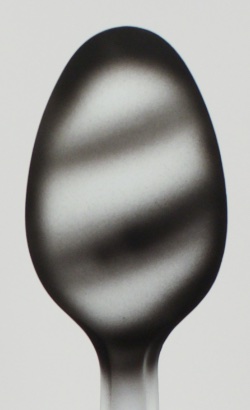
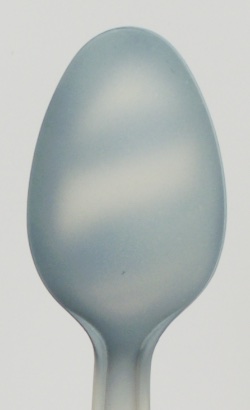
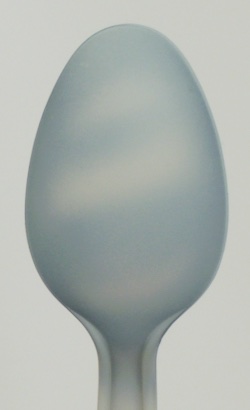
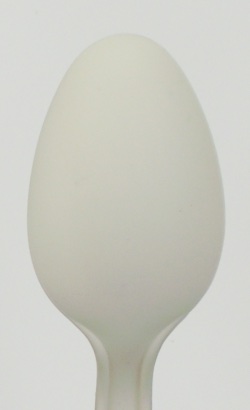
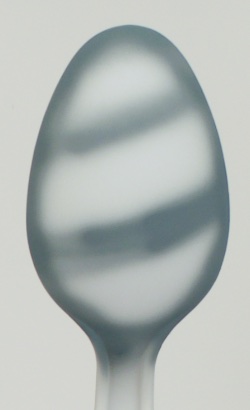
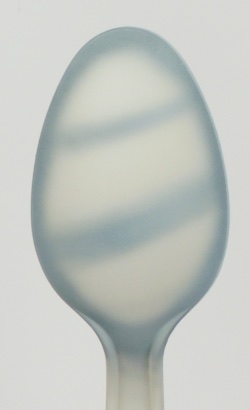
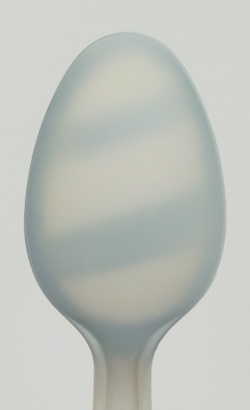
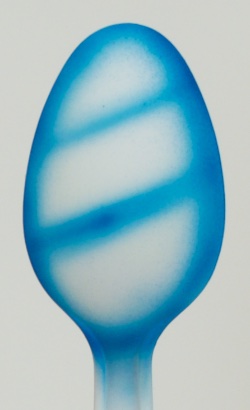
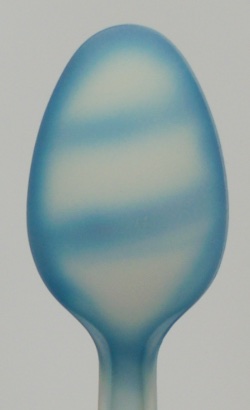
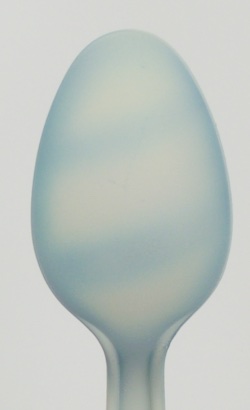
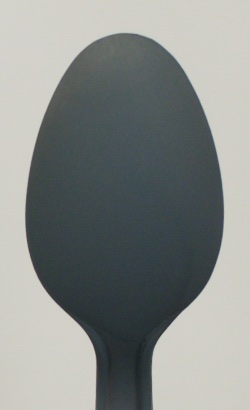
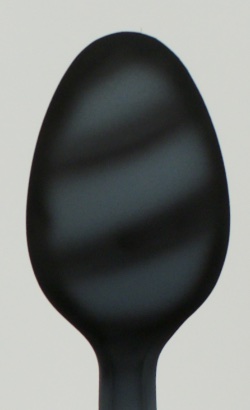
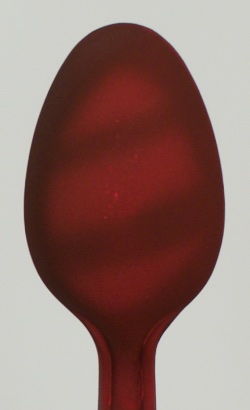
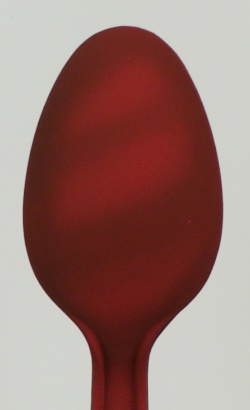
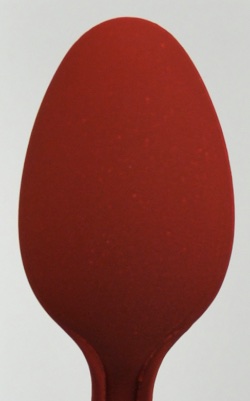
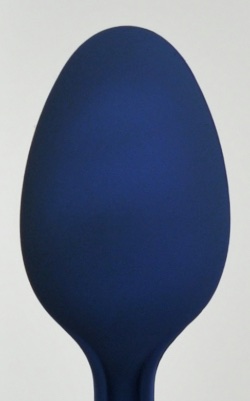
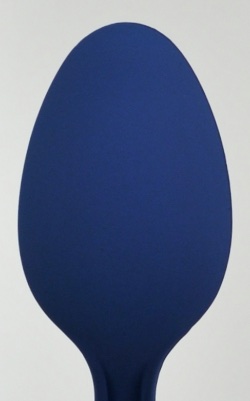
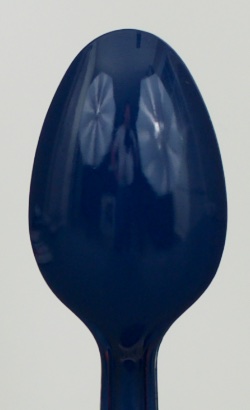
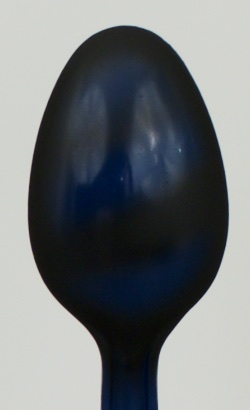
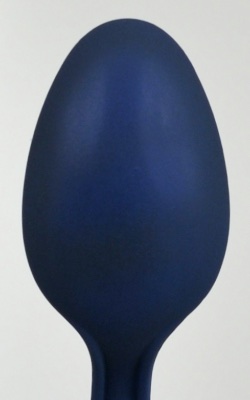
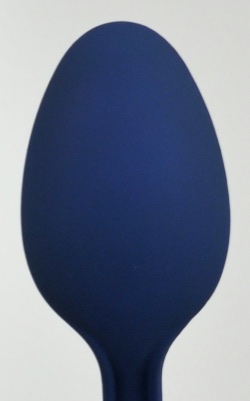
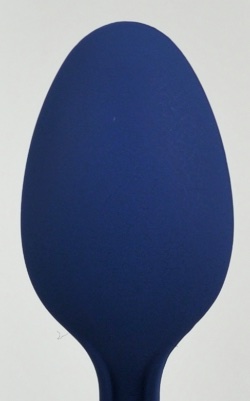
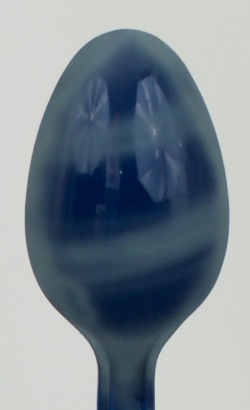
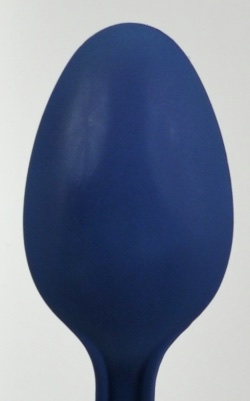
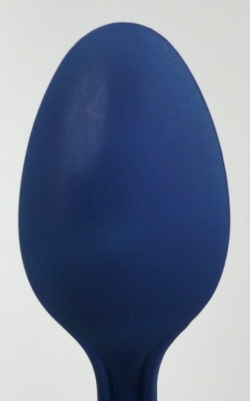
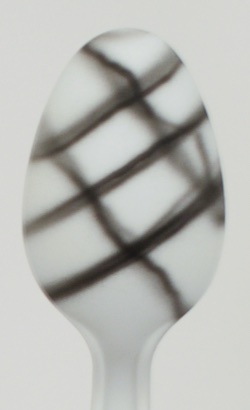
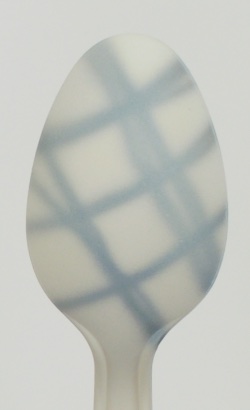
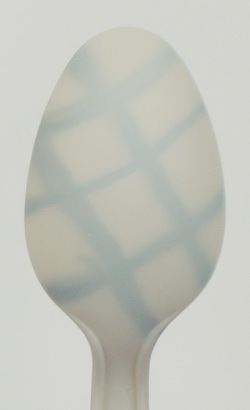
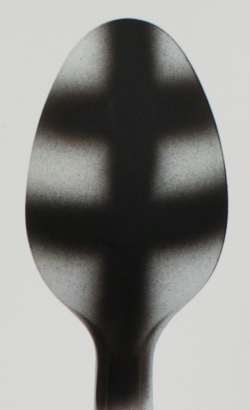
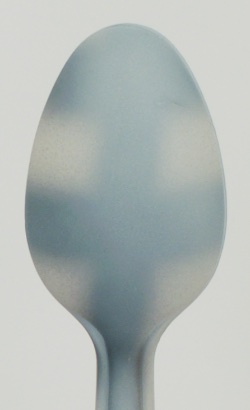
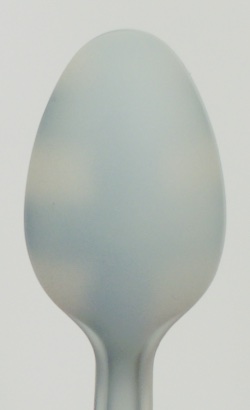
In order to better represent some of the concepts I tested a some of the techniques on my favorite test subject, plastic spoons*! They may not be the best examples, short of using 10 different kits for a single tutorial, but I hope they help highlight different looks and techniques. In most of the examples I edged around the outside in a traditional fashion with a few lines across the center as an additional reference. In the bottom of the two cross lines I tried to add a bit of inconsistency, such as a dark spot, to demonstrate what happens if you start and stop over a piece or aren’t consistent with the pre-shade application.
Over 70 spoons lost their life in the making of this tutorial. RIP.
Shading Darkness & Colour Options
An important thing to consider is how subtle you want your pre-shading to look. While you can always decrease the appearance of the the shading by adding more colour coats on top, pre-shading up front with the right paint can give you better results in less time. For example, when shading white, a pre-shade base of black will stand out a lot more than a lighter gray. Meanwhile, using a pre-shade option with a bit of colour can create a more dynamic look and tie in other colours on your kit. The same will apply to other colours with varying ranges of coat coverage depending on how dark the paint is (e.g. dark blue paint will be better at hiding black shaded lines than yellow).
In addition, depending on the look you’re going for, different base colours can make a big impact by adding subtlety or contrast to the top coat. For example, if you have a kit with a lot blue and white, try shading with blue under the white parts to cary that color throughout the rest of the kit.
In the following examples I start with a white base, apply various pre-shading colours, and coat with an off white to demonstrate how the pre-shading starts to fade into the coat.
| White Primer | Black Shaded Lines | White Coat x1 | White Coat x2 | White Coat w/o Shading |
 |
 |
 |
 |
 |
| White Primer | Gray Shaded Lines | White Coat x1 | White Coat x2 | White Coat w/o Shading |
|
 |
 |
 |
|
| White Primer | Blue Shaded Lines | White Coat x1 | White Coat x2 | White Coat w/o Shading |
|
 |
 |
 |
|
Black vs. Gray. vs. Other Base Colours
How does those same techniques work when applied over primer or other colours?
| Gray Primer | Black Pre-Shading | Red Coat x1 | Red Coat x2 | Red Coat w/o Pre-Shading |
 |
 |
 |
 |
 |
| Basic Red Base | Black Pre-Shading | Red Coat x1 | Red Coat x2 | Red Coat w/o Pre-Shading |
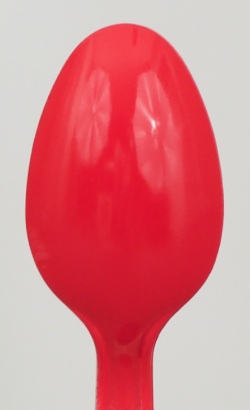 |
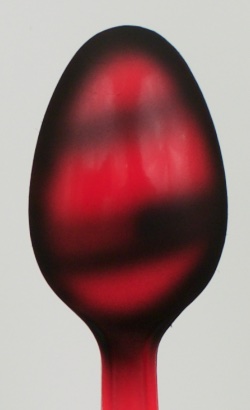 |
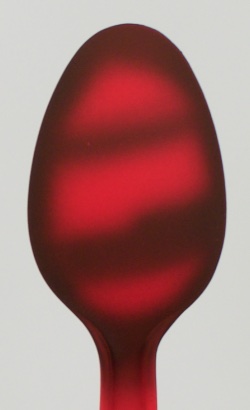 |
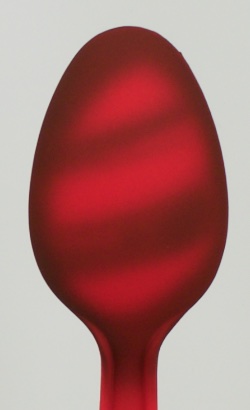 |
 |
| Basic Red Base | Gray Pre-Shading | Red Coat x1 | Red Coat x2 | Red Coat w/o Pre-Shading |
|
 |
 |
 |
|
| Gray Primer | Black Pre-Shading | Blue Coat x1 | Blue Coat x2 | Blue Coat w/o Pre-Shading |
|
 |
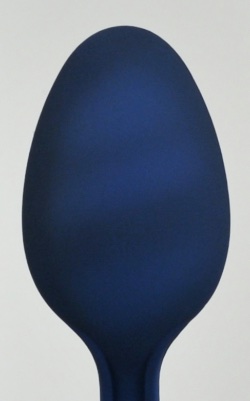 |
 |
 |
| Basic Blue Base | Black Pre-Shading | Blue Coat x1 | Blue Coat x2 | Blue Coat w/o Pre-Shading |
 |
 |
 |
 |
 |
| Basic Blue Base | Gray Pre-Shading | Blue Coat x1 | Blue Coat x2 | Blue Coat w/o Pre-Shading |
|
 |
 |
 |
|
Thin vs. Thick Edges
When shading edges, or detail lines, it’s important to understand the effect that line thickness can have.
At the very least, making thick lines is easier. One can work over an area back and forth until there’s some semblance of straightness. Thin lines show flaws a lot more, as you can see with my poor line skills below.
| White Primer | Black Shaded Lines | White Coat x1 | White Coat x2 | White Coat w/o Shading |
|
 |
 |
 |
|
|
 |
 |
 |
|
Advanced Pre-Shading/Highlighting
In addition to the basics, there are few ways to mix up pre-shading process by…..
Black Basing/The Max Technique
The Max Technique is a bit of a twist on traditional pre-shading, named for professional Japanese modeler (he helped launch the Master Grade line!) Max Watanabe. In most circles it’s simply called black basing. While essentially the same thing, the Max Technique works best for Gunpla while the general technique of black basing tends to be a better fit for model aircraft.
The Max Technique involves starting with a flat black base for the entire piece and slowly applying paint coats on top to fade in the colours you like. By working from the inside of the piece outward you can achieve the same basic effect as pre-shading but with potentially less obvious edge work. This is a fairly advanced technique because you need to use your airbrush to put down very subtle and consistent coats coats across all your pieces while maintaining good handling skills to edge outward. There’s a more to it as well, such as specially prepared paint coats, which I’m not really sure I fully comprehend. If you’d like to read more, check out Saint-ism’s page on the subject.
Black basing also starts with a black base, but your subsequent paint coats are layered in a slightly different method. Doog’s Model’s has an absolutely amazing tutorial on the technique.
The Saint-ism Technique
Some of the best Gunpla shading out there comes from builder Saint-ism, as the following image should hopefully demonstrate…
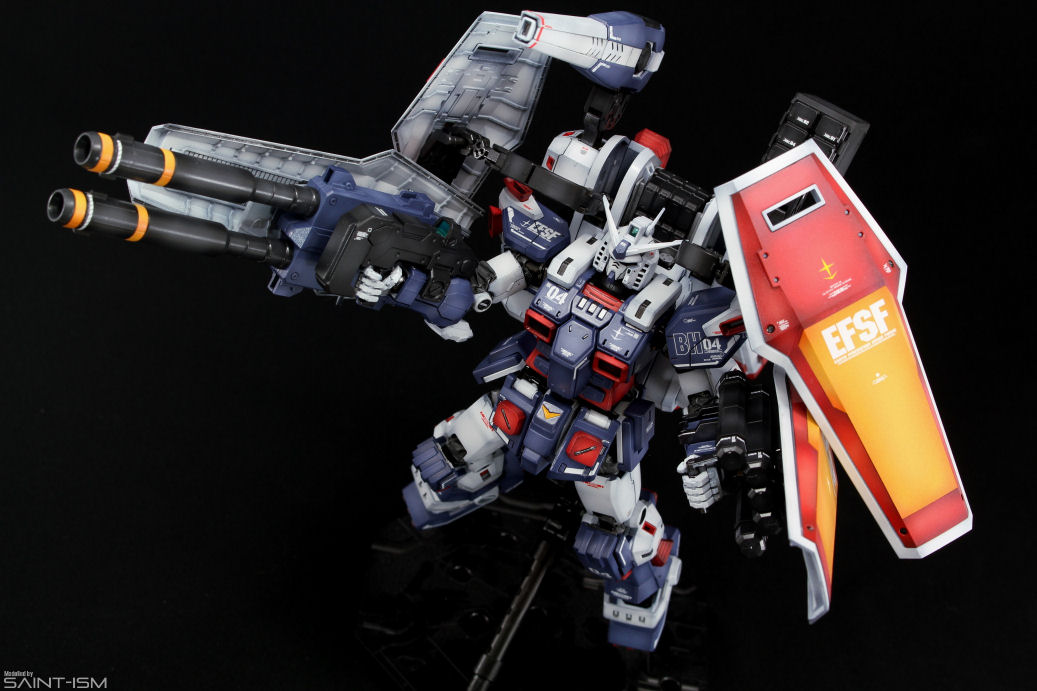
For more photos of this build, check out Saint-ism’s website
How does he do it? As with the aforementioned Max Technique he puts down a base coat and paints highlights on top. What makes his method different is that instead of a base black coat, he starts with a colour similar to the desired finish and highlights on top with another colour that best accentuates the base. The end result is a look that is extremely vibrant. You can read more about his technique here.
Paint Modulation/Highlighting
Another advanced technique involves combining dark and light shading to introduce lighter and darker spots on a kit. Commonly called paint modulation, this technique is often used on military dioramas to give the appearance of dynamic lighting. Essentially trying to capture the way light would fall across and object and create different light and shadowed areas. MIG Jimenez has a great selection of photos to help illustrate the technique.
There’s also a similar technique called colour modulation where prominent or protruding parts of a piece are painted with slightly lighter colours than the rest of the kit to help make them pop in the final product. Mike Rinaldi has a solid tutorial of the technique. While I’m not sure how much impact this would have on Gunpla models, it’s worth considering for some of the non-mobile suit kits Bandai has made from the franchise. Though I look forward to someone using this method on a military realistic looking mobile suit build.