


This tutorial was contributed in part by the great Vonschlippe! You can check out some of his builds on imgur or catch him helping others on r/Gunpla. If you see him around please give him your thanks let him know what you think of the tutorial. – Falldog
Hairspray chipping methods may not be for everyone, especially for modelers who do not own an airbrush or are not confident with their airbrushing skills yet. Here are some other techniques to get that worn, chipped look onto your kits. For best results, chipping should be executed using a combination of techniques!
Pencil Chipping
The easiest method, hands down! Grab yourself a silver #11 Prismacolor coloring pencil for dark surfaces and a regular HB pencil for pale surfaces. Make sure they are well sharpened, and keep them sharp in between uses. Simply apply them onto your kit to simulate chips and scratches! This method can be tedious on large kits, but it produces very convincing effects at a very small price. It works best on a flat coated surface, and because it’s vulnerable to smearing it may be a good idea to topcoat again after pencil chipping.
This technique is best when used in parallel with other techniques such as hairspray chipping, which is great for wear and tear on the edges of a part, but not so much for paint chips along panel lines and recessed spots. It is easy to do, cheap, and surprisingly effective.
Dry Brushing
Dry brushing is another traditional method of simulating scratches, light chips, and a variety of other chip effects. Dry brushing has it’s own section on the Guide.
Sponge Chipping
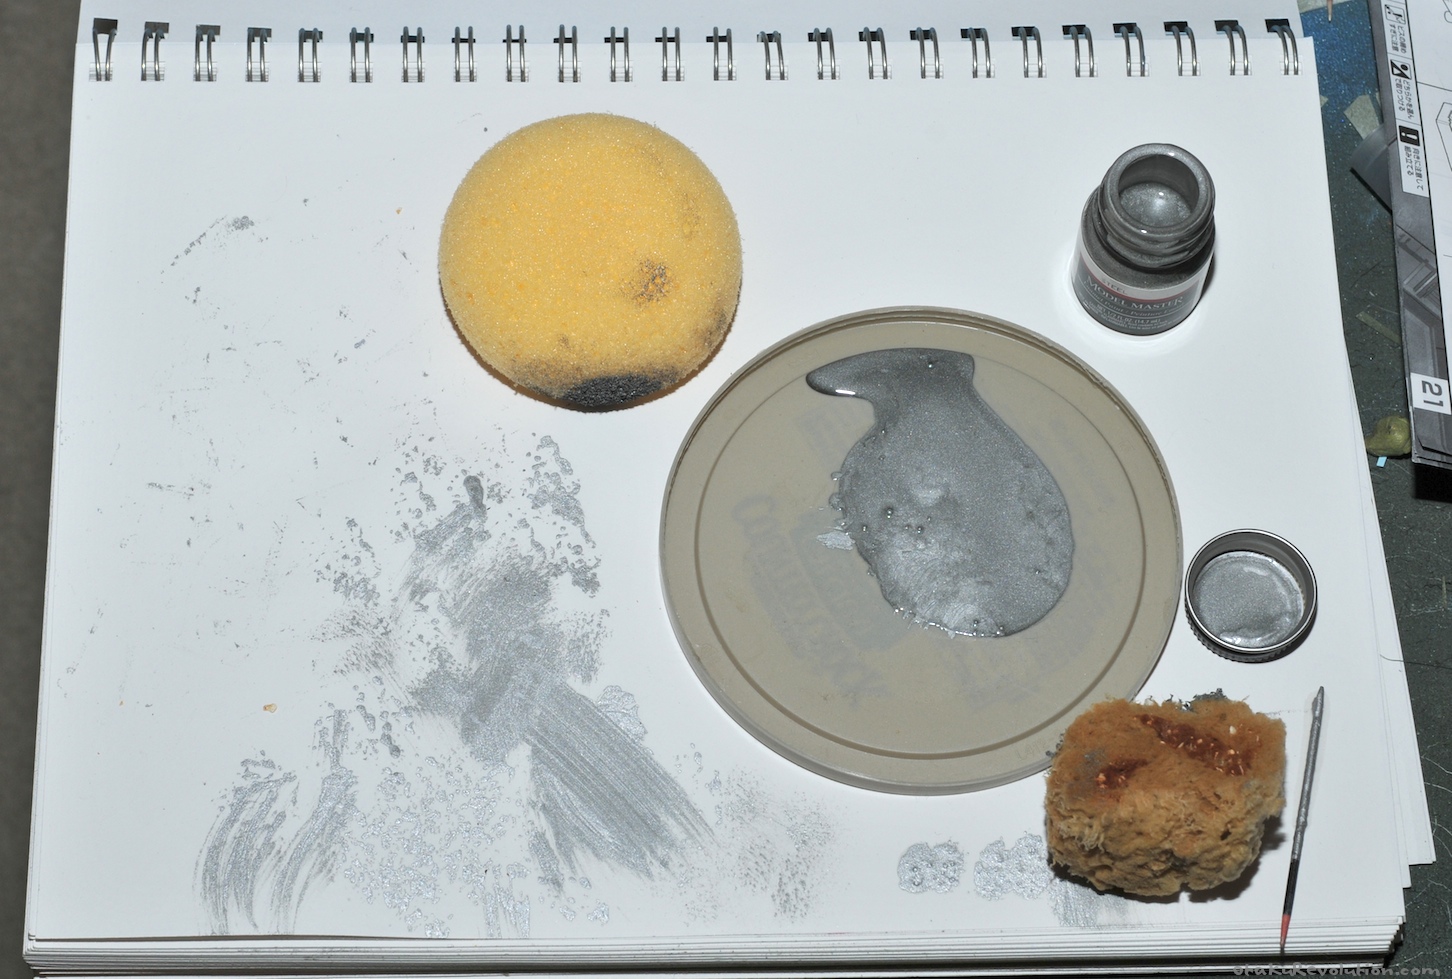
A simple sponge and some paint with careful application can create the look of chipped paint without the hassle of applying multiple coats of paint and product to your kit. If you haven’t read the number of other times I’ve mentioned this already, go slow and apply in moderation! It’s really easy to over do this technique. Since you’re applying paint here, cleaning up mistakes isn’t an easy task.
All you need for sponge chipping is a sponge, some paint, and some scrap paper or cardboard. Whatever paint you like to use should work just fine. Any sponge should work as well but I suggest you experiment with what you’ve got. Different kinds of sponges will create different patterns, some of which you may not want to use. If you don’t have any sponges around the house you can grab some from your local craft store for cheap.
To use this method pour a bit of paint into a shallow dish (like an unused cap) and gently dab the sponge into the paint. Try not to get too much onto the sponge, it’ll make the next part easier.
Next, take the sponge and gently dab it onto the scrap paper. The idea is to do so until you’ve got just enough paint on the sponge to give you the effect you’re looking for without muddling or going overboard on the kit.
Here are two examples of the paper as I work from lots of paint to little. One sponge is coarse and more random, the other is fine with more minute details.


When you reach an output you like (such as heavy or light spotting) simply dab your kit. Also akin to dry brushing, try and apply little amounts here and there until you reach the constancy you’re looking for. It’s very easy to go overboard. It’s very important to dab your kit with the same pressure as when you dabbed the paper. Remember, sponges will soak up paint, so if you essentially squeeze harder against your kit, it will result in more paint transferred. In a lot of cases, if you apply too much, you can simply wipe up the area with a clean part of the same sponge. My first attempt using the sponge method was pretty successfully. My Ez-8 went from…
[flickr-photo:id=4818088772,size=n]
[flickr-photo:id=4820175510,size=n]
Salt Chipping
Salt chipping is a lot like chipping with hairspray but the end result is a lot different. The resulting marks are more rounded and blobby, making it perfect for emulating spot rusting. It requires a bit of practice and it may be “overkill” for small models, because the chip size produced by this method is significantly larger than with hairspray chipping.
The method involves a base coat, salt crystals, and a color topcoat. The base coat will be the color of the chips visible in the finished products, which can be anything from a metal color to a dark orange rusty finish. The salt crystals can be regular table salt, nothing fancy. The average diameter of the crystals will match the size of the paint chips. The color topcoat is the “main” color you want to give to a given piece, which will feature chipping to reveal the undercoat.
Apply a base coat to the kit, and make sure it is fully cured before proceeding to the next steps. When in doubt, wait 24 hours. Let us suppose that this base coat is a rusty orange color.
Applying the crystals should be done on leading edges and panel lines, as well as anywhere that should feature some chipping. Wet a small brush into a cup of water and dab it onto the surface to be chipped, leaving a small amount of water behind. Work on small areas at a time, because otherwise the water will evaporate before you get to apply any salt! Pinch and sprinkle some salt onto the wet area; it will partially dissolve and melt onto the surface. Stray crystals should be brushed off, either by blowing or using a dry brush. You may need to shake off the excess.
As the water dries entirely the crystals should have bonded fairly well to the surface. You may want to knock off some crystals if they are clumped up together or the pattern is too heavy. Once everything is dry, it’s time to apply an acrylic coat of color on top of everything, let’s say a military green. Leave everything to dry for a day.
It’s now time to chip! Using a toothpick or a piece of sprue, drag it across the bumps created by the salt on the surface of the kit. The crystals should pop right off, revealing the basecoat underneath and leaving a very realistic paint chip.