


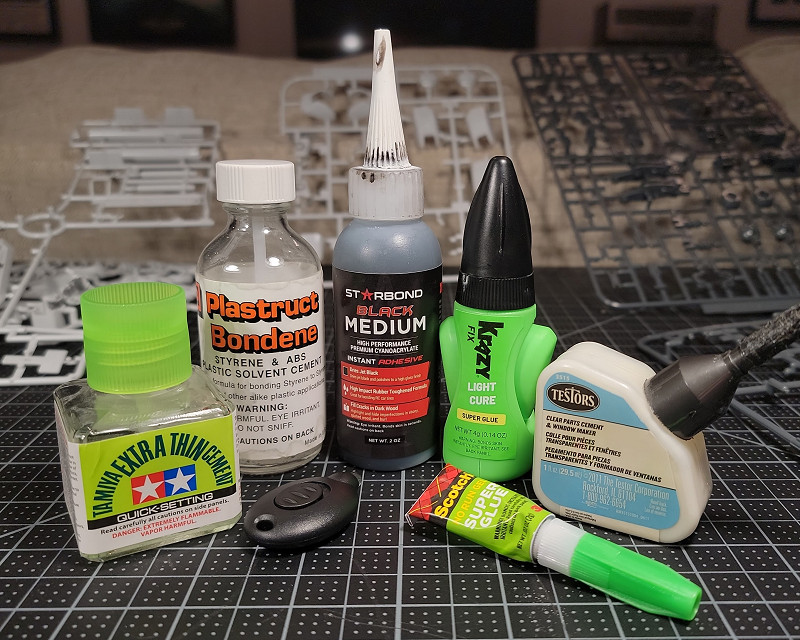
Now, 90% of the time, you’ll be able to complete a kit without needing any glue. Unfortunately, that other 10% is filled with broken parts, loose joints, and extremely small pieces. There’s quite an assortment of glues out there and picking the best one for the task can make life a lot easier, and make your kit look better. These all should be available at your local hobby shop, aside from super glue, which is available at grocery stores, pharmacies, gas stations etc.
For simplicity’s sake I’ve divided glues into five basic categories with recommendations based on personal usage. There’s a lot of glues out there and, depending where you’re located in the world, may not have access to the same ones I do.You can search for the active ingredients in most glues online, cross referencing them to what I have here. Though, at the end of the day, nothing beats a bit of old school experimentation.
One other thing… I’m not 100% glue is the right word to use here. Some of these have ‘cement’ in the product name when I wouldn’t consider it a glue. Plastic weld is more of a chemical activator than a ‘glue’ in a traditional sense. Thus, for the purpose of this tutorial, glue is defined as something that makes something adhere to something else. Please bear with my poor semantics.
Modeling Cements
Modeling cements are generally what comes to mind when folks think of modeling glue. They are usually clear and generally come in paste tubes, which often become a messy endeavor if you try to use it straight from the tube. Generally I don’t recommend these types of glue. In my experience they’re often too slow to set and require a lot of extra glue to build strength. If you must use them don’t try and apply it directly from the tube, you’ll just get it everywhere. Instead put a little bit in a dish or on a piece of cardboard (your gunpla’s box will serve nicely). Apply using the end of a toothpick and hold the pieces tightly in place until set and let cure overnight.
CA Glue/Super Glues
Super Glue, Krazy Glue, or whatever brand name you know it by, are the strongest glues safe for modeling. Generically they’re referred to as CA glues as they’re based on Cyanoacrylate. Thanks to the small size of the applicators they can generally be applied directly from the tube directly to the parts in need. Hold in place and 10-15 seconds later it should be set enough that you can walk away and leave it to cure for 30-60 minutes. Since super glue dries hard I’ve used it effectively to close seam gaps prior to painting.
Unfortunately, super glue has its problems. To be more precise, it causes fogging. What is fogging you say? Well, have you ever seen a crime documentary or drama where they heated super glue to produce fumes in order to protect/reveal fingerprints? Any application of super glue will release those fumes (though on a smaller scale) as it dries. Depending on the surface near it those fumes may result in white fogging. Since it’s essentially a thin layer of glue there’s no real way to remove it aside from sanding. Here’s a pretty extreme case of fogging.
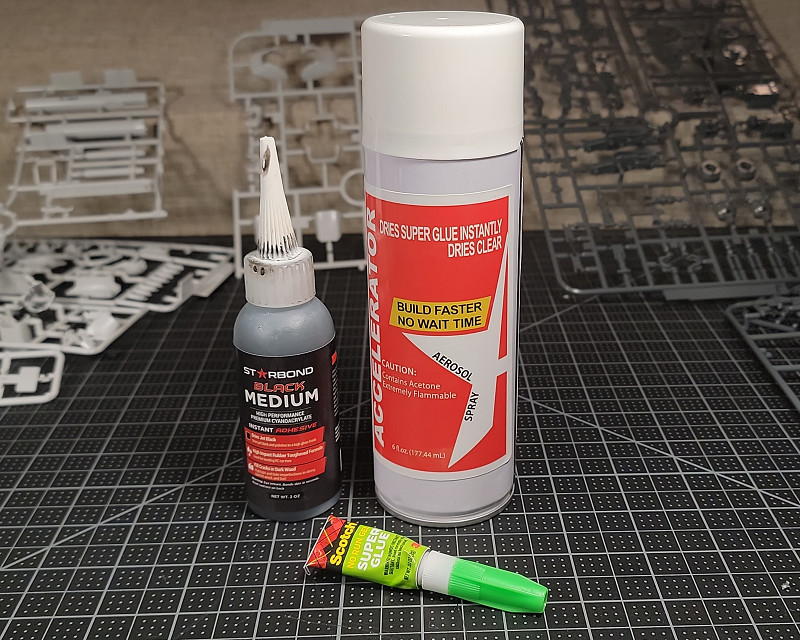
My go-to recommendation is Starbond Black Medium CA glue. The black colour makes it easier to see and work with, plus it will keep a long time in a fridge while I feel like there’s a ticking clock whenever I open a thing of Super Glue or Krazy Glue. I recommend putting a little bit on a dish or cardboard box (again, leftover Gunpla boxes work great here), then apply to your pieces with a toothpick for pinpoint accuracy. Make sure to also pick up a can of CA glue accelerator. As the name suggests it speeds up the cure process to where its practically instantaneous. You can spray on top of glued pieces, or spray one piece and then apply a piece with glue already on it.
I still use small amounts of super glue to tighten up joints though most on this page will work just as well.
Specialty Modeling Glues
These are glues, in the traditional sense, designed specifically for use by model makers. They tend to work great for large pieces as well as small detailed work. Two glues I used quite a bit when starting off were Model Master’s Instant Adhesive and Testor’s Clear Parts Cement.
Instant Adhesive is a lot like super glue without the constant risk of fogging (I want to say of all the times I used it there was a small amount of fogging once but for the life of me I can’t remember when). It dries hard and clear and with the small applicator it’s extremely easy to use. The only issue I have is that the applicator tends to seal itself up before I get around to finishing the bottle. I wrote that years ago, but saving it for posterity. I haven’t used Model Master stuff in ages, in part because all the model shops around me closed up, and in part because I don’t even think Model Masters exists as a brand anymore. I probably still have that bottle around somewhere, but I’ve largely moved to plastic weld glues for day-to-day tasks.
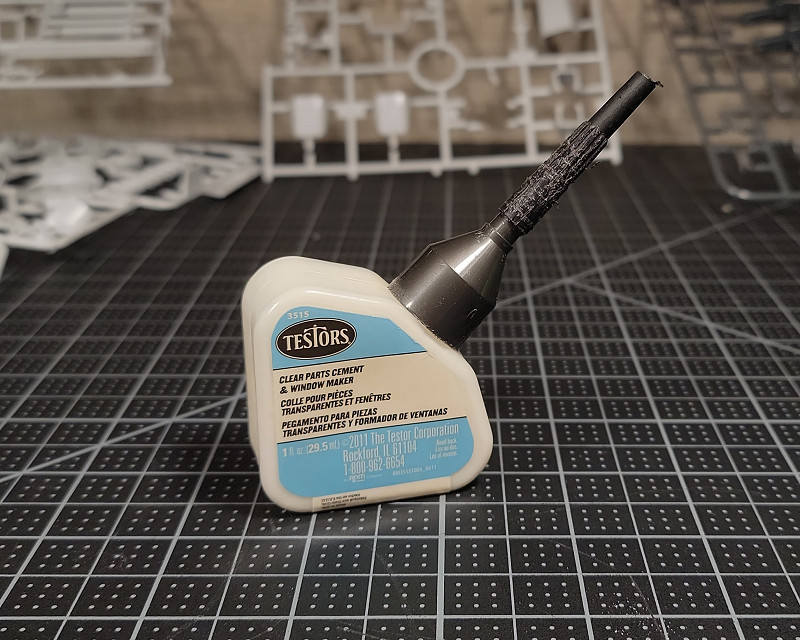
The Clear Parts Cement glue was designed in part so that it could be used for making windows and clear parts. It’s more milky than the Instant Adhesive but dries clear. Additionally I don’t think it’s as hard so there’s a bit of flex which is nice. The best part is that you can completely do away with the precision applicator. I just put a small amount in a dish and use a toothpick to apply where needed. It takes awhile to dry but does so completely clear making it perfect for clear parts.
UV Activated Glue
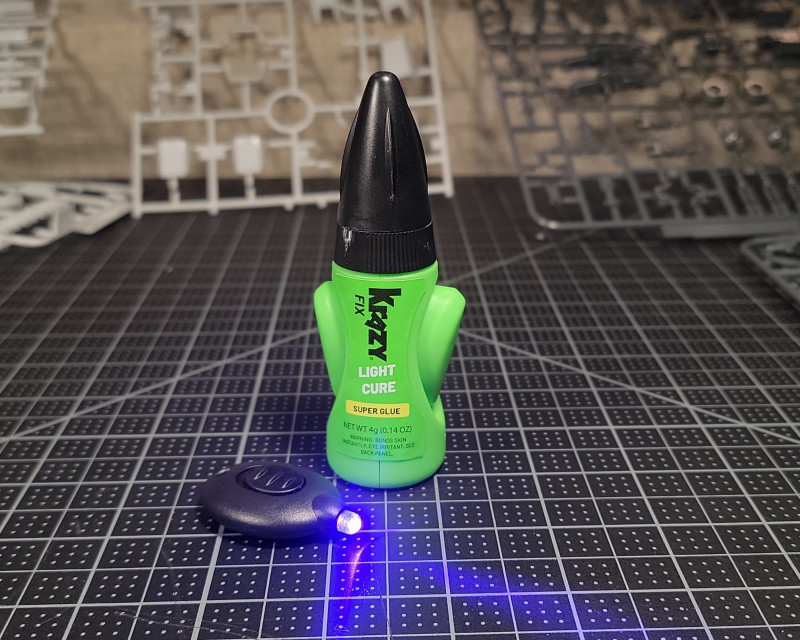
UV activated glue, or Krazy Fix Light Cure Super Glue as the official name goes, is something new to me. I got it looking for a fast acting alternative to the aforementioned Testor’s Parts Cement. it’s essentially a runny clear resin that quickly cures under UV light. The Krazy brand I tried comes with a small UV LED which you shine at the resin, causing it to solidify clear in a few seconds. So far, aka used on one kit, it’s worked great. I was able to affix some clear plastic and metal detail bits quickly without any hazing.
Plastic Weld
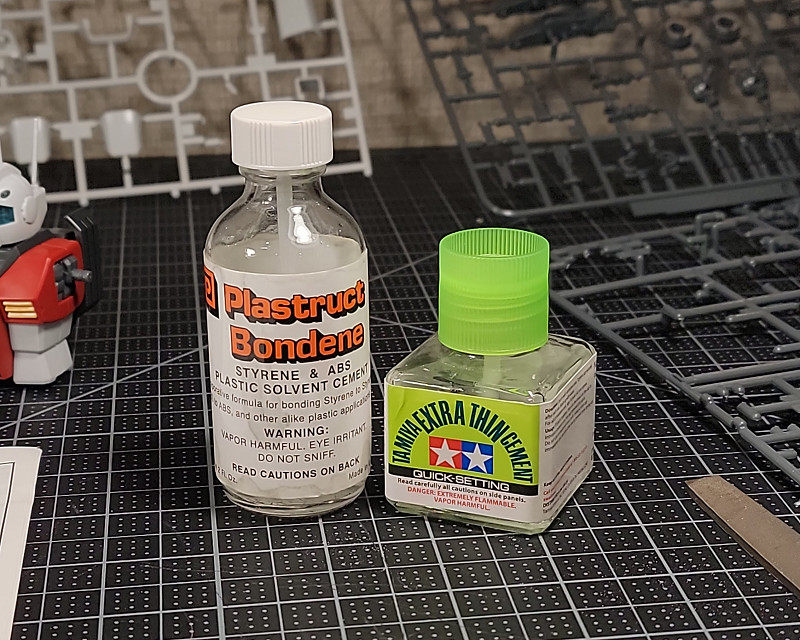
Plastic welding glues is a category of “glue” where the active ingredient actually welds plastic together. Where the previous entries on this page form a bond between pieces by introducing a hardened material in the middle, welders essentially melt the plastic a bit by introducing solvents. When the solvents/carrier for them evaporates the plastic returns to normal. Two pieces affixed together with plastic weld are essentially one single piece.
The two I use quite a bit are Tamiya Quick-Setting Thin Cement, which is Butanone based, and Plastruct Bondene which is Dichloromethane based. Both work the same way, though I find Bondene to be a more active agent and result in a strong bond.
Both the Tamiya and the Bondene are thin liquids and come with applicator brushes that make using them a breeze. If I need two pieces to really stick together, such as a broken part, I will apply a bit to each edge to start the reaction before pushing them together. Depending on how much you apply, and how much pressure you apply, you’ll actually see some liquid plastic squeeze out of the seam. This is great when there’s damage and really helps ensure a solid connection. Because of this plastic welds are great for removing seam lines between pieces.
Plastic welds send to act and set quickly. Make sure to have parts oriented properly because breaking the bond afterward might as well be breaking the plastic all together. Good news is that any overflow tends to just evaporate and won’t damage any plastic. Just don’t touch it otherwise you’ll leave a nice fingerprint in the plastic.
One last thing, different welding solutions work with different types of plastic. From what I’ve seen most of these solutions are pretty effective across the board when using ABS and polystyrene, the two most common plastics used by Bandai. The third plastic, polypropylene, which is used on polycaps and RG frames, don’t seem effected by these solutions.